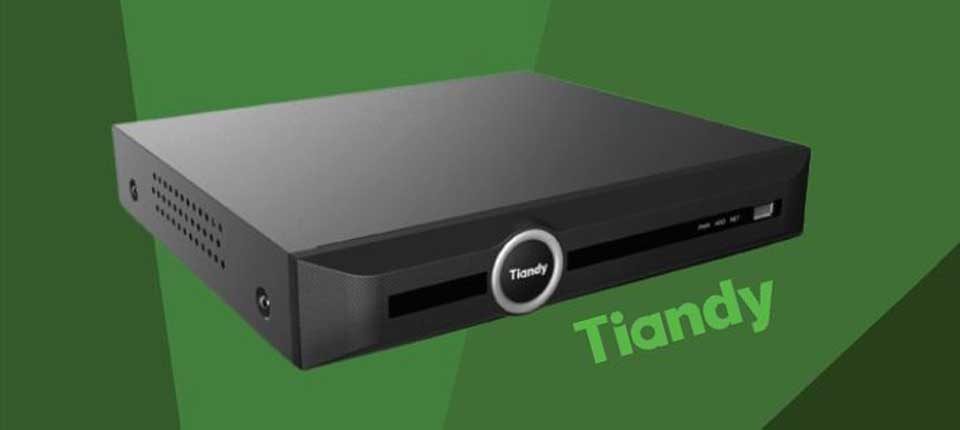
Tiandy NVR Full Installation Guide,Describes the main features that users need to know when using the NVR.Describe the parts and accessories that users must know before using NVR: front and rear panels, mouse, and how to operate the device through these parts and accessories.
- Overview of Product Functions
Describes the main features that users need to know when using the NVR.
Basic Features
- Support for network device access, including network cameras, IP domes and network video servers, as well as third-party network cameras.
- Support for the standard Onvif protocol.
- Each channel supports the preview of primary and secondary code streams.
- Each channel supports adjustable encoding parameters, including resolution, frame rate, code rate, image quality.
- Each channel supports regular functioning and alarming, custom 1, custom 2 and other intelligent video template parameters.
- Support for fast addition of IP channels.
Local Monitoring
- Support for VGA and HDMI displays.
- Support for multi-screen video preview.
- Support for the preview of up to 1/3/4/6/8/9/10/13/16/20A/20B/25/32/36/40/64 screens.
- Support for the preview of shortcut menu operations.
- Support for front-end intelligent analysis.
- Support for video motion detection, video loss detection, video occlusion detection and port alarm detection.
- Support for a variety of mainstream PTZ control protocols, and also setting and recalling of preset position, cruise path and trajectory.
Hard Disk File Management
- Support for hard disk SMART information display.
- Support for bad track detection.
- Support for setting of hard disk property: redundant, read-only, read-write and backup.
- Support for hard disk sleep.
- Support for hard disk pack quota, which can be divided into disk pack or different channels to allocate different video storage space.
- TC-R58(20/40/80) configuration: I/B/N s TC-R38(40/80) configuration: I/B/N(/Z) and TC-R31680 configuration: E/B/N(/Z) series devices support disk array.
Video Recording and Playback
- The video trigger mode includes: timer and port alarm, motion detection alarm, detection or port alarm, detection and port alarm, video loss alarm, video occlusion alarm, intelligent analysis alarm and other alarm situations.
- Support for pre-recording and delay of linkage videos of all alarm types.
- Support for querying of video files by general conditions/events.
- Support for local redundant recording.
- Support for locking/unlocking of video files.
- Up to 4 video recording periods can be set a day, and the recording trigger mode in different periods can be set independently.
- Support for holiday plans.
- Support for querying of videos by channel number, video type, start and end time and file type.
- Support for several playback modes including regular playback, event playback, label playback, intelligent playback, video summary playback, time-phased playback, picture playback and external file playback.
- Support for video snapshot function. Different types of videos are distinguished with different colors.
- Support for pause, fast forward, slow, forward 30S, reverse 30S, step, step back, stop, one day before, one day after, as well as dragging your mouse for locating.
- Support for rolling your mouse wheel to zoom in and out the playback timeline.
- Support for digital zooming of any area.
- Support for video file playback function.
- Synchronous playback of up to 16 channels is possible for devices with 16 channels and above.
Data Backup
- Support for backup of videos, pictures and other data via USB devices.
- Support for bulk backup by file range and type.
- Support for playback, clipping and backup of videos.
- Support for fast backup by channel and time.
- Support for management and maintenance of backup devices.
Alarm and Abnormality Management
- Support for setting of the arming time of alarm inputs/outputs.
- Support for video loss, motion detection, video occlusion, port, intelligent analysis, detection or port, detection and port and other alarm detections. All the alarms can be linked to single-screen display, text plan, sound alert, email and alarm output, and can trigger the recording of any channel.
- Support for disk full, no disk, disk read/write error, illegal access, IP address conflict, MAC address conflict, no redundant disk available, network disconnection, abnormal hot standby, abnormal array, disk overloaded, abnormal recording, disk SMART abnormality, disk temperature abnormality and other abnormality detections. In addition, the POE equipment also supports the POE overload detection. Various exceptions can trigger screen prompt, sound alert, upload center, email alarm and port alarm.
- When the system runs abnormally, the software watchdog can restart.
Other Local Features
- Five-level user permission management allows an administrator to create more than one operation user and allocate them with proper permissions, which can be accurate to a certain channel.
- Complete logging and retrieval of operation, alarm, exception and information logs.
- Support for manual triggering and clearing of alarms.
- Support for import/export of device configuration information.
Network Features
- Support for TCP/IP protocol cluster, and also PPPoE, DHCP, DNS, DDNS, NTP, SADP, NFS, HTTPS and other protocols.
- Embedded WEB server.
- Support for unicast and multicast. For unicast, TCP, UDP, and RTP protocols are supported.
- Support for remote search, playback, download, locking and unlocking of video files.
- Support for remote fetching and configuration of parameters, as well as remote export and import of device parameters.
- Support for remote fetching of equipment running state, system log and alarm state.
- Support for system maintenance operations such as remote formatting, updating and rebooting of hard disk.
- Support for alarm port expansion through alarm host.
- Support for remote manual triggering and stopping of video recording.
- Support for remote manual triggering and stopping of alarm outputs.
- Support for remote PTZ control.
- Support for voice intercom or voice broadcast.
Development Support
- Provides SDK software development kits under Windows and Linux-based systems.
- Provides application software source code for demonstration.
- Provides development support and development training
services for application systems.
![]()
Notes:
- Product features list the main features available from our company’s NVR. Features depend on model specifications, intended purposes and configurations. The real product shall prevail.
- Need-to-Know
Describe the parts and accessories that users must know before using NVR: front and rear panels, mouse, and how to operate the device through these parts and accessories.
-
- Introduction to Front panel
Keys and indicator lights on the front panel are introduced.
Tiandy NVR Full Installation Guide
Read More :
The front panel of PSE series NVR, TC-R14(20/40) configuration: I/B/N, TC-R54(20/40) configuration: I/B/N, TC-R3440 configuration: I/B/N,
TC-R5110 configuration: I/B/N, TC-R5220 configuration: I/B/N standard
series NVR is shown as below:

The functions of the front panel are shown in the following table:
| S/N | Type | Name | Description |
| 1 | State
indicat ors |
PWRS | Power indicator; it is on when the device is connected to the power supply. |
| HDD | HDD working indicator; it is on when the device reads from and writes to the HDD. | ||
| NET | Network status indicator; it flashes in network communication mode. | ||
| 2 | Interfa ce | USB
interface |
To connect to external mouse, USB device, mobile hard disk and other devices. |
The front panel of TC-R11(05/10/20) configuration: I/B/V2.0, TC-R31(05/10/20) configuration: I/B standard series NVR, TCR1120 configuration: I/B/V2.0 multimedia NVR is shown as below:

The functions of Status indicators on the front panel are shown in the
following table:
| S/N | Type | Name | Description |
| 1 | State
indicat ors |
PWRS | Power indicator; it is on when the device is connected to the power supply. |
| HDD | HDD working indicator; it is on when the device reads from and writes to the HDD. | ||
| NET | Network status indicator; it flashes in network communication mode. |
The front panel of TC-R58(20/40/80) configuration: I/B/N, TC-R38(40/80)
configuration: I/B/N, TC-R58(20/40/80) configuration: I/F,
TC-R38(20/40/80) configuration: I/F/N series NVR is shown as below:

The functions of Status indicators on the front panel are shown in the following table:
| S/N | Type | Name | Description |
| 1 | State
indicat ors |
PWRS | Power indicator; it is on when the device is connected to the power supply. |
| HDD | HDD working indicator; it is on when the device reads from and writes to the HDD. | ||
| NET | Network status indicator; it flashes in network communication mode. | ||
| 2 | Interfa ce | USB
interface |
To connect to external mouse, USB device, mobile hard disk and other devices. |
The front panel of TC-R516(40/80/160) configuration: E/B/N, TC-R31680
configuration: E/B/N series NVR is shown as below:

The functions of Status indicators on the front panel are shown in the following table:
| S/N | Type | Name | Description |
| 1 | Key | POWER | ON/OFF button + power indicator. |
| 2 | Status indicate r | Alarm indicator | When the equipment works abnormally, the indicator is on. |
| 3 | Status indicate r | Running
indicator |
When the equipment works normally, the indicator light is on. |
| 4 | Status | LAN1 | Network card 1 status indicator; it |
| indicato r | flashes in network communication state. | ||
| 5 | Status
indicato r |
LAN2 | Network card 2 status indicator; it flashes in network communication state. |
| 6 | Status
indicato r |
Hard disk error
indicator |
This indicator is on in red when the
HDD works abnormally. |
| 7 | Status
indicato r |
Hard disk
running indicator |
This indicator flashes in green when the HDD works normally. |
| 8 | interface | USB interface | To connect to external mouse, USB device, mobile hard disk and other devices. |
The rear panel and interfaces of the equipment are introduced.
The interfaces on the rear panel of TC-R3105 configuration: I/B/P(/Z) series PSE NVR are shown as below:
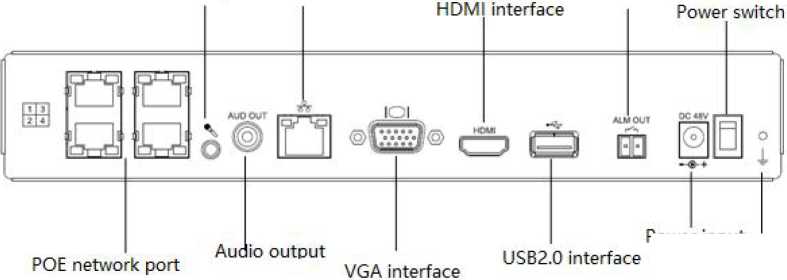
Voice intercom input LAN Ethernet port
Alarm output
Power input
Earthing terminal
The interfaces on the rear panel of TC-R3210 configuration: I/B/P(/Z) series PSE NVR are shown as below:

The interfaces on the rear panel of TC-R3220 configuration: I/B/P(/Z) series PSE NVR are shown as below:

The interfaces on the rear panel of TC-R3220 configuration: I/B/P/H(/Z) series PSE NVR are shown as below:

The interfaces on the rear panel of TC-R11(05/10/20) configuration: I/B
TC-R31(05/10/20) configuration: I/B(/Z) series NVR are shown as below:
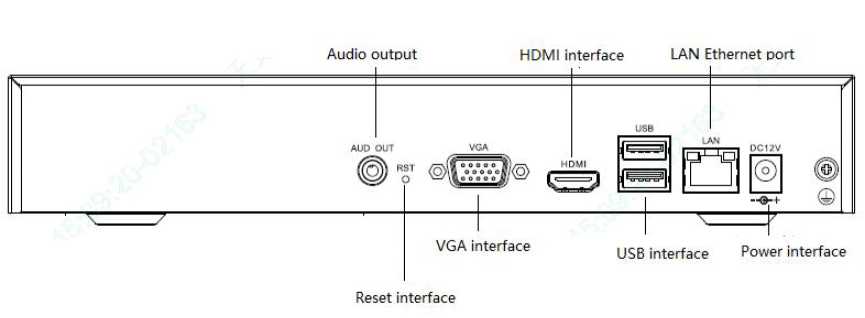
The interfaces on the rear panel of TC-R1230 configuration: I/B, TC-R12(10/20) configuration: I/B, TC-R32(10/20) configuration: I/B(/Z), TC-R5210 configuration: I/F, TC-R3210 configuration: I/F(/Z) series NVR are shown as below:
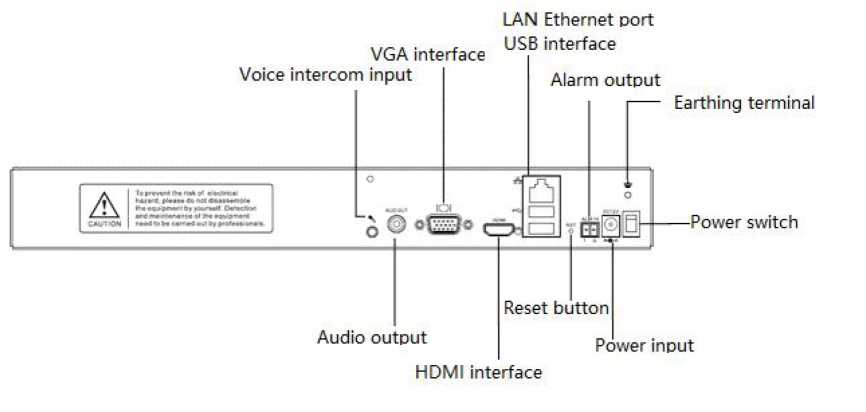
The interfaces on the rear panel of TC-R3105 configuration: I/F(/Z) series
NVR are shown as below:
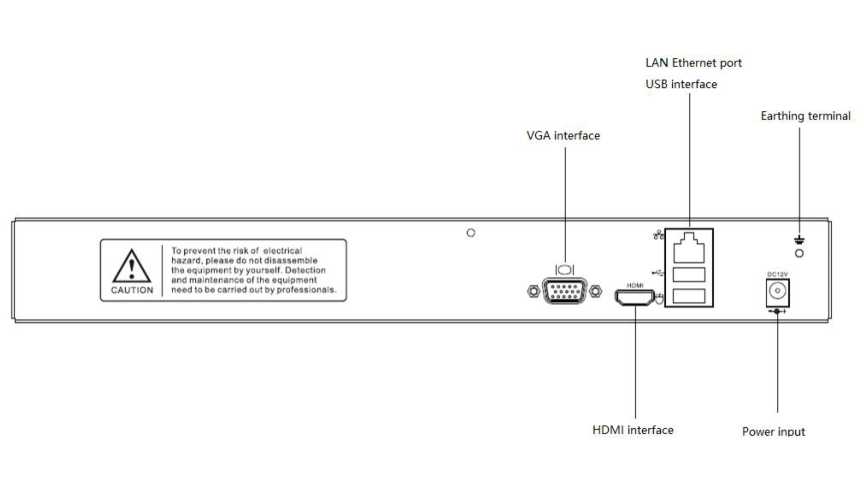
The interfaces on the rear panel of TC-R14(20/40) configuration: I/B/N, TC-R54(20/40) configuration: I/B/N, TC-R3440 configuration: I/B/N(/Z) series NVR are shown as below:
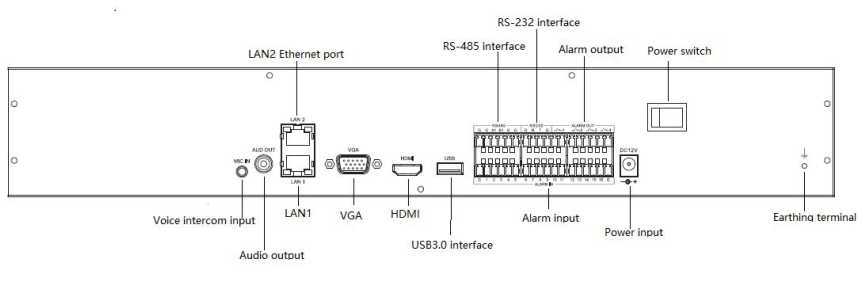
The interfaces on the rear panel of TC-R58(20/40/80) configuration: I/B/N, TC-R38(40/80) configuration: I/B/N(/Z), TC-R58(20/40/80) configuration: I/F, TC-R38(20/40/80) configuration: I/F/N(/Z) series NVR are shown as below:
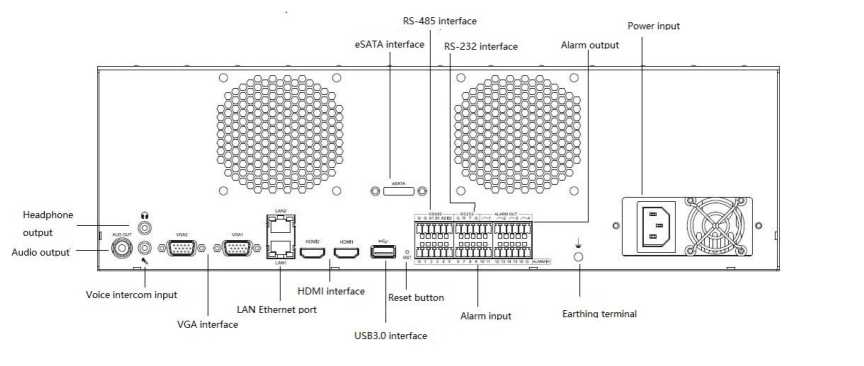
The interfaces on the rear panel of TC-NR2x enhanced series NVR (80 channels, 160 channels, 16 disk position) are shown as below:
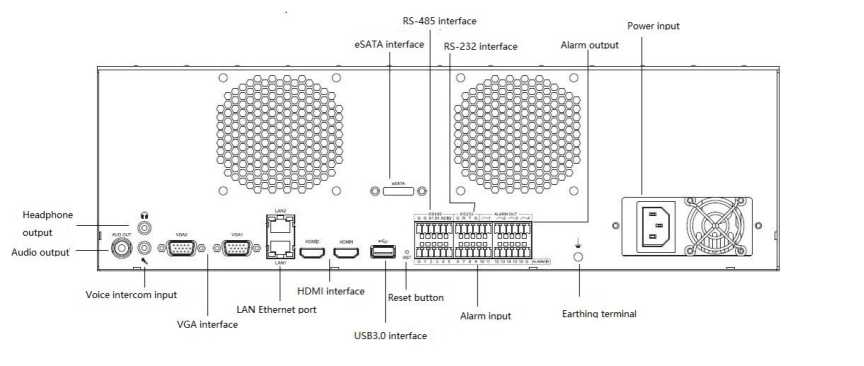
The interfaces on the rear panel of TCR1120 configuration: I/B/V2.0 multi-media NVR are shown as below:

![]()
Note:
• The schematic diagram illustrates the functions of interfaces on the front and rear panels only, and the specific chassis size shall be subject to the real product.
-
- Instructions to Mouse Operations
After your mouse is connected to the USB interface, you can use your mouse to operate the device. For information about available operations, refer to the following table:
| Name | Action | Description |
| Left-click | Click |
|
| Double click | • Single screen, full screen, multi-screen display switch in preview and playback states. | |
| Press&hold
and drag |
|
detection and video occlusion alarm area.
|
||
| Right click | Click |
|
| Mouse wheel | Swipe up |
|
| Swipe down |
|
| factor (-) for digital zoom | ||
| Double click | • Mouse switches between
primary and secondary screens |
- Installation and Connection
- Precautions for Installation
Wr Warning:
Improper battery replacement is at the risk of explosion. The replacement operation is not recommended for users. To replace the battery, use the battery of the same type or equivalent type.
NVR is a special monitoring device which shall be installed by paying attention to the followings:
- Do not place containers containing (such as water glasses) liquid on the NVR.
- Install the NVR in a well-ventilated location. Install multiple devices such that they are spaced greater than 2cm.
- Operate the NVR under allowable temperature (-10°C ~ +55°C) and humidity (10% ~ 90%). (The H.265 series NVR with RAID mode enabled operates under 0°C ~ +55°C; the H.265 series NVR E16 with redundancy mode enabled operates under +20°C ~ + 55 ^).
- Please remove the power cord to cut off the mains power before cleaning the device.
- Dust on the circuit board within the NVR, when dampened, may result in short circuit. Please regularly brush out dust on the circuit board, connectors, chassis and fan. If dirt is hard to be cleaned, use water-diluted neutral cleaner to remove it and then dry it.
- Do not use volatile solvents such as alcohol, benzene or diluent to clean the device, neither strong or abrasive cleaners, which may damage the surface coating.
- Please purchase monitoring-level SATA HDD from regular channels to ensure the quality and use requirements of the HDD. Seagate monitoring-level HDD is recommended.
- Please ensure that there is no danger due to uneven mechanical loads.
- Please make sure that the video cable and audio cable have enough space for installation, and the bending radius of the cable should not be less than 5 times the outer diameter of the cable.
- Please ensure that the NVR is reliably grounded.
Note:
- When you receive this product, please check against the ” packing list” in the packing box. In case of any damage or missing accessories, please contact your vendor immediately.
- . Installing HDD
Our NVR device is not supplied with hard disk. A hard disk needs to be configured and installed according to your recording plan. Disassembly of the chassis and installation of the hard disk must be completed by professionals.
• Notes:
- Please use the NVR dedicated monitoring-level hard disk recommended by the hard disk manufacturer.
- For the maximum number of hard disks installed on the device, refers to the instructions in the hard disk document.
- Make sure that the power supply is cut off before installation commences.
-
- Calculation Method of HDD Capacity
-
Calculate the total capacity required for a hard disk video recorder according to the requirements of video recording (video type, video storage time), as detailed in the Appendix of this Manual.
Example:
| Bit Rate | File Size/Hour | Bit Rate | File Size/Hour |
| 96 Kbps | 42 m. | 128 Kbps | 56 M |
| 160 Kbps | 70 M | 192 Kbps | 84 M |
| 224 Kbps | 98 M | 256 Kbps | 112 M |
| 320 Kbps | 140 M | 384 Kbps | 168 M |
| 448 Kbps | 196 M | 512 Kbps | 225 M |
| 640 Kbps | 281 M | 768 Kbps | 337 M |
| 896 Kbps | 393 M | 1024 Kbps | 450 M |
| 1280 Kbps | 562 M | 1536 Kbps | 675 M |
| 1792 Kbps | 787 M | 2048 Kbps | 900 M |
| 3072 Kbps | 1350 M | 4096 Kbps | 1800 M |
![]()
8192 Kbps
3600 M
16384 Kbps
7200 M
Note:
The data provided in the table above is for reference only. The estimation of “file size” in the table may deviate from the actual value, and any loss caused thereby shall be borne by the user.
-
-
- HDD Installation Procedure
-
Installation tools
A cross screwdriver.
Installation diagrams (1) :
1 Remove the screws on the rear and sides of the chassis and then
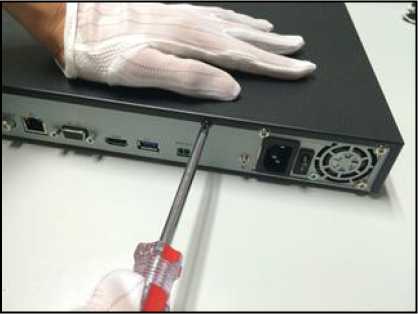
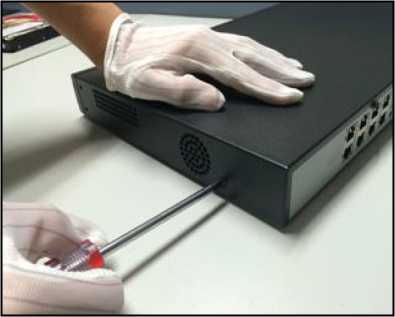
remove the top cover.
2S Connect one end of the HDD data cable to the SATA interface of the NVR master board Up, and the other end to the HDD.
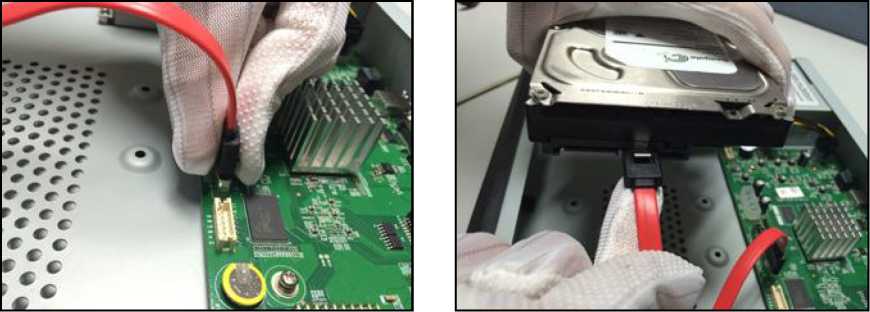
3S Connect one end of the HDD power cable to the SATA interface of the NVR master board, and the other end to the HDD.
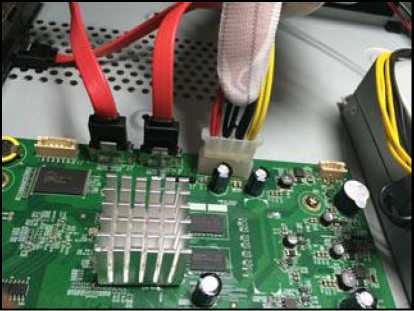
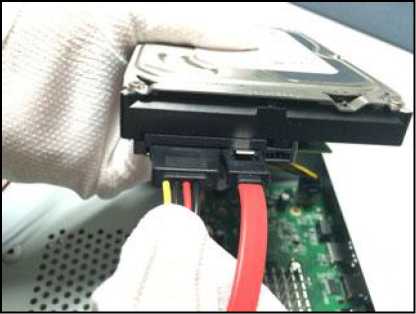
4S Fix the HDD screws on the bottom of the NVR chassis, attach the top
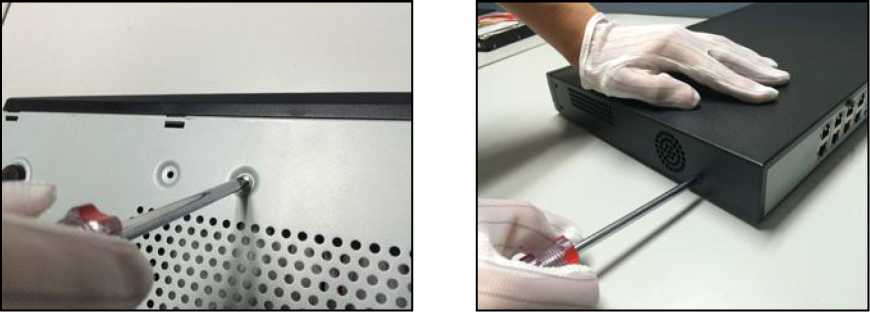
cover of the chassis and fix it with screws.
Installation diagrams (2) :
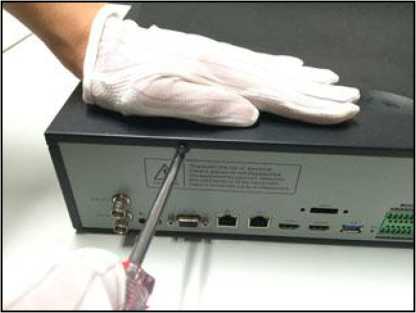
1 Remove the screws on the back of the chassis, remove the top cover,
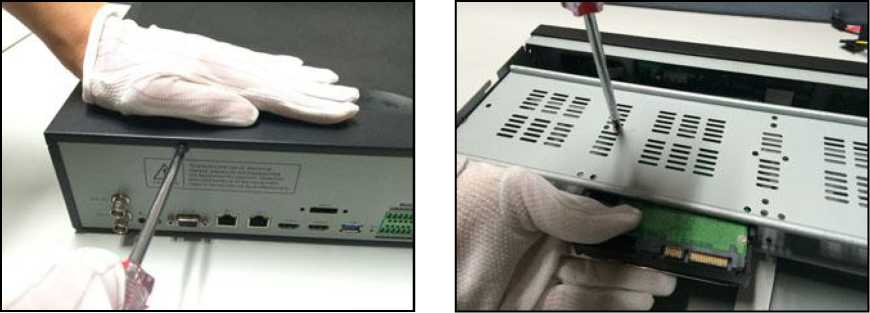
and fix the hard disk to the chassis HDD holder.
2S Connect one end of the HDD data cable to the SATA interface of the
NVR master board, and the other end to the HDD.
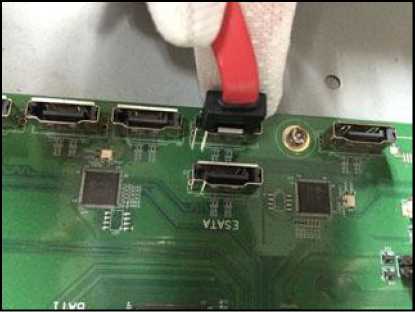
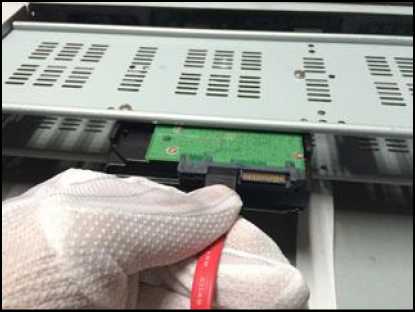
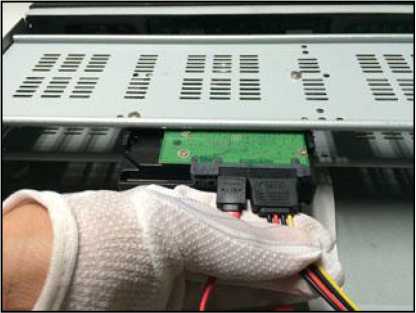
3S Connect the power cable to the hard disk, attach the top cover of the chassis and fix it with screws.
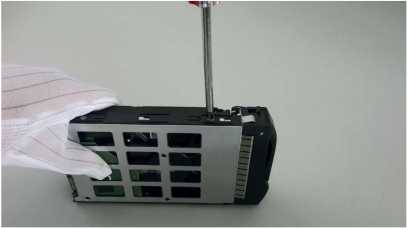
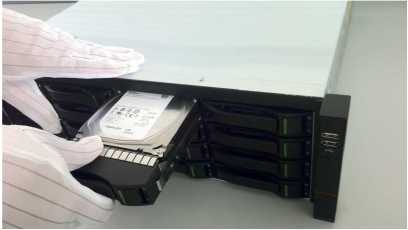
Installation diagrams (3): (installation of the front HDD) 1 Attach the HDD mounting screws and insert it into the HDD slot on
the front panel.
- Local Configuration and Operation
- Switch ON/OFF
- Switch ON
- Switch ON/OFF
![]()
Note:
• Make sure to use the power supply required by NVR before
startup, and ensure that the NVR is well grounded.
- Make sure the NVR video output is properly connected to the monitor before startup.
- Abnormal power supply will result in malfunctioning of NVR or even damage. It is recommended to use stabilized power supply for power supply.
- Connect the power supply and turn on the power switch on the rear panel. The device starts with a “beep” sound.
- NVR displays the following screen at startup:
Tiandy
• * • •
4.1.2. Switch OFF

1. Select “Main Menu ->
” to enter the logoff interface, as shown in
the figure below.
Logout
Reboot
Shutdown
- Users can click logoff to restart or shut down system.
![]()
Notes:
- Please do not cut off the power supply when the system is displaying “The system is shutting down…”
- Do not cut the power supply off when the device is running.
- Equipment Activation
After the device is started, the device can be configured with password and secret protection through device activation to ensure the normal login and password security of the device.
- First, on the password setting interface, enter the password twice, and click Next to enter the next interface.
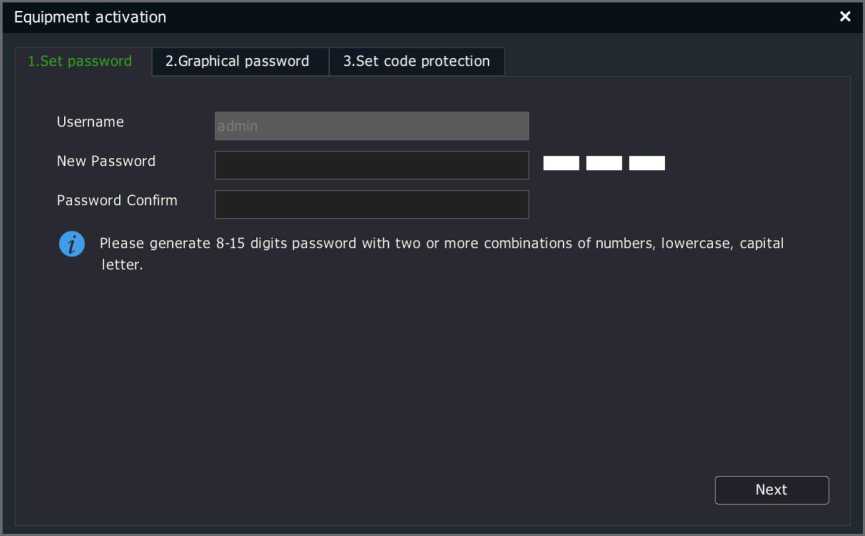
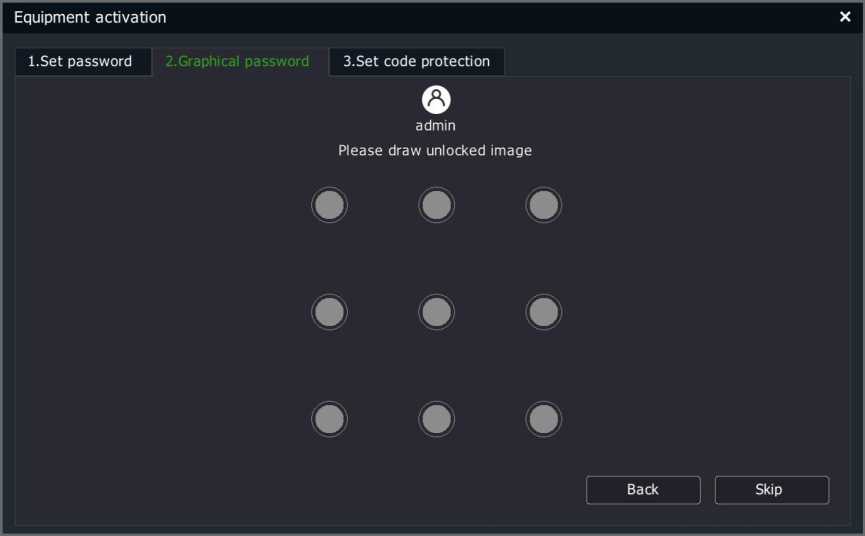
2S On the graphic password setting interface, set an unlock pattern, and then automatically enter the password setting interface. ClickPrevious to return to the password setting interface, or click Skip not to set the graphic password.
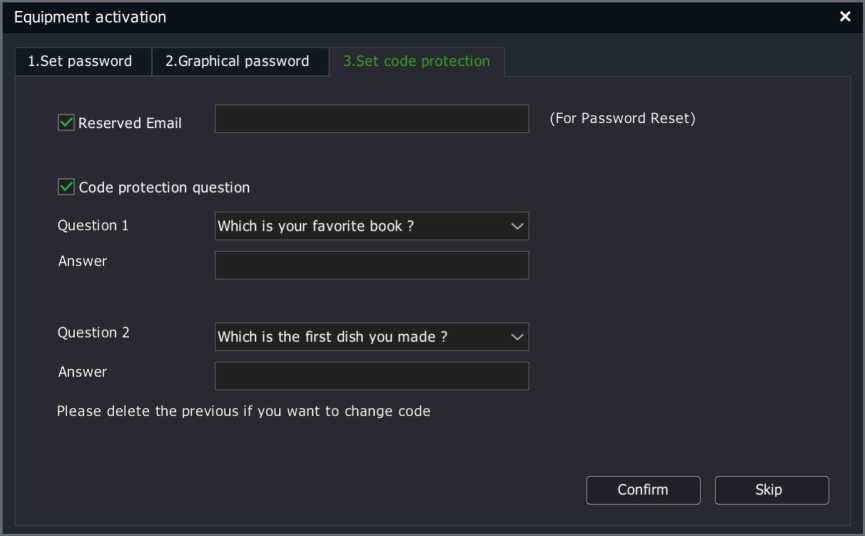
3S On the security question setting interface, set the mailbox and security question. You can skip this step directly into the boot wizard. The mailbox and security questions are used for password resetting.
After the device is started, the device can be simply configured through the boot wizard to ensure the normal operation of the device.
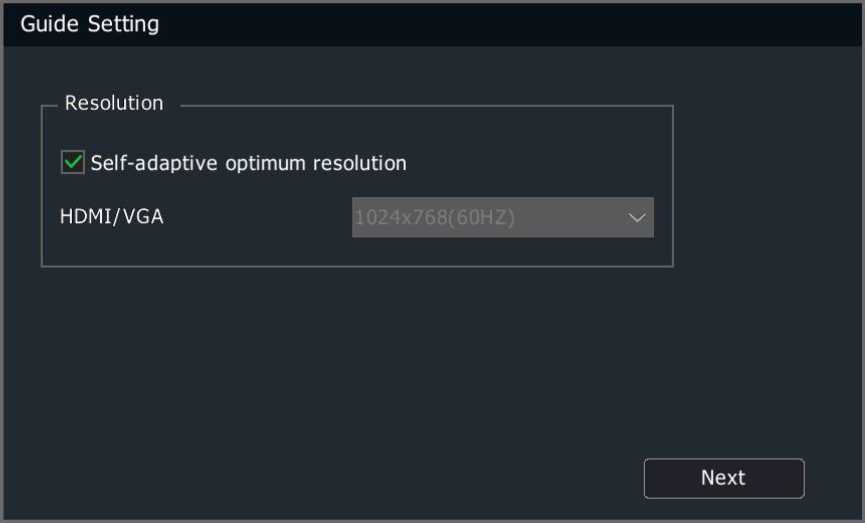
- First, on the Setup Wizard interface, set the current language and resolution of output device. Click “Next” to enter the next interface.
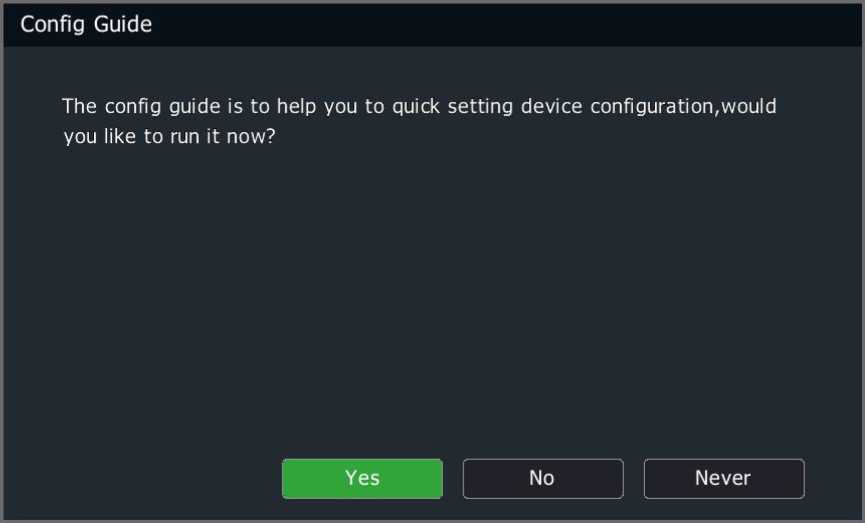
- On the Setup Wizard interface , select whether to run the boot wizard. Click “Yes” to enter the next interface, “No” to skip the boot wizard, or “Never” to close the boot wizard. In the third case, the boot wizard will be skipped at the next startup.
- On the Authentication interface, a user shall log in as administrator
“admin” for authentication. Click “OK” to confirm the account. After
authentication is successful, the boot wizard appears. The device will be locked for 5 minutes if you input the wrong password for 5 consecutive times. Click Cancel to skip the boot wizard.
Permission Identification
Login as Administrator
ID
Password
![]() Confirm
Confirm
Cancel
Note:
• Administrator: admin, password: (boot password set in Section 4.2 Device Activation).
- On the time and time zone setting interface, click “Apply” to set the time zone, time format and time; click “Next” to enter the next interface; and click “Exit” to exit the boot wizard.
1 2 3 4 5
Time&Time Zone S… Network card Server Search Format Disk Mobile Monitoring
 (GMT+08:00)Beijing,Urumchi,Singapore
Time Zone
Time Format
Time
yyyy/mm/dd hh:mm:ss
2020-03-13 S 09:05:33
Next [ Exit
- On the network setting interface, click “Back” to return to the previous interface; click “Next” to set network parameters and enter the next interface; and click “Exit” to exit the boot wizard.

Polymerization Op…
Network card
MAC Address
▼ IPv4 setting
IP Address
SubNet Mask
Gateway
Preferred DNS
Reserved DNS
IPv6 setting
Network cardl
I | Auto obtain IP address via DHCP
192.168.15 .34
255.255.255.0
192.168.15 .1
fl Get DNS automatically
8 .8 .8 .8
8 .8 .4 .4
Back j | Next j [ Exit
- On the server searching interface, you can configure digital channels.
Click “Search” to search digital channels; click “Back” to return to the
previous interface; click “Next” to enter the next interface; and click “Exit” to exit the boot wizard.

IP Address
Modify IP
Activated
Protocol
Channel
MAC Address
Display
IPv4 v | Al I
“Next” to enter the next interface; and click “Exit” to exit the boot wizard.
For the non-activated IPC, the NVR password will be used t.
0 Sync password to get reserved information.
Search | | Back | | Next | | Exit
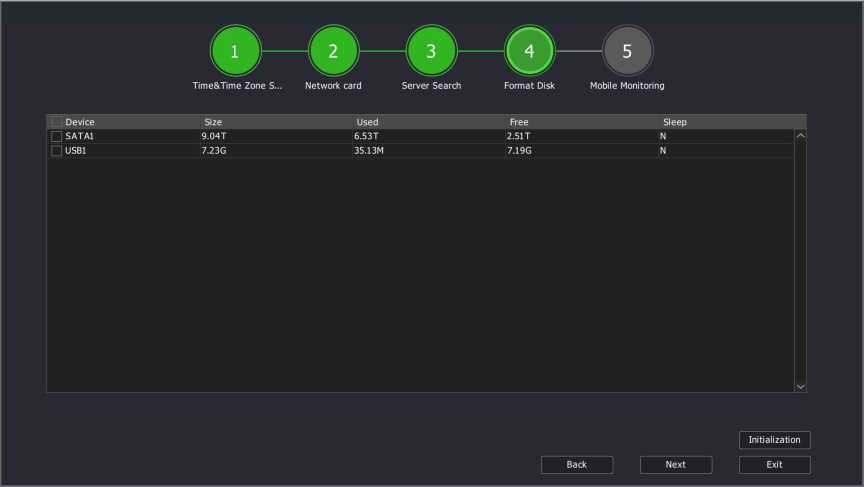
- On the formatting disk interface, click “Initialize” to format the selected disk; click “Previous” to return to the previous interface; click
![]()
ote:
• The disk must be initialized before recording properly.
- On the mobile monitoring interface, you can configure control devices on the mobile side. Click “Back” to return to the previous interface; click “Next” to enter the next interface; and click “Exit” to exit the boot wizard.
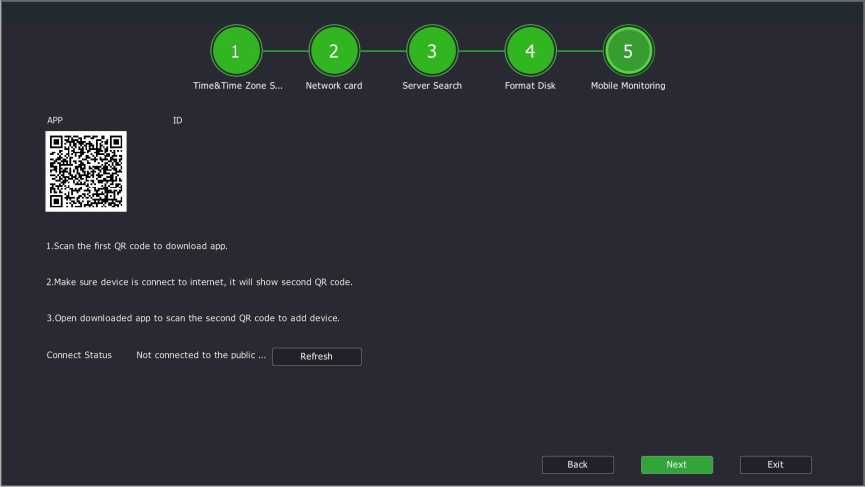
• Some device models use QQ for mobile monitoring. The real product shall prevail.
- If there is still a hard disk in the system that has not been formatted, the following message as shown in the figure below will appear. Click “Execute” to automatically format the unformatted disks in the system one by one; and click “Back” to enter the preview screen directly.
![]() Format Disk
Format Disk
Format disk will erase all the data, continue?
Cancel
Confirm
Users can easily add an IP channel to the device with one click. If no channel is added, the preview status is shown as below.

1X On the preview interface, click a channel to display the “+” sign, and the server search form appears, as shown in the figure below.
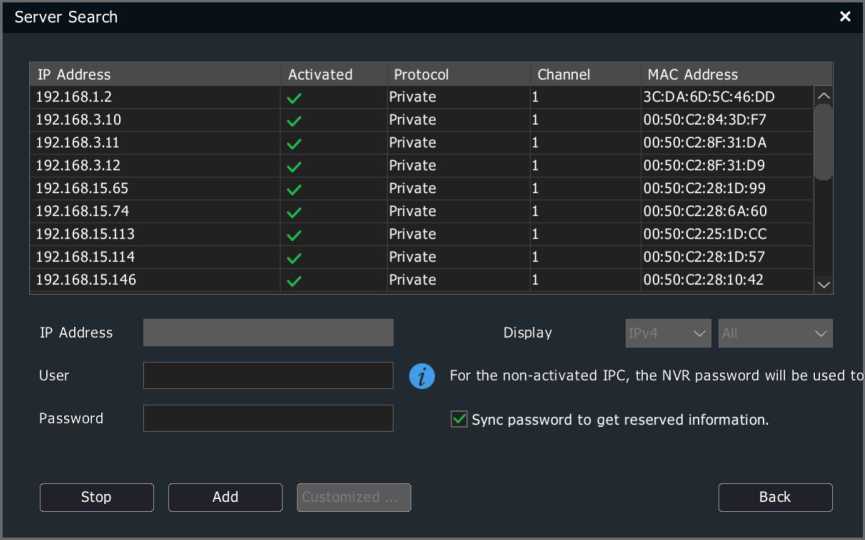
Note:
• A channel is added with default port, username and password; if not, you can choose “Custom Add”.
- After the search is completed, double-click the search list or select the channel and click “Add” to complete the addition.
- Users itself can also configure parameters to add digital channels. Click “Customized Adding” to display the “Customized Adding” form, as shown in the figure below.
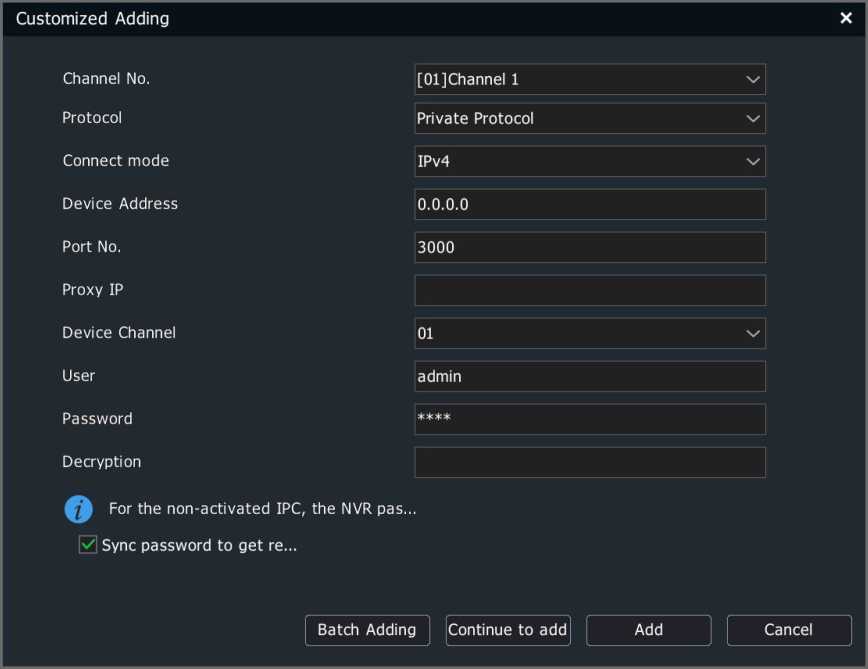
- Enter the IP address, port number, user name, password and other information of the front end.
![]()
Note:
• If it is the local channel of PSE-NVR and there is no connection, the add method of the PSE channel will automatically be changed to manual add after fast addition. The plug&play function is enabled by default for the POE port of the PSE series NVR. Please do not connect it to the LAN; otherwise, IP addressed of other devices in the LAN will be automatically modified.
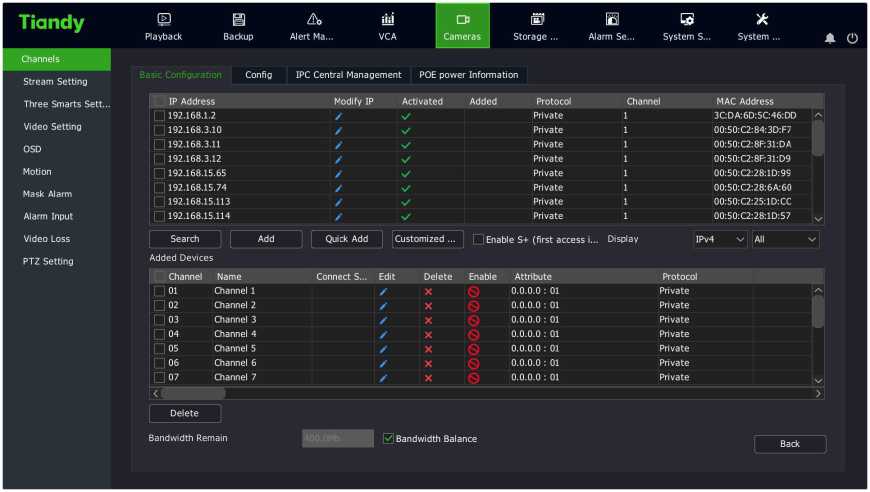
4.4.2 Adding Digital Channels Using Regular Methods
- Select “Main Menu -> Cameras -> Channels -> Basic Configuration” to
enter the channel configuration interface, as shown in the figure below.
![]()
Notes:
- This page displays different tabs for different device models.
- After addition is complete, you can check the results in the added device list.
- Click connect status O to directly preview the video of this channel.
- When the connection status displays an exclamation point, move
the mouse over the * icon to show the cause of the
connection failure.
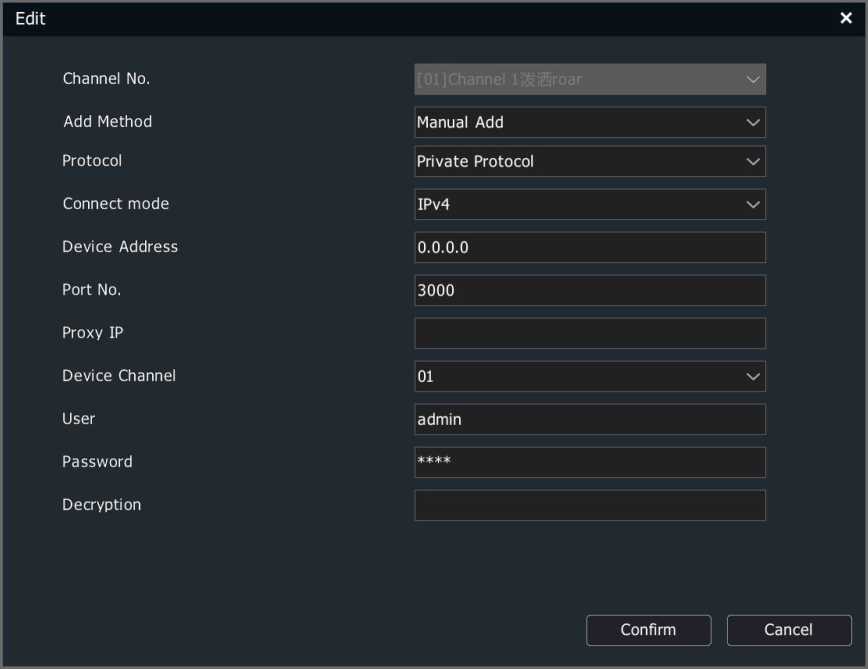
- Click “search” to begin searching. Search results are automatically sorted by IP address. You can modify the IP front end in the search results list. Click f to display the modify IP interface, as shown in the figure below.
- Select the IP channel to add from the search list, click “Add” or double-click the mouse, and the IP device will be added to the idle
channel of NVR. You can add multiple IP channels. The channel search is shown as below.
PTZ Setting Added Devices
| Channel | Name | Connect S… | Edit | Delete | Enable | Attribute | Protocol | |
|---|---|---|---|---|---|---|---|---|
| □ 01 | Channel 1 | Z | X | 0.0.0.0 : 01 | Private | – | ||
| 02 | Channel 2 | z | X | 0.0.0.0 : 01 | Private | |||
| 03 | Channel 3 | z | X | 0.0.0.0 : 01 | Private | |||
| □ 04 | Channel 4 | z | X | 0.0.0.0 : 01 | Private | |||
| □ 05 | Channel 5 | z | X | 0.0.0.0 : 01 | Private | |||
| □ 06 | Channel 6 | z | X | 0.0.0.0 : 01 | Private | |||
| QO? | Channel 7 | /’ | X | c9 | 0.0.0.0 : 01 | Private | – | |
| Tiandy | E | a | iki | □o | H | s | X | |||
| Playback | Backup | Alert Ma… | VCA | Cameras | Storage … | Alarm Se… | System S… | System … | a o |
| Channels | Basic Configuration | |||||||
| Stream Setting | Config | IPC Central Management | POE power Information | |||||
| Three Smarts Sett… | IP Address | Modify IP | Activated Added | Protocol | Channel | MAC Address | ||
| □ 192.168.1.2 | ✓ | x/ | Private | 1 | 3C:DA:6D:5C:46:DD | -N | ||
| Video Setting | □ ’192.168.3.10 | / | x/ | Private | 1 | 00:50:C2:84:3D:F7 | ||
| OSD | □ ’192.168.3.11 | / | x/ | Private | 1 | 00:50:C2:8F:31:DA | ||
| □ ’192.168.3.12 | / | x/ | Private | 1 | 00:50:C2:8F:31:D9 | |||
| Motion | □ 192.168.15.65 | / | x/ | Private | 1 | 00:50:C2:28:lD:99 | ||
| Mask Alarm | □ 192.168.15.74 | / | x/ | Private | 1 | 00:50:C2:28:6A:60 | ||
| □ 192.168.15.113 | / | Private | 1 | 00:50:C2:25:lD:CC | ||||
| Alarm Input | □ 192.168.15.114 | / | Private | 1 | 00:50:C2:28:lD:57 | – | ||
Video Loss Search I Add Quick Add I Customized… □ Enable S+(first access I… Display IPv4 v All
Delete
| Bandwidth Remain | □ Bandwidth Balance | Back |
- When adding an inactive IPC, an activation pop-up window will
appear as shown in the figure below. Check the “Synchronize
information retained for retrieving the password”, the retained
information will be synchronized to the front end and activated.
For the non-actlvated IPC, the NVR pas…
Sync password to get re…
![]()
• If the add method for PSE-NVR’s digital channel is plug and play,
then this channel is busy.
Customized Adding
1 On the Channel Config -> Basic Configuration interface, click
“Custom Add” to enter the digital channel interface; when device type
is private protocol, proceed as shown in the figure below.
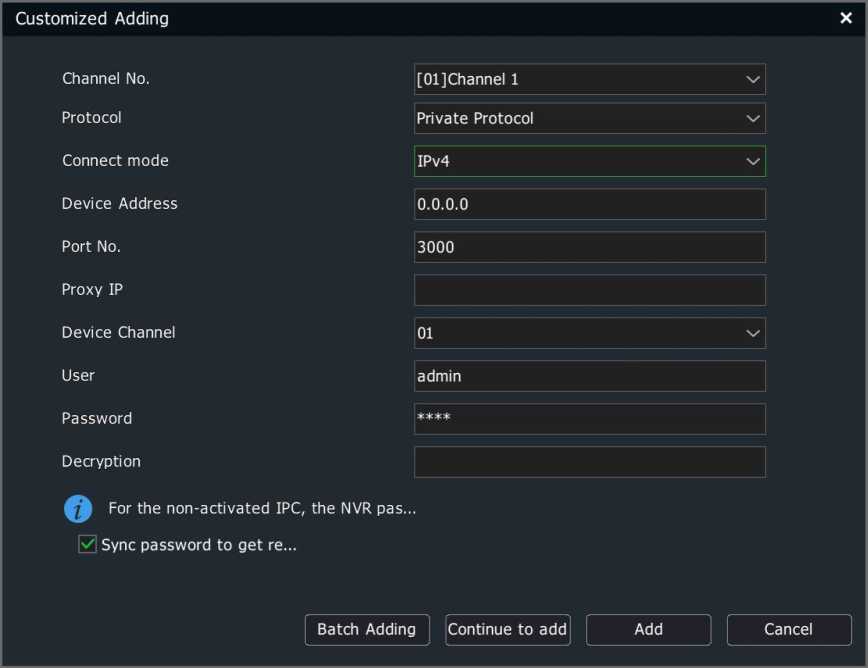
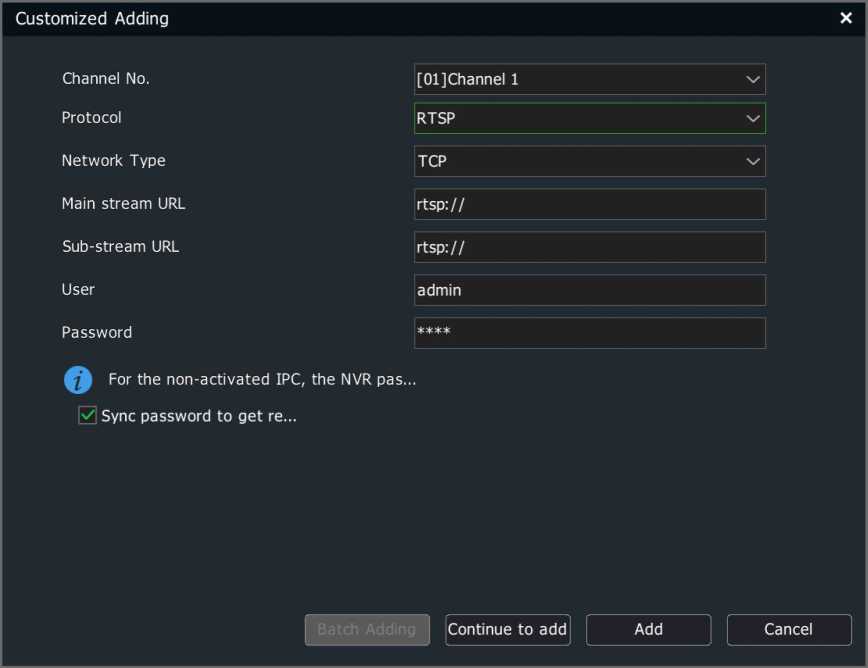
2S Select the channel number to add, check Enable, and select the connection mode according to the device type. When device type is RTSP, proceed as shown in the figure below.
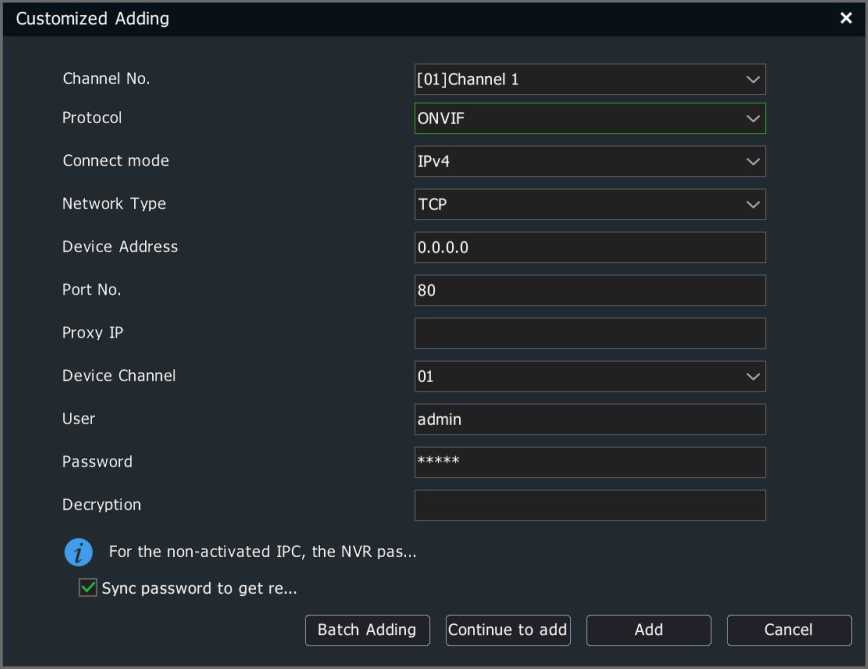
When device type is ONVIF, proceed as shown in the figure below.
- After entering the IP address or URL address and username and password of the front-end device, click “OK” to add a digital channel. Repeat this operation to add other digital channels.
![]()
Notes:
- If the device to add is a multi-channel NVR, you can select the channel number to add from “Channels”, and also can add multiple channels for one NVR at a time.
- Continue adding, batch adding, adding according to the add rule and target channel, and skipping the current channel if the
current channel is included in the target channel. If the IP address
is ascending, the last bit of IP, after 255, will not be incremented.
- When device type is ONVIF, the port number defaults to 80, and the username and password default to admin. The login account and password may vary from manufacturer to manufacturer, which needs to be modified according to the actual situations.
4.4.3 Adding POE Camera 1 On the Channel Config -> Basic Configuration interface, click f in
the added device list or double-click a PSE channel to enter the digital
channel interface.

2S A PSE channel can be added by means of “Plug & Play” and “Manual Add”:
- If “Manual Add” is selected, the device shall be connected to the network interconnected with IP channels. Other configuration methods are the same as adding ordinary digital channels.
- If “Plug & Play” is selected, the front end to add shall be connected to the device’s independent POE-powered Ethernet port. The device will
complete the connection automatically.
-
-
- Quick Add
-
In order to allow users to quickly add devices, users can choose to enable the “Quick Add” function to add channels. In this mode, the device will be automatically searched and added to the digital channel.
^Notes:
- The “Quick Add” function will automatically search for IPC and add it to the idle channel. Please pay due attention when using it.
- The PSE device channel list cannot be removed manually.
-
- Configuration Management
-
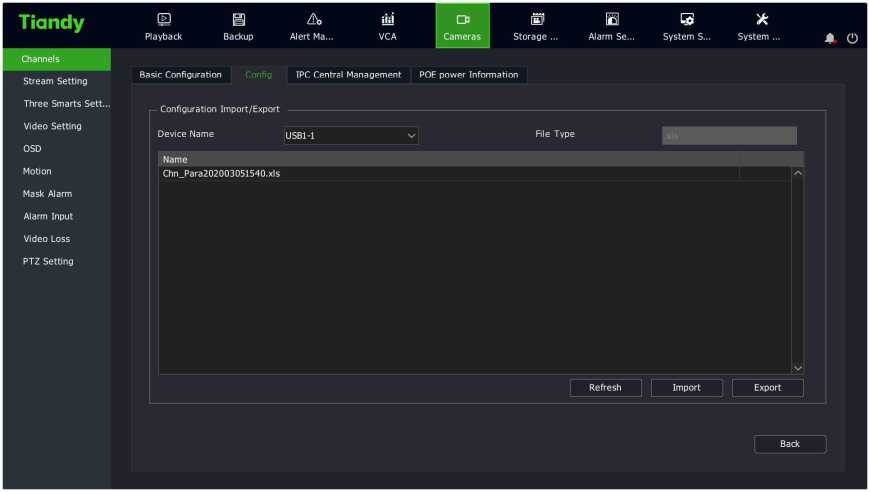
Users can import and export all channel parameter configurations through configuration management.
- Select “Main Menu -> Cameras->Channels -> Config” to enter the configuration management interface. If a mobile storage device is connected, clicking Export can export all channel configuration parameters, which are saved as .xls format file. Users can manually edit exported parameters on the computer and use them as input parameters, as shown in the figure below.
- Importing contents contained in the exported .xls file shall meet the following formats.

Wherein:
- In “Enable “, 0: channel not enabled, 1: channel enabled;
- In “Chn Type “, 0: main stream, 1: secondary stream, 2: picture stream;
- In “Net Mode “, 1: TCP, 2: UDP, 3: multicast;
- In “Connect Mode “, 0: IP, 1: domain name, 2: active mode;
- In “Preview Mode “, 0: tiled on the display area, 1: wide-screen proportional display is maintained.
- Exported .xls files can be edited with Office 2003 and above and imported into the device.
-
- IPC Central Management
-
The centralized management function of IPC allows users to import and export parameters of the added front-end devices, upgrade them remotely, and restart IPC.
- Select “Main Menu -> Cameras -> Channels ->IPC Central
Management” to enter the IPC centralized management interface, as shown in the figure below.
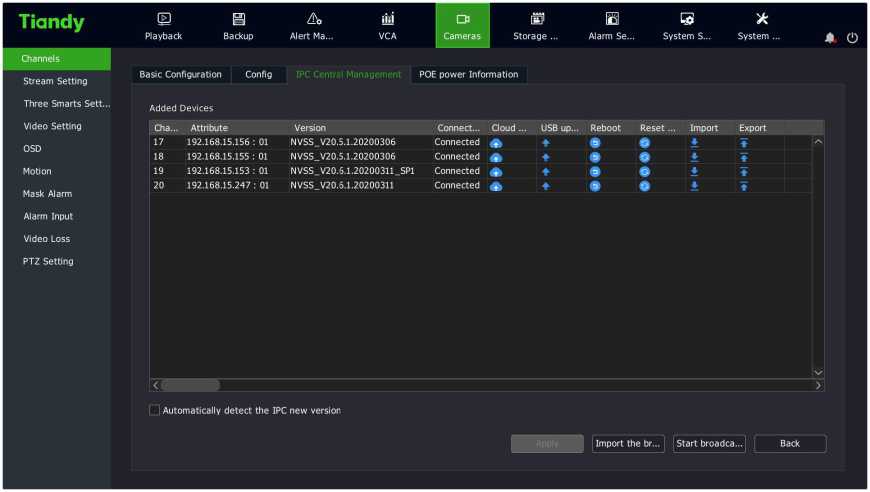
• The interface can display the channel number, property, version
number and connection status of the added front-end device,and allow perform cloud upgrade, parameter import and export, remote upgrade, IPC restart and other operations.
- Configuration Import/Export
- Select the front end to operate from the added device list.
(2) Click “B”
to display the configuration import prompt box, as
shown in the figure below.
![]() Configuration Import
Configuration Import
Import parameters can lead to reboot of front terminal IPC, whether to continue?
Cancel
Confirm
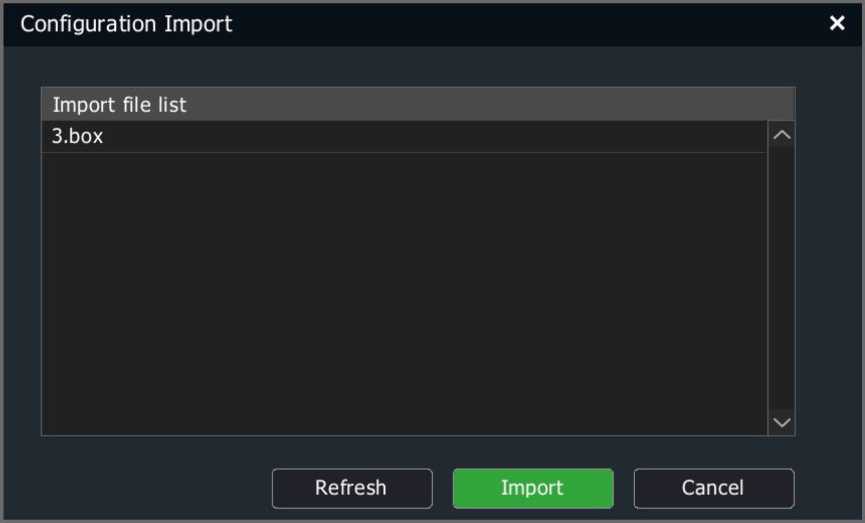
(3) Click “ok” to enter the configuration import interface, as shown in the figure below.
(4) Select the configuration file and click “Import” to quickly import
the configuration into the front-end device.
(5) Export the front-end configuration parameters, and click
“B” to
display the configuration export interface, as shown in the figure below.
Configuration Export
Export to
File name
USB1-1
Export
Cancel
- Select the storage device, fill in the name of the export file and click “Export” to export the front-end configuration. The prompt form pops up after export is successful, as shown in the figure below.
Export Successed
Config file exported.
Confirm
- Remote Upgrade and IPC Restart
- Select the channel to upgrade or restart from the added device
 list.
list.
(2) Click ”
” to display the IPC Upgrade interface, as shown in the
figure below.
IPC Upgrade
Upgrade file list 3.box uuu.box
Refresh
Upgrade
Back
![]()
(5) Click ”
(4) Click ”
- Select the configuration file to upgrade, and click “Upgrade” to complete the IPC upgrade.
” to remotely restart the selected device.
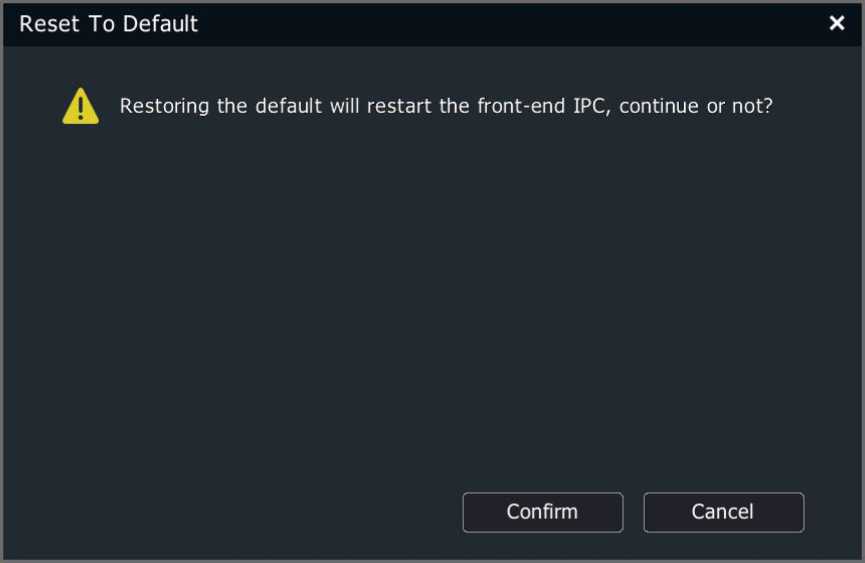
” to display the Restore Defaults prompt box, as shown in the figure below.
(6) Clicking “OK” and selecting IPC will restore defaults and restart
IPC.
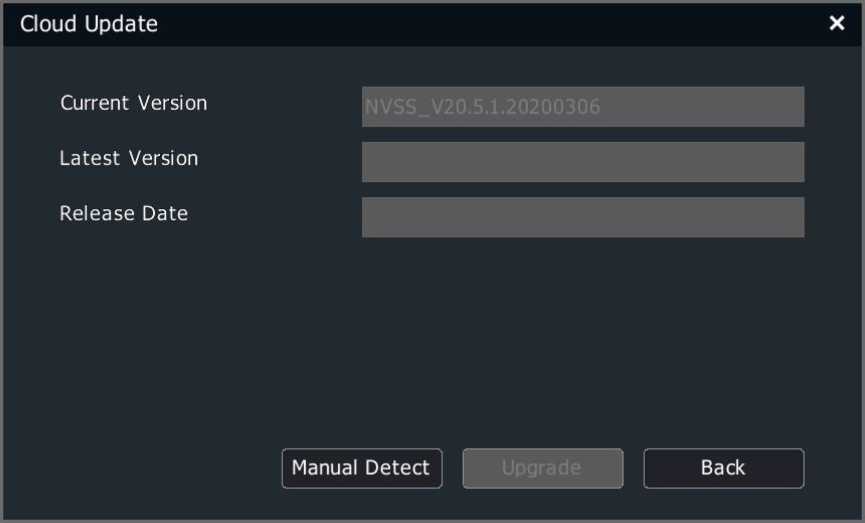
(7) Click “D”
to display the Cloud Upgrade prompt box, as shown in
the picture below.
- Import Broadcast/Start Broadcast
- Click Import Broadcast to display the IPC Upgrade interface, as
shown in the figure below.
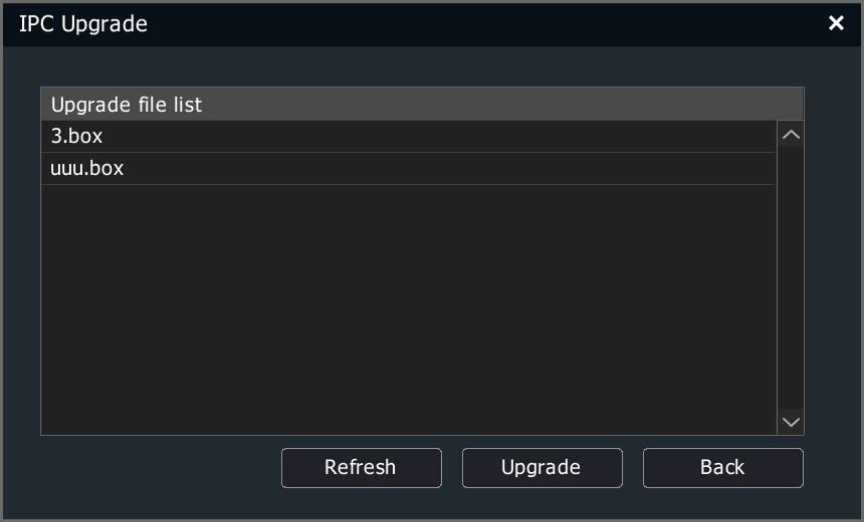
- Select the configuration file to upgrade, and click “Upgrade” to complete the IPC upgrade.
- After the upgrade is completed, click the Start Broadcast button to the Start Broadcast prompt box, as shown in the figure below.
![]() Start broadcasting
Start broadcasting
This operation will activate all the IPC alarm sound, continue or not?
Cancel
Confirm
- Click OK, and all IPCs will begin to play the imported audio.
-
- POE Power Information
-
This function is available in the PSE series NVRs while unavailable in other models.
- Select “Main Menu -> Cameras -> Channels ->POE Power Infomation” to enter the POE power information display interface, as shown in the figure below.
![]()
Tiandy
Channels
Stream Setting
Three Smarts Sett…
Video Setting
OSD
Motion
Mask Alarm
Alarm Input
Video Loss
PTZ Setting
| E | a | iki | □3 | H | E | s | X | |||
|---|---|---|---|---|---|---|---|---|---|---|
| Playback | Backup | Alert Ma… | VCA | Cameras | Storage … | Alarm Se… | System S… | System … | o |
Basic Configuration Config IPC Central Management POE power information
Instruction: check the check box of corresponding channel to use long-distance network cable, while uncheck it to use short-distanc…
| □ Select All □ 01
□ 02 |
□ 03
□ 04 |
□ 05
□ 06 |
□ 07
□ 08 |
□ 09
□ 10 |
□ n
□ 12 |
□ 13
□ 14 |
□ is
□ 16 |
|---|---|---|---|---|---|---|---|
| 01: 0W | 03: 0W | 05: 0W | 07: 0W | 09: 0W | 11: 0W | 13: 0W | 15: 0W |
| a | Ci | Ci | a | Ci | Ci | a | a |
| 02: 0W | 04: 0W | 06: 0W | 08: 0W | 10: 0W | 12: 0W | 14: 0W | 16: 0W |
| a | Ci | Ci | a | Ci | Ci | a | a |
| Actual Power: | o.oow | Surplus Power: | 200.00W |
Notice:
- Device POE rated power is200.0W.
- Each POE port power range:0~30W.
- When actual power exceed rated power, system will close POE port by port number by descending, till the actual power go lower than rated power.
Note:
” /!” means that the POE port is normally powered, and ” ■ ” means that the port is not connected to a camera or powered normally.
• Above the “?” port is the real time power information of the POE port.
Please refer to the interface for POE power notes.
-
-
- Code Setting
-
Select “Main Menu -> Cameras -> Stream Setting” to enter the code setting interface, as shown in the figure below.
| Tiandy | E | a | iki | □3 | H | s | X | |||
| Playback | Backup | Alert Ma… | VCA | Cameras | Storage … | Alarm Se… | System S… | System … | a o |
| Channels
Stream Setting Three Smarts Sett… Video Setting OSD |
Audio/Video Parameter ROI
Channel |[17]Channel 1 v~] [schedule | Bl Enable Substream Encoding H.265 v–1 Qs+ H.265 x7 | | g+ |
||
| Motion
Mask Alarm Alarm Input Video Loss PTZ Setting |
Resolution (1080P)1920xl080 | 0 Corridor Mode (4CIF)704xS76(PAL)/704×480(NTSC v | |
| FrameRate 25 v | |||
| BitRate Type CBR xz | VBR xz | ||
| BitRate 2048 x/ | (32~16384Kbps) l1024 >7 (32~16384Kbps) | ||
| StreamType Audio/Video v | Audio/Video [ | ||
| More setting… [
Copy To Channel [All x/ | [ Copy Refresh Back |
|||
Audio/Video Parameter
Select the channel to set and set audio and video parameters:
- Channel: select the channel where you want to set parameters. There are four types of video compression parameters: main stream (normal), main stream (alarm), custom 1, and custom 2.
- Encoding: The system supports H.264 and H.265 encoding, and high profile, main profile and baseline encoding methods are available.
- S+: S+ will display and distinguish the main and secondary streams according to whether it is supported by the front end. After S+ is turned on, compression mode, video quality, I frame rate and key areas will not be available. Some front ends also support mutual exclusion of S+ and intelligent analysis. When S+ is turned on, the intelligent analysis will be turned off.
- Resolution: Sets the resolution of the front-end device.
- Corridor Mode: Enables the corridor mode when resolution is 16:9 (for example, 1080P). When corridor mode is enabled, the resolution of the video is adjusted to 9:16.
- FrameRate: Video frame rate refers to the number of video frames per second that can be selected or edited from a drop-down list.
- BitRate Type: variable bitrate and fixed bitrate. The variable bitrate will change according to the scenario, and the fixed bitrate will be coded according to the set bitrate as far as possible.
- BitRate: Can be selected or edited from the drop-down box, range: 32-16384Kbps.
- Stream type: The composite type provides two options: “Pure Video” and “Audio Video”. “Audio Video” means containing video and audio information, while “Pure Video” contains only video information.
- Click “More” to display the image quality, I frame rate, audio encoding, audio control type, and input volume setting options.
- Quality: 5 options including best, better, good, average, poor. Image quality is proportional to the bitrate. The better the image quality is, the higher the bitrate is.
- I-Frame Interval: I frame, also known as key frame, One I frame is contained in several video frames. If I frame rate is 100, there is one I frame in every 100 frames of video. I frame rate inversely proportional to the bitrate. The higher the I frame rate is, the smaller the bit rate is. It is recommended that the I frame rate be the same as frame rate.
- Audio: The system provides 3 audio encoding modes: ADPCM_D(ADPCM_DIV4), G.711A and G.711U. Three audio sampling rates of 8K, 32K and 48K are also provided.
- Audio Type: Audio control type used by the front end: Lineln and MicIn.
- Input volume: The input volume of the corresponding channel, ranging from 0 to 100.
- Audio output type: Laser-enabled devices also support the selection of audio output type, including built-in speaker, external audio source and off. When a built-in speaker is selected, you can adjust the output volume.
- The secondary stream can be set separately. For setting methods, refer to the main stream.
![]()
Notes:
- When bitrate type is selected as “fixed bitrate”, the image quality is unavailable.
- Secondary stream parameters are used for network transmission. When the network environment is not very good, users can use the secondary stream for preview and storage to reduce the bandwidth. In addition, the secondary stream is also suitable for mobile monitoring.
- For corridor mode, this should be supported by the front-end IPC.
- Coding parameter templates vary with different front-end IPCs.
- Click the More button to display or hide the setting options under the button.
ROI
The focus area can be set here after a front-end that supports it is connected. The image displayed in the focus area is of higher quality.
- Select the property page of the focus area, as shown in the figure
below.
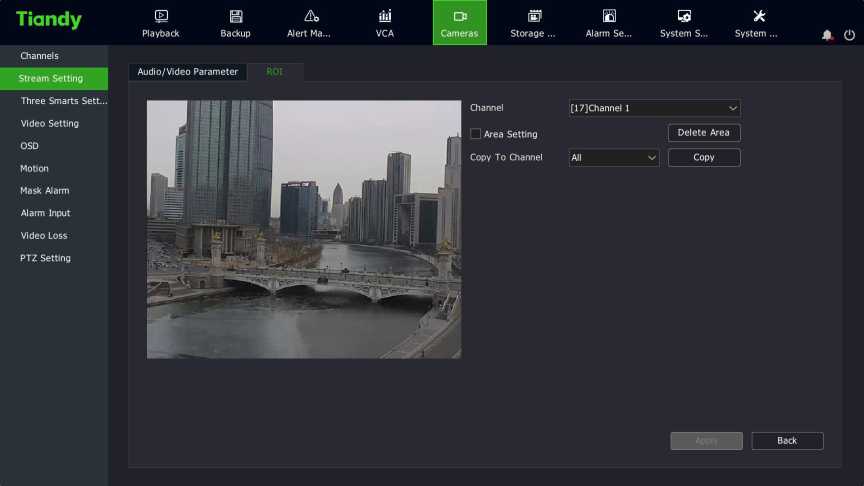
- Check “Area Setting” to enable this function. Press and hold the left mouse button and drag over the video to set the focus area. Up to four focus areas are supported. Click “Delete Area” to delete all the focus areas that have been set.
- Click “Apply” to save the settings.
4.4.9 Video Setting
In order to obtain a good visual effect, users can adjust video parameters of the front-end according to the scenario, and the adjusted parameters will apply to local preview, video recording, network preview, etc.
Select “Main Menu -> Cameras -> Video Setting” to enter the HD parameters interface, as shown in the figure below.
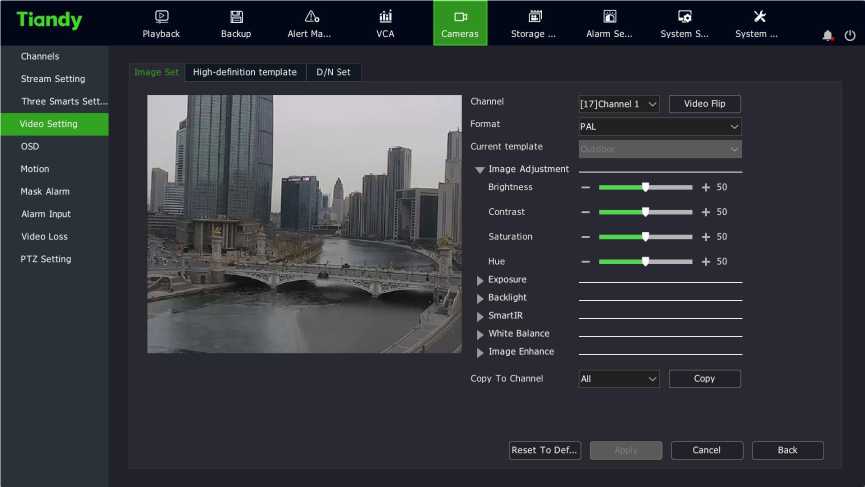
HD parameters
- Select the channel to set.
- Set system, video rotation, mode and other parameters.
![]()
Notes:
- Brightness, contrast, saturation and chroma can be adjusted between 0-100.
- The shutter speed is adjustable between 1/100000 – 1. The higher the set value is, the faster the response is.
- Auto gain is adjustable between 0 and 100.
- Ultra-wide tendency policy has three options: Off, Auto and Manual. The ultra wide tendency rating is displayed when the Ultra wide tendency policy is not turned off, and the value is adjustable between 0 and 100.
- Image enhancement includes image style, indoor and outdoor modes, digital noise reduction and noise reduction level. Image style includes adaptive, natural, bright, soft and sharp; Indoor and outdoor modes include indoor and outdoor; Digital noise reduction has three options: Off, Normal and Expert. When the normal mode is selected, the noise reduction level option is displayed, and the value is adjustable from 0 to 100. When the expert mode is selected, there will be the space-domain noise reduction level and the time-domain noise reduction level options, and the value is adjustable from 0 to 100.
- White balance has options including automatic, semi-automatic, sunny day, fluorescent lamp, warm light, incandescent lamp, natural light, lock and manual. Manual and semi-automatic can be the value between 0 and 50.
- The Copy to Channel function can be used to copy the set parameters.
- Use the mouse wheel to adjust video input parameters, or you and Q icons to increase or decrease the value.
can also click lU
- After setting, click “apply” to save setting parameters.
- Restore Defaults is to allow the camera directly to restore the defaults of all parameters on this page.
High-definition template
- Select the channel for the HD template you want to set.
- HD templates are divided into indoor, outdoor, sports, wide
tendency, low light, high light, bright, custom, as shown in the figure below.
Tiandy
Channels
Stream Setting
Three Smarts Sett…
Video Setting
OSD
Motion
Mask Alarm
Alarm Input
Video Loss
PTZ Setting
EaztoiiiioHESX
Playback Backup Alert Ma… VCA Cameras Storage … Alarm Se… System S… System … 0 0
Image Set High-definition template
Channel
Day
Night
D/N Set
[17]Channel 1
Outdoor
Outdoor
Reset To Def… j j | | Back
D/N Set
- Select the channel where you want to set Color to Black.
- Color to Black types are divided into color, black and white, timer, inter-sync, exter-sync, day and night and adaptive.
- Timer is shown in the figure below.
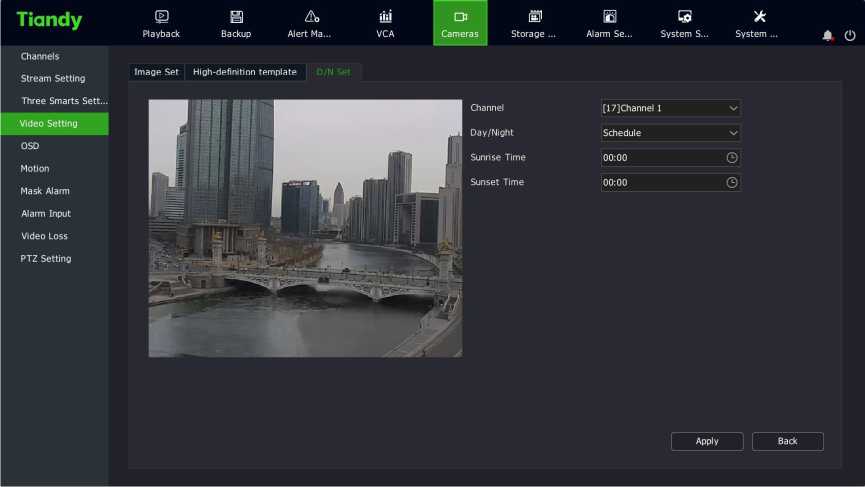
![]()
Notes:
- Daylight hours and dark hours can be set to a time range of 00:00-23:59, and the dark hours must be later than dawn time.
- The Color to Black mode depends on the front end.
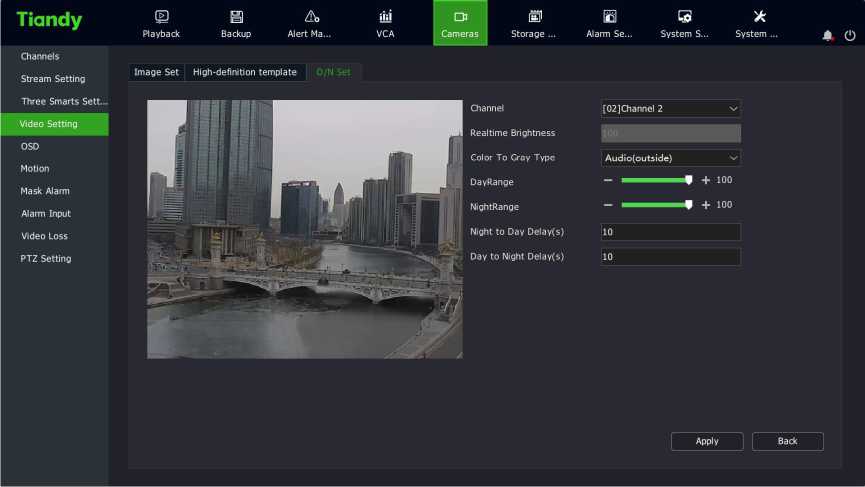
4X Exter-sync is shown in the figure below.
![]()
otes:
- Daytime and night brightness values can be adjusted from 0 to
100, or you can click the o and icons to increase or
decrease the value. E3
- The Color to Black delay and Black to Color delay can be adjusted
between 0 and 120s.
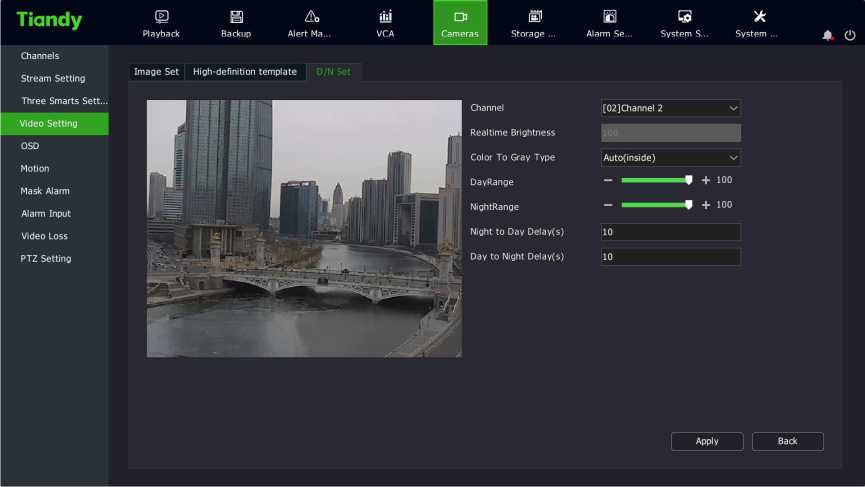
![]()
5X Inter-sync is shown in the figure below.
Notes:
- Daytime and night brightness values can be adjusted from 0 to
100, or you can click the s or Q icon to increase or decrease
the value.
- The Color to Black delay and Black to Color delay can be adjusted
between 0 and 120s.
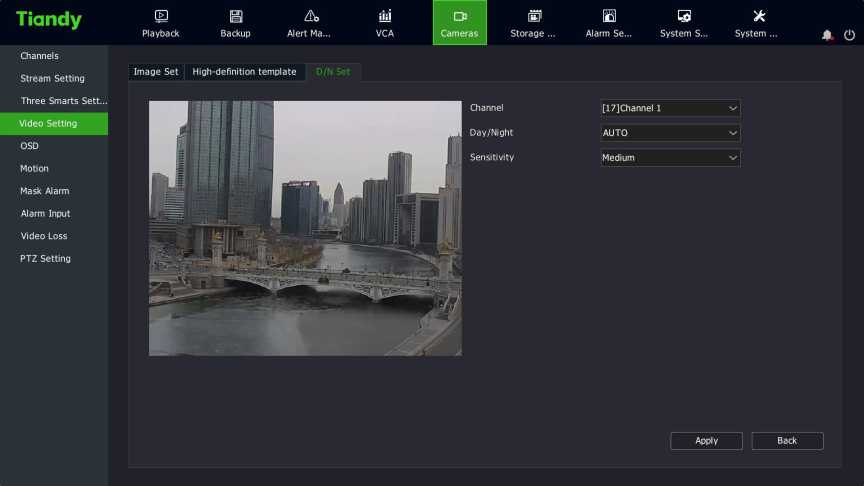
6X The day and night mode is shown in the figure below.
![]()
Notes:
- The day and night mode includes automatic, daytime and nighttime.
- The sensitivity is divided into high, medium and low.
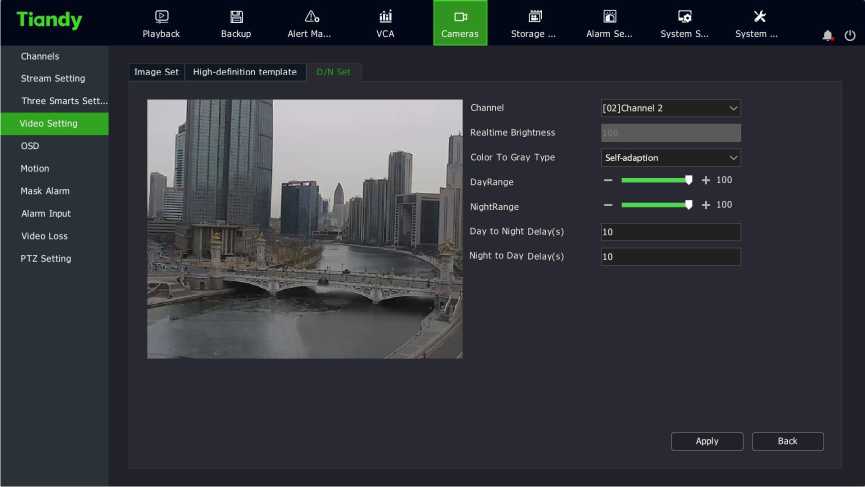
7. The adaptive mode is shown in the figure below
![]()
Note:
- Day/night brightness values can be adjusted from 1 to 100.
- The effective delay time for Color to Black/Black to Color is 0-120 seconds.
4.4.10. OSD
1. Select “Main Menu ->Cameras ->OSD ” to enter the OSD overlay parameter setting interface, as shown in the figure below.
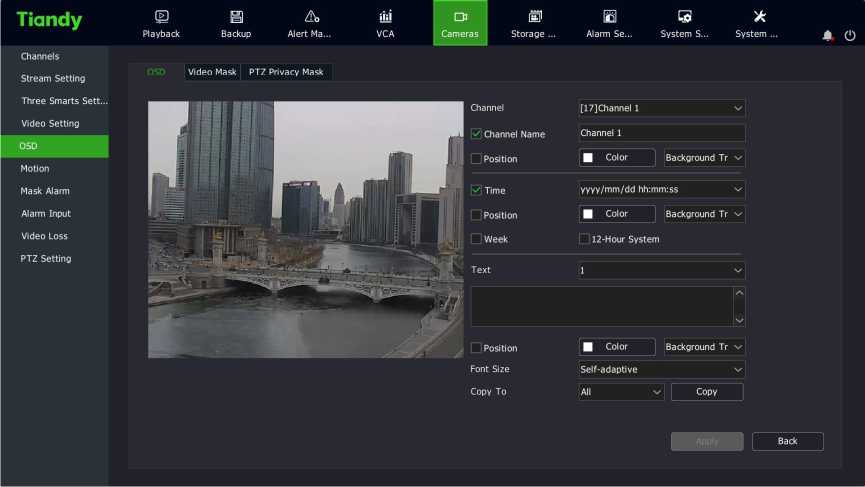
OSD Overlay
- Select the channel to be set OSD.
- Set OSD for the channel.
To change the OSD position of the channel, check the custom position, and directly drag the mouse OSD box to set it.
![]()
Notes:
• OSD overlay includes channel name, date, week day, 12-hour system, date format, time format, OSD color, background color, etc.
Video Occlusion
The video occlusion function can occlude some key areas on the video.
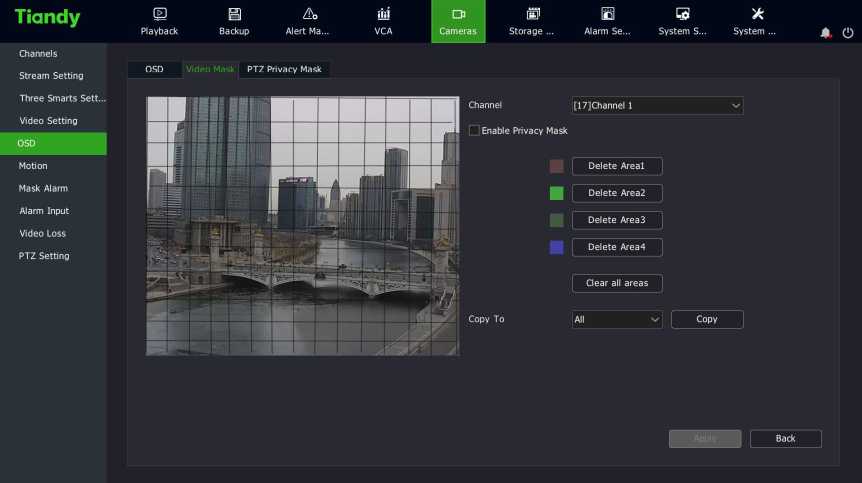
1. Select the channel to set video occlusion.
2. Drag the mouse to set the video occlusion area.
PTZ Privacy Mask
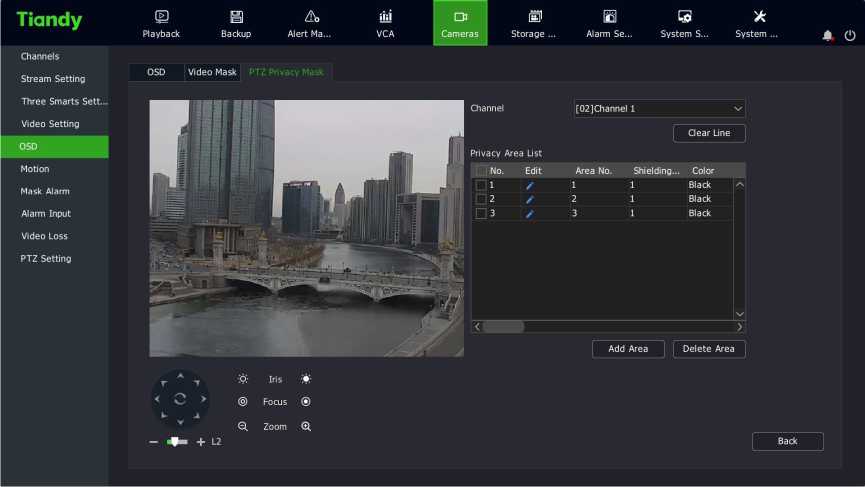
1. Select the channel to set dynamic privacy occlusion.
- Control the PTZ via the shortcut PTZ control panel to switch to the screen you want to occlude.
- Drag the mouse to set the video occlusion area and click “Add Area”.
- The added area is shown in the list on the right. Click “Delete Area” to delete areas.
NO Note:
• This section applies to a front-end IPC that supports this
functionality.
4.4.11 Motion 1. Select “Main Menu -> Cameras-> Motion” to enter the motion
detection setting interface, as shown in the figure below.
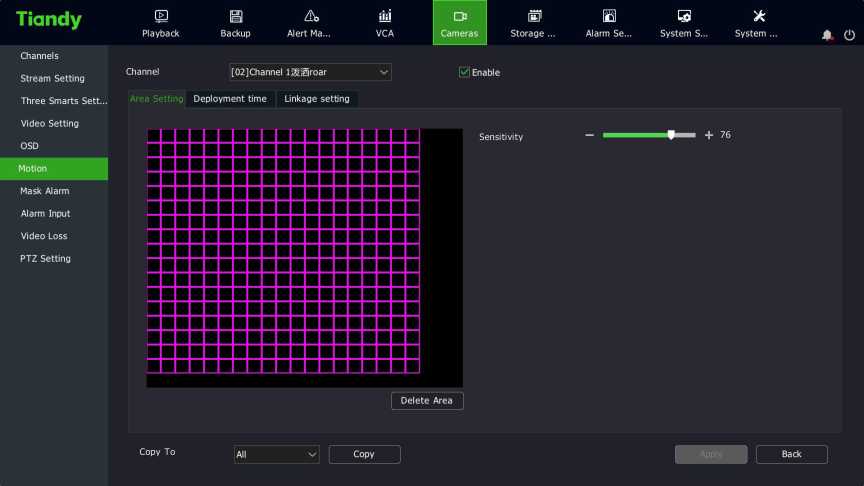
2. Select the channel to set motion detection.
- Set the motion detection arming time, detection area and sensitivity, as follows:
- Check “Enable”.
- Enter the “Deployment Time” to set the motion detection arming time.
- Draw the area to be detected on the video of the channel with the mouse.
- Adjust the sensitivity on the sensitivity slider. The higher the sensitivity value is, the more sensitive the motion detection is.
- Enter the “Linkage Setting” to set the motion detection and alarm linkage.
- Alarm linkage voice prompt, screen display, sending email, linkage video, linkage output, linkage snapshot, linkage text preplan, linkage single screen and linkage double light are available for setting.
- After setting, parameters of other channels can be copied.
5S Click “Apply” to save the settings parameters.
J Note:
• Double lights can be linked after front end devices supporting
double lights are connected.
-
-
- . Mask Alarm
-
1 Select “Main Menu -> Cameras -> Mask Alarm” to enter the occlusion
alarm interface, as shown in the figure below.
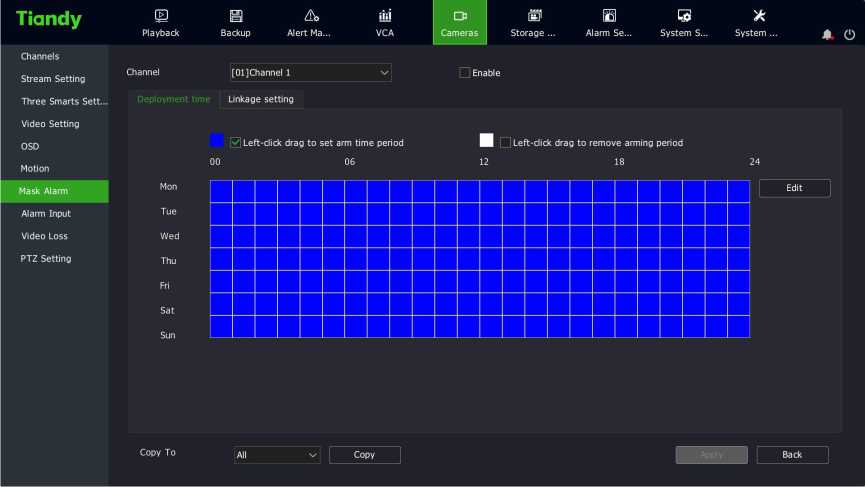
2X Select the channel to set video occlusion.
3X Check “Handle Video Occlusion” to process the occlusion alarm.
4X Select “Linkage Setting”. When an alarm occurs, you can link voice prompt, screen display, sending email, linkage video, linkage output, linkage snapshot, linkage text preplan, and linkage single screen, etc.
5X After setting, you can copy the parameters from other channels. Click “Apply” to save the set parameters.
-
-
- Alarm Input
-
By setting alarm inputs, when input alarm occurs in the front-end IPC, the NVR device can be linked to provide prompt, video, etc.
- Select “Main Menu ->Cameras -> Alarm Input” to enter the alarm input setting interface, as shown in the figure below.

| Tiandy | E | a | iki | □3 | H | s | X | |||
|---|---|---|---|---|---|---|---|---|---|---|
| Playback | Backup | Alert Ma… | VCA | Cameras | Storage … | Alarm Se… | System S… | System … | a o |
Channels
Stream Setting
Three Smarts Sett…
Video Setting
OSD
Motion
Mask Alarm
Alarm Input
Video Loss
PTZ Setting
Input Port No.
Input Port Alias
Circuit Type
Remote Alarm Input 2
Remote Alarm Input 2
Normally open
1 □ Enable
Deployment time Linkage setting
Copy To Port AN v I Copy
I Apply | Q Back
- Select the input port number to set.
- Select Annunciator Type.
nO Note:
- Normally-open alarm: active when the alarm input port for the
front-end IPC is closed.
- Normally-closed alarm: active when the alarm input port for the front-end IPC is open.
- Check “Handle Alarm Input” to set the arming time of alarm input.
- Enter “Linkage Setting” to set alarm linkage.
- Options include alarm linkage voice prompt, screen display, sending email, linkage video, linkage output, linkage snapshot, linkage PTZ, linkage text preplan, linkage single screen, etc.
- After setting, parameters of other channels can be copied.
- Click “Apply” to save the settings.
-
- Video Loss
-
Set the video loss alarm. When video loss occurs in a channel, it is linked to the NVR device for prompt, recording, etc.
- Select “Main Menu -> Cameras -> Video Loss” to enter the video loss setting interface, as shown in the figure below.

![]()
Tiandy
Channels
Stream Setting
E
Playback
B
Backup
Alert Ma…
iid
VCA
[01]Channel IChannel IChannel IC’/
Q H
Cameras Storage …
E 3 X
Alarm Se… System S… System …
Three Smarts Sett…
Video Setting
OSD
Motion
Mask Alarm
Alarm Input
Video Loss
PTZ Setting
Deployment time Linkage setting
0 Enable
Copy To
Copy
- Select the channel to set video loss.
- Check “Handle Video Loss” and set the arming time for video loss.
- Enter “Linkage Setting” to set alarm linkage.
- Options include alarm linkage voice prompt, screen display, sending email, linkage video, linkage output, linkage snapshot, linkage PTZ, linkage text preplan, linkage single screen, etc.
- After setting, parameters of other channels can be copied.
- Click “Apply” to save the settings.
-
- PTZ Setting
-
Set the PTZ control protocol and serial port property for a channel.
- Select “Main Menu -> Cameras -> PTZ Setting” to enter the PTZ
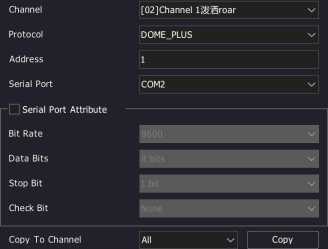
setting interface, as shown in the figure below.
- Select the channel to set.
- Select the PTZ control protocol, address and serial port of the channel. Once the setup is complete, parameters of other channels can be copied.
- Click “Apply” to save the settings.
NO Note:
• Users can customize the serial port properties to set the baud rate, data bit, stop bit and check bit of the serial port, and choose to copy these set parameters to other channels after setting.
-
-
- Three Smarts Setting
-
For the three smarts camera, the intelligent three smarts setting can be used to carry out motion detection.
- Select “Main Menu -> Cameras -> Three Smarts Setting” to enter the basic setting page, as shown in the figure below.
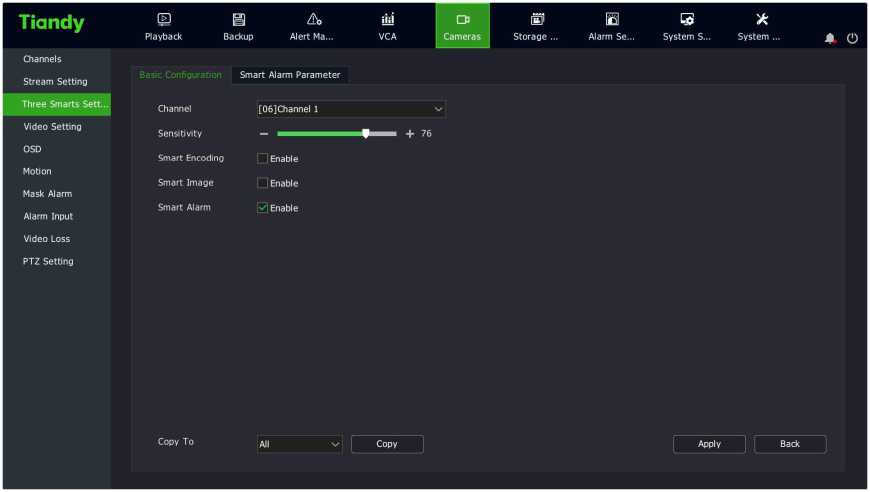
- Select the channel to set motion detection to set the sensitivity, and select to enable intelligent coding, intelligent image and intelligent alarm. Click the Apply button.
- Set the motion detection area, as shown in the figure below.
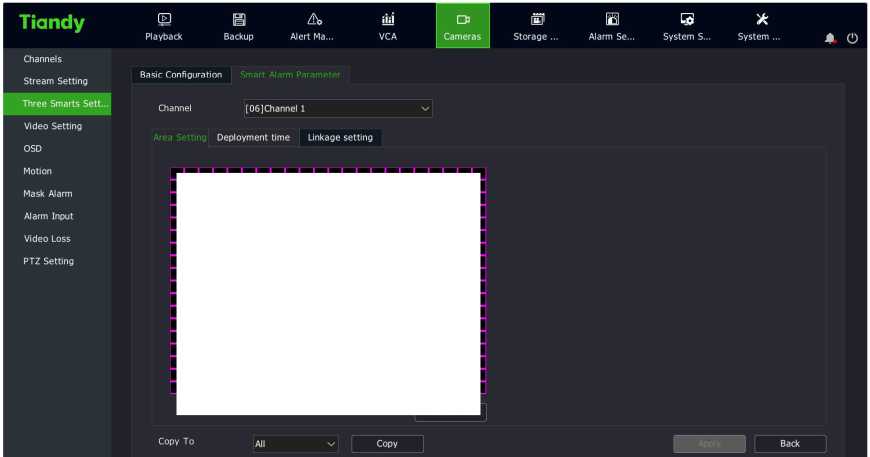
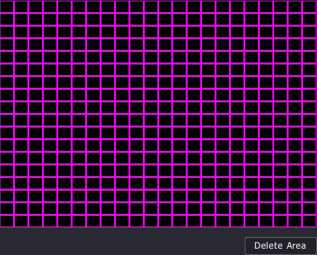
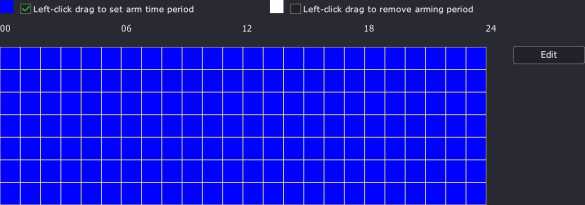
- Set the arming time as shown in the figure below.
Tia ndy
E
Playback
a
Backup
Alert Ma…
iki
VCA
Cameras
H E S X
Storage … Alarm Se… System S… System …
Channels
Stream Setting
Three Smarts Sett…
Video Setting
OSD
Motion
Mask Alarm
Alarm Input
Video Loss
PTZ Setting
Basic Configuration Smart Alarm Parameter
Channel [06]Channel 1
Area Setting Deployment time Linkage setting
Copy To
Copy
Back
- Enter the “Linkage Setting” to set the motion detection alarm linkage,
as shown in the figure below.
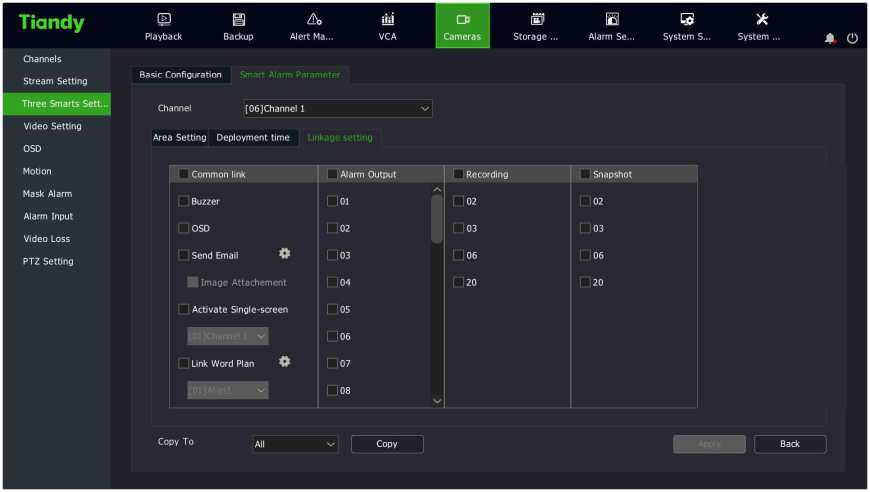
- Options include alarm linkage voice prompt, screen display, sending email, linkage video, linkage output, linkage snapshot, linkage text preplan, linkage single screen, etc.
- After setting, parameters of other channels can be copied.
- Click “Apply” to save the settings.
4.5 Preview
-
-
- Interface Status
-
On the preview interface, the video recording and alarm status of each channel can be distinguished by the icon on the upper right of each channel. For description of preview status, please refer to the table below.
| Icon | Status Description |
| £ | Alarm (including motion detection alarm, video occlusion alarm, port alarm, video loss alarm, intelligent analysis alarm, etc.) |
| [reg] | Video recording (including timer, manual and various types of alarm linkage videos) |
| 1 | Face recognition: This channel has enabled face recognition |
| M[reg] | The channel is recording and an alarm occurs |
4.5.2 Task Bar Menu
In preview state, the task bar allows for preview screen switch, preview setting, output mode, alarm clearing, alarm information viewing, network setting, mobile monitoring, time setting and other operations, as shown in the figure below.

Taskbar diagram of main port

Taskbar diagram of auxiliary port
Descriptions of main port taskbar items
| Name | Description |
| Main Menu | Enter the system Main Menu. |
| Single screen | Select a channel from the drop-down menu to switch between single screens. |
| Multi-screen | Change the preview mode with the drop-down menu option. |
| Custom preview | Directly apply the specific preview screen number and scene configuration previously set by the user. For settings, see “Preview Setting -> Custom Preview Interface Description”. |
| Previous | Switch to the previous screen. |
| Next | Switch to the next screen. |
| Start switching | Continuously switch to the next screen according to the preview settings and start from the first screen when you reach the last screen. |
| Output mode | Options include standard, soft, bright, highlight. |
| Auxiliary port | Mouse operation changes from main port to auxiliary port. |
| Alarm clearing | Clear all current alarms in the system. |
| Alarm
information |
Check abnormal alarms and regular alarms. |
| Network setting | Enter the network setting screen. (An alarm will be generated when IP conflicts and the network disconnects) |
| Mobile
monitoring |
Download the mobile monitoring client and QR code for the connecting device. |
| Time setting | Enter the time setting interface |
| Hide/lock toolbar | Hide or lock the toolbar |
| Target detection | The real-time mode allows viewing of the alarm pictures of face detection and face recognition in real time. The history mode allows viewing of the alarm pictures of face detection and face recognition within one hour; |
Notes:
- To use the “Custom Preview” action, set the “Custom Preview” configuration in the Preview Setting.
- To use “Start Switching”, set “Cruise Interval” in the Preview Setting.
- Android and IOS clients are available for mobile monitoring, and the status of public network connection can be checked.
- TC-NR1016M7-S8, TC-NR1032M7-S8, TC-NR20xxM7-S8,
TC-NR20xxM7-E8, and TC-NR20xxM7-E16 are set with main and auxiliary ports, while other models have no auxiliary ports.
Description of auxiliary port right-click menu item
| Name | Description |
| Single screen | Select a channel from the drop-down menu to switch between single screens. |
| Multi-screen | Change the preview mode with the drop-down menu option. |
| Previous | Switch to the previous screen. |
| Next | Switch to the next screen. |
| Start switching | Continuously switch to the next screen according to the preview settings and start from the first screen when you reach the last screen. |
| Main port | Mouse operation changes from auxiliary port to main port. |
| Set as main port | Set auxiliary port as main port, which means that main and auxiliary ports are exchanged. |
| Hide/lock toolbar | Hide or lock the toolbar |
Custom Preview
Users arrange some specific channels according to the specific number of screens on the same screen as needed. When you select a configuration from the “Custom Preview” popup menu, the preview becomes this display screen.
Single Screen
Switches the current screen to a specified channel. Select a channel in the “Single Screen” pop-up menu, that is, selecting the channel for preview.
Multi-screen
Modify the display mode of the output device. The system supports 1/3/4/6/8/9/10/13/16/20A/20B/25/32/36/40/64 screen preview. If the multi-screen preview is selected, the preview is done according to this number of screens.
J Note:
• For TC-NR20-S series and TC-NR20-E series NVRs, except for 20-channel devices, VGA1/HDMI1 supports up to 64 screens and VGA2/HDMI2 supports up to 32 screens. The maximum number of supported screen is subject to the specific model.
Page UP/Down
Click the “Previous ” button on the taskbar to switch to the previous screen, and click the “Next” button to switch to the next screen.
Start/Stop Switching
After calling out the taskbar on the main port/auxiliary port, select “Start Switching”, and the main port/auxiliary port will start switching according to the set cruise sequence; Select “Stop Switching” to stop switching.
4.5.3 Shortcut Preview
- In preview state, select the channel to operate by using the left mouse button. The shortcut bar is shown below the red box, as shown in the figure below.

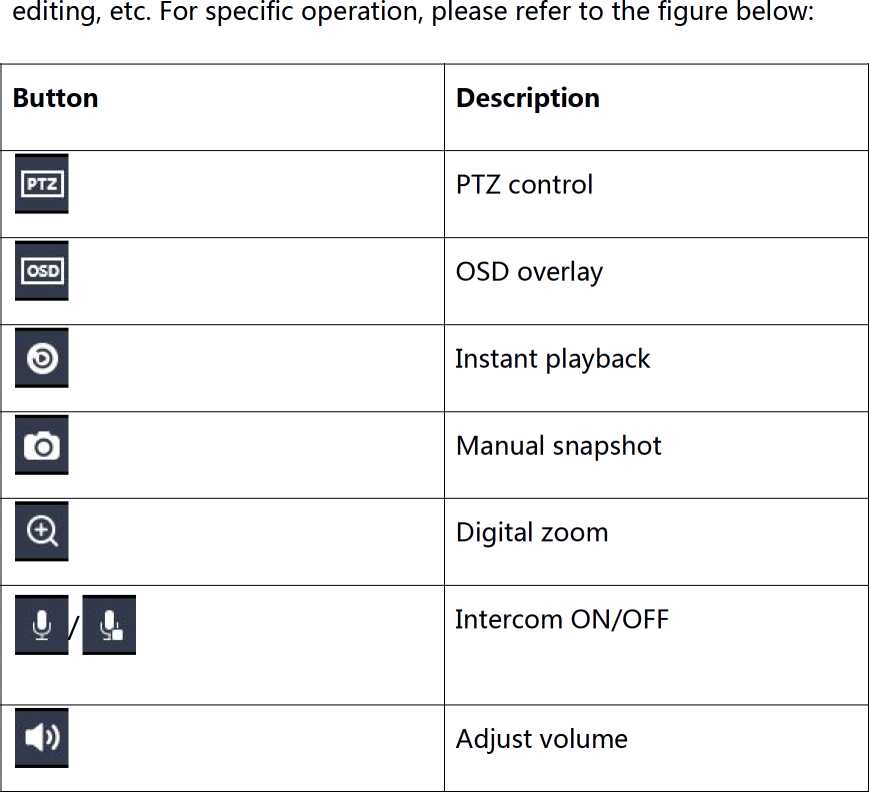
- The shortcut menu can be used for PTZ control, instant playback,
manual snapshot, digital zoom, intercom and channel information
| ■ | Low delay/high flow | ||||
| ^^^^^■,,,,,, | Set the fisheye mode supported by preview | ||||
| Eq | View/edit channel information | ||||
| View the IPC parameters | |||||
| 3D | Enable 3D positioning | ||||
Instant Playback
Playback videos within 5 minutes of the channel. If there is no video available in the channel, the “Instant Playback Failed” message will be display.
Digital zoom
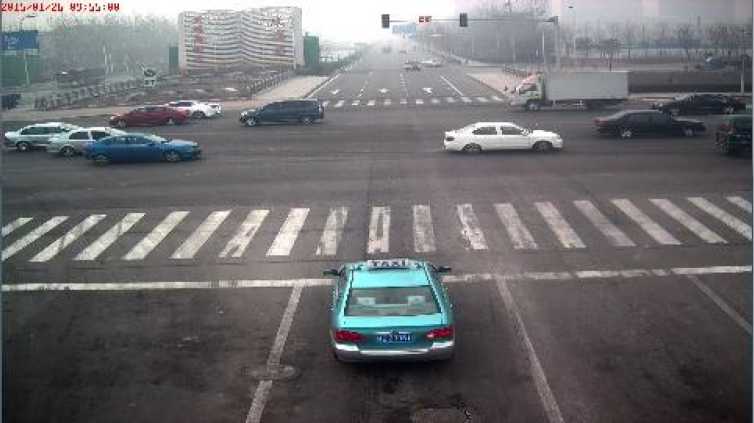
1S Click to enter the digital zoom interface, as shown in the figure
below.
Original video:
Screenshot of the digital zoom effect:
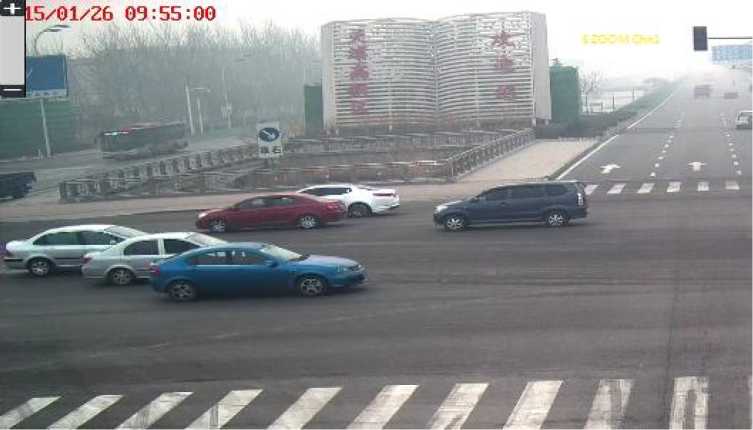
2S Scroll the mouse wheel to zoom in or out. The zoom-in or -out area is centered around the current position of the mouse.
3S You can also click “+” in the upper left corner of the screen to zoom in and “-” to zoom out. Zoom-in and -out are done around the center of
the current screen.
4S When zooming in, the left mouse button can still drag and drop the image to change the zooming area.
- Click the right mouse button to exit digital zoom.
![]()
Note:
• Depending on the processing capacity of the equipment, the
maximum magnification time is 8 times or 16 times.
High Flow/Low Delay:
When High Flow is selected, the NVR devices will ensure fluency based on network traffic. When the Low Delay mode is selected, the video delay is reduced.
-
-
- Preview Parameter Setting
-
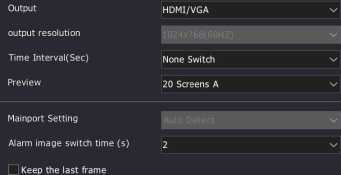
- Enter “Main Menu -> System Setting -> Preview Setting”, as shown in the figure below.
Tiandy
D H E
Cameras Storage … Alarm Se…
s
System S…
X
System …
General Setting
Network Setting
Preview Setting
Disk Management
Error Management
User Management
Other Setting
E
Playback
a
Backup
■id
VCA
Basic Configuration View configuration Customized Preview
0 Self-adaptive optimum resolution
Cancel
- Description of the Preview Setting -> Basic Configuration interface:
- Output device: select a video output device from the “output device” drop-down list: HDMI2/BNC, VGA/HDMI, VC (VC is shown here when the last channel is set as the virtual composite channel).
- Output resolution: 800*600, 1024*768, 1366*768, 1440*900, 1280*800, 1280*720, 1920*1080, 2560*1440, 2560*1600,
3840*2160, etc. The list items may vary with devices.
- Automatic detection: Adaptive to the best resolution of the monitor.
- Cruise interval: Sets the preview automatic switching time interval. Options include no cruise, 2s, 3s, 5s, 10s, 15s, 30s and 60s.
- Preview mode: set screen number configuration, including 1, 3, 4, 6, 8, 9, 10, 13, 16, 12 A, 12 B, 25, 32, 36, 40, 64, etc. The list items may vary with devices.
- Main port setting: This setting is available in TC-NR1016M7-S8, TC-NR1032M7-S8, TC-NR20xxM7-S8, TC-NR20xxM7-E8, and TC-NR20xxM7-E16, while unavailable in other specifications.
- Output mode: Sets VGA output display effect. Options include standard, soft, bright, and highlight.
- Alarm screen switching interval: Sets the time interval of alarm linkage single screen display. Options include 2s, 3s, 5s, 10s and 15s.
- Keep the last frame: With this option configured, the preview will stay on the last frame after the front camera is disconnected. Otherwise, “No Video” is displayed.
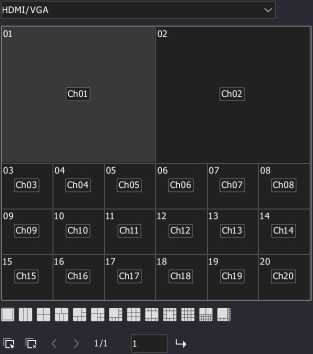
- Description of the Preview Setting -> View Configuration interface

Tiandy
General Setting
Network Setting
Preview Setting
Disk Management
Error Management
User Management
Other Setting
| E | a | iki | a | H | E | s | X | |||
|---|---|---|---|---|---|---|---|---|---|---|
| Playback | Backup | Alert Ma… | VCA | Cameras | Storage … | Alarm Se… | System S… | System … | o |
Basic Configuration View configuration
| Output | ||
|---|---|---|
| Channel | Channel | |
| Channel 1… | – | |
| 2 | Channel 1… | |
| 3 | Channel 1… | |
| Channel 4 | ||
| ^5 | Channel 5 | |
| 6 | Channel 6 | |
| Channel 7 | ||
| 8 | Channel 8 | |
| 9 | Channel 9 | |
| 10 | Channel 10 | |
| 11 | Channel 11 | |
| 12 | Channel 12 | |
| 13 | Channel 13 | |
| 14 | Channel 14 | |
| 15 | Channel 15 | |
| 16 | Channel 16 | |
| 17 | Channel 1 | – |
Customized Preview
Select the screen number on the right, double-click the screen to delete the preview channel, and double-click the channel number in the table on the left to configure the channel number to the specified location. To open or close all preview channels, click Auto Configure and Clear All on the lower right.
Notes:
- The standard series NVRs (16-channel 8-disk position, 32-channel 8- disk position) have two kinds of output devices: HDMI2/BNC and VGA/HDMI1.
- The TC-NR20-S series and TC-NR20-E series NVRs (TC-NR20xxM7-S8, TC-NR20xxM7-E8, TC-NR20xxM7-E16) have two kinds of output devices: VGA1/HDMI1 and VGA2/HDMI2.
- The multimedia NVR series (20-channels 1-disk position) have one kind of output device: HDMI/VGA.
- When the maximum preview performance is switched from the main stream to the secondary stream, as the secondary stream is non-composite audio by default, there may be no sound in the UI preview. Due to the limitation of device performance, when the access stream reaches the upper limit of device performance, it cannot continue to connect to other streams.
- Description of the Preview Setting -> Customized Preview interface
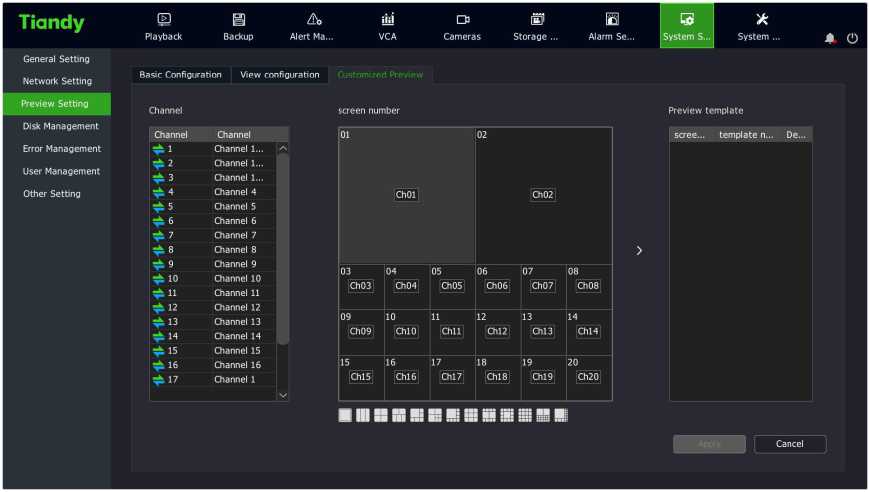
The left and middle sides of the interface are used the same way as the view configuration interface. When the channel is configured, click the arrow between middle and right to add the configuration to the preview template. The maximum number of supported templates is 8. After configuration is completed, click “Apply” in the lower right corner to make it effective. Selecting the preview template can change the channel and screen number configuration. Double-click can change the template name. Preplan application is used in the right-click menu of preview screen.
-
-
- Preview Interface Message
-
Limited Decoding Performance
When the decoding performance of the device reaches the upper limit, the device will display the message as below: “Decodingperformance reaches the upper limit, please manually disable part of channels”. You can configure whether to enable the message. For details, see the System Settings -> General Settings. It is not enabled by default.
System Exception Message:
When the options in System Settings -> Route Maintenance ->
 Network Exception/Storage Exception are enabled and related exception
events occur, the
 icon in the upper right corner of the screen will
become the
icon. Double-click on the icon will open the system
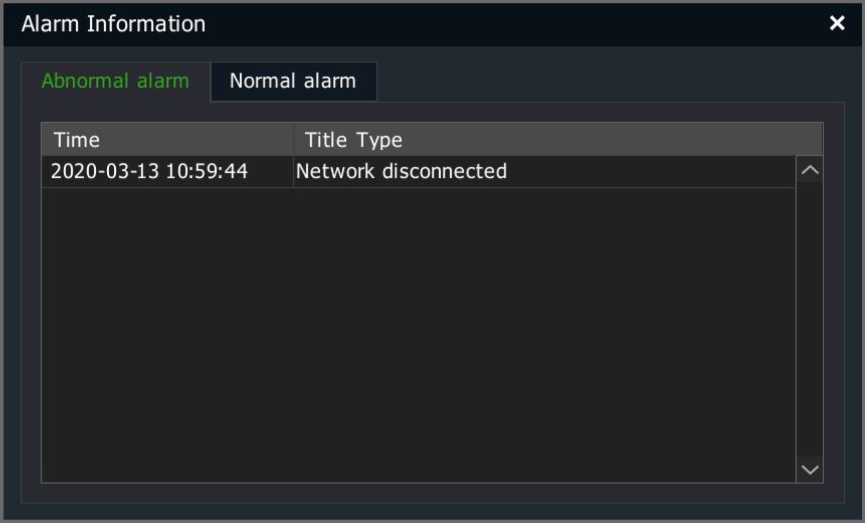
notification interface, as shown in the figure below.
Alarm Information
Abnormal alarm
Time Title Type Content
| 2020-03-13 10:53:39 | VCA | [03]Channel IChannel ICh… |
| 2020-03-13 10:53:36 | VCA | [03]Channel IChannel ICh… |
| 2020-03-13 10:53:34 | VCA | [03]Channel IChannel ICh… |
| 2020-03-13 10:53:32 | VCA | [03]Channel IChannel ICh… |
| 2020-03-13 10:53:18 | VCA | [03]Channel IChannel ICh… |
| 2020-03-13 10:52:40 | VCA | [03]Channel IChannel ICh… |
| 2020-03-13 10:52:29 | VCA | [03]Channel IChannel ICh… |
| 2020-03-13 10:52:29 | Motion | [03]Channel IChannel ICh… |
| 2020-03-13 10:52:11 | Motion | [03]Channel IChannel ICh… |
| 2020-03-13 10:51:39 | VCA | [03]Channel IChannel ICh… |
• Users can choose not to display the message, or click “Next” to
check the next message.
When an anomaly alarm regarding the risk of video loss occurs, a red warning form will appear to alert the user to deal with the abnormal alarm in time, as shown in the figure below.
Abnormal notice
[03-17 11:50:05]No valid disk.
Please handle it timely. Otherwise there is a risk of losing the videotape.
Later process… Processing
Alarm Message:
In intelligent analysis, when linkage call is set for the channel and
when an alarm occurs, a single screen of the corresponding

channel appears, and the
icon flashes in the upper right
corner of the screen. Clicking the icon can open the calling, and at

this point, the icon becomes
. Clicking the right mouse
button can exit the alarm.
-
-
- Audio Preview and Intercom
-
Audio Preview
After selecting a video channel with mouse or remote control, the system will automatically play the audio of that channel.
Voice Intercom
Users can use the voice intercom interface of the device to realize the intercom function between the remote control end and the device. Please connect the pickup and speaker before intercommunication.
-
-
- Right Back to Preview Interface
-
On the parameter configuration interface, right-click to return directly back to the preview interface.
4.6 PTZ control
-
-
- PTZ Parameter Setting
-
Notes:
- Before controlling the dome camera or PTZ of the IP channel, please first confirm that the network is normally connected between PTZ decoder and NVR, and configure the parameters of the PTZ decoder in the device.
- For parameter setting of front-end IPC serial port, see section 4.3.15.
- For parameter setting of NVR local serial port, see System Settings.
-
- PTZ Control
-
- In login state, enter the preview state. Use your mouse to click the channel preview screen that requires PTZ control. Click the “PTZ” button in the preview shortcut menu bar to enter the full-screen screen of the channel, and the PTZ control form appears, as shown in the figure below.
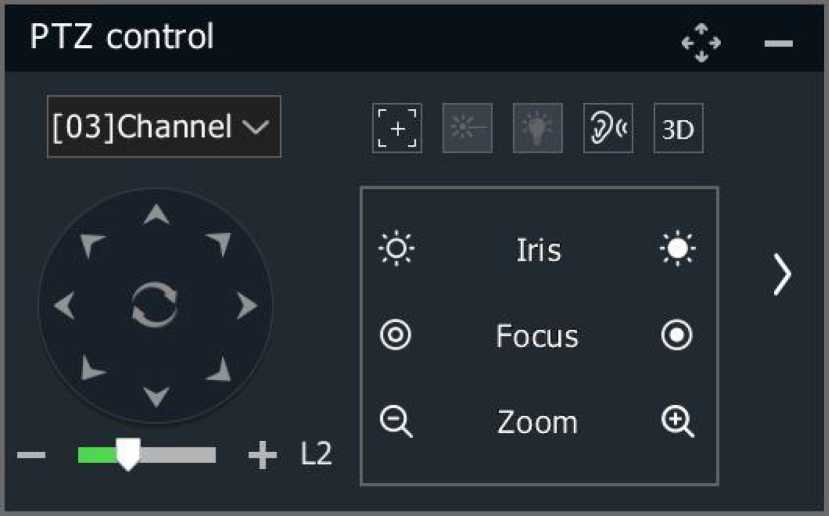
- Select the channel for PTZ control.
- Description of PTZ control:
- PTZ control: Use your mouse to click the DQOU button to control up, down, left and right actions of the PTZ; use your mouse to click the □□□□ button to control the tilt actions of the PTZ; click the s button to start or stop the automatic pan operation of the PTZ.

2) Lens control: click the
button on the left of the “Aperture” to

turn off lens aperture; click the
button on the right to turn

on aperture; click the
button on the left of the “Focus” to

 zoom.
zoom.
enable far focus; click the
button on the right to enable
close focus; click the
button on the left of the “Zoom” to
reduce zoom; and click the
button on the right to increase
- Speed setting: click the progress bar to select a value or scroll the mouse wheel to change a value, or click the or icon to increase or decrease the value. The higher the value is, the action speed of the PTZ is greater. The value is L2 by default.
 Click the B icon to set the one-key focus function, click the
![]() icon to enter the 3D positioning function interface, and click the icon to set ON and OFF of the front-end laser.
icon to enter the 3D positioning function interface, and click the icon to set ON and OFF of the front-end laser.
 icons to expand and hide the control menu on
5). Click 0 and H
the right, as shown in the figure below.
6 ) Drag the km icon to drag the PTZ control form.
icon to zoom out the PTZ control form. In PTZ
7 ) Click the
![]()
zoom-out state, click the
icon to return to the PTZ control
form. In PTZ zoom-out state, press and hold the left mouse button to control the PTZ direction of the dome camera according to mouse movement direction.
- 6.3 Preset Position, Cruise, Trajectory Settings and Recalling
Preset Position Setting and Recalling
1 Recall preset position: Selects a preset position number from the “Preset Position” drop-down list, or enter the preset position number directly and click the “Recall” button to recall the selected preset position.
2S Set preset position: after controlling the PTZ to act to a specific position, select the preset position number from the preset position drop down list or directly input the preset position number, and click “Set” button to complete setting the preset position of this position number.
Trajectory Recording and Demonstration
When you click the “Start Trajectory” button, the button message changes to “End Trajectory”, and the system enters the trajectory recording state. At this point, the system will automatically record all operations on the PTZ before users click the “End Trajectory” button. After pressing the ” End Trajectory” button, the trajectory recording is completed and the system will automatically exit the trajectory recording state. Users can click the “Demo Trajectory” button to demonstrate the trajectory just recorded.
Cruise Path Setting
- Click the “Cruise Path” button to enter the cruise path setting interface,
as shown in the figure below.
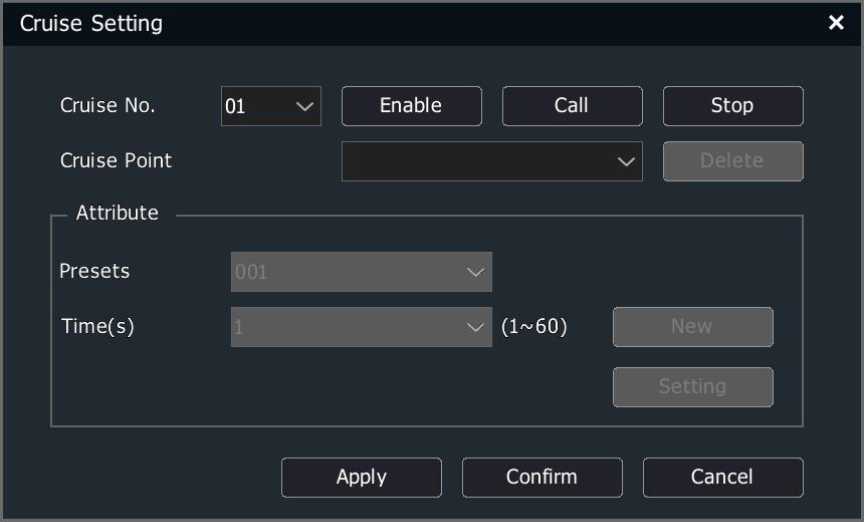
- Cruise path setting are described as follows:
- View cruise path information
Select a cruise path number from the “Path Number” drop-down list. After selecting a cruise point, the system automatically displays the preset position corresponding to the cruise point and the
duration of stay in the preset position.
- Edit cruise path
Select the path number you want to edit from the “Path Number” drop-down list. If the path is disabled at this point, press the “Enable” button to enable the cruise path. Select the preset position number from the “Preset Position” drop-down list, and press “Add” after entering the time, the preset position will be added to the cruise point list of the cruise path. After selecting a cruise point from the cruise point list, click the “Delete” button to remove the cruise point from the cruise point list of the cruise path.
After a cruise point is selected, select a preset position from the preset position dropdown list, and click the “Set” button after the time is entered to modify the configuration information of the selected cruise point.
- Enable/disable cruise path
Select a cruise path number from the “Path Number” list to enable or disable the path.
- Recall/stop cruise path:
Click the “Recall” button to cruise according to the set path. Click “Stop” to stop the current path cruise.
- Exit the cruise path setting interface
Click the “OK” button to save all the path editing operations on the cruise path setting interface into the system, and then exit the path setting interface. When pressing the “Cancel” button, the system will automatically ignore all editing operations and exit the path setting interface.
- 3D positioning
Users can select any area on the video screen with the mouse, and the system will automatically control the action of the PTZ lens to realize the zoom-in/out function of the display scene (drawing a rectangle from left to right for zooming in from and right to left for zooming out).
4.6.4 USB Keyboard Controlled PTZ
- In preview mode, select the channel for PTZ control by using [t] [I] keys and press P. At this time, the system will display the selected channel on a single screen. The upper right corner of the screen displays “PTZ ChnXX” to alert users that the system is in the PTZ control state of the XX channel.
- Controlling PTZ Actions
- PTZ control: In the PTZ control mode, press [t][l][^][^] keys to control the PTZ up, down, left and right; Press the “Enter” button, the PTZ starts automatic pan action and press the “Enter” button again, the PTZ stops automatic pan action.
- Lens control: In the PTZ control mode, press I or G to turn on the lens aperture; press Ctrl+I or Ctrl+G to turn off the lens aperture; press Z or B to zoom in; press Ctrl+Z or Ctrl+B to zoom out. Press F or J to enable far focus; and press Ctrl+F or Ctrl+J to enable close focus.
- Recall preset position: In PTZ control mode, press the [Backspace] key, and then [Number] key, and then [Enter] key, the system will recall the corresponding preset position.
- Speed setting: In PTZ control mode, press the numeric keys [1] – [4] to set the speed of the PTZ.
- Exit the PTZ control mode: Click [ESC] in the PTZ control mode to return to the preview mode.
4.7 Storage Setting
-
-
- Recording
-
Basic
- Select “Main Menu -> Storage Setting -> Recording -> Basic ” to enter the recording interface, as shown in the figure below.


Tiandy
Recording
Parameter
Images Setting
Diskgroup Allocation
Reindex
Playback
Channel
a
Backup
Alert Ma…
iki
VCA
a
Cameras
E S X
Storage … Alarm Se… System S… System …
Basic Advanced Holiday Plan
[01]Channel 1;£ v 0 Audio Recording 71 Redundant
I I I-frame Record
10 xz f Reset
[Mainstream x’
PreRecord(s)
Dwell (days)
Copy To
PostRecord(s)
StreamType
Back
- Select the channel to set.
- Select whether to “Audio Recording”, whether to enable “Redundant “, and whether to enable “I-frame Record”.
- When “Audio Recording” is not checked, only video data is saved in the video file.
- When there are redundant disks in the system and the “Redundant” function is enabled on the selected channel, recordings and captured image files will be saved in both the recording disk and redundant disk.
- If “I-frame Record” is enabled, the system will posterize video files, which can greatly save the hard disk space for the videos of non-key areas.
- Select video type. Options include “Schedule”, “Port Alarm”, “Motion”, “Video Loss”, “Video Mask”, “Motion/Port”, “Motion&Port”. You can check “Cancel” to delete the set video types.
- Press and hold the left mouse button and drag over the time zone, and the selected time zone will be updated as the specified video type.
- Set the pre-recording and delay time of alarm videos.
- PreRecord: Assuming that the pre-recording time set by the user is 5s, the system will automatically save the video information to the video file 5s before alarming.
- PostRecord: The delay time of video is applied to the alarm video. Assuming that the delay time set by the user is 5s, the system will automatically save the video information to the video file 5s after alarming ends.
- The combination of prerecord and postrecord: can facilitate the user to analyze the monitoring information before and after the occurrence of alarms.
- Dwell : Set the maximum retention time of videos in days. 0 means no restriction, and the maximum retention time of videos is 120.
- StreamType : Set the stream type of videos, including MainStream and SubStream. Some models also support dual stream recording.
- Click “Apply” to save the configurations.
Advanced
- Select “Main Menu -> Storage Setting ->Recording -> Advanced” to enter the video template advanced setting interface, as shown in the figure below.
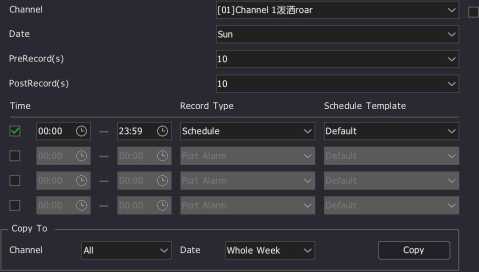
- Select the channel to set.
- Set whether to enable the ANR function of front-end IPC. If enabled, IPC will automatically start the local recording when the IPC is disconnected, and automatically upload the locally saved videos to the NVR when the IPC gets online again.
- Select the pre-recording time from the “PreRecord” drop-down list.
- Select the video delay time from the “PostRecord” drop-down list.
- Set the time period and the video type within the time period. Click the “Time” option box to make it selected. Enter the start and end time of the time period into the time period input box. Select a video type from the “Record Type” drop-down list. Different video types can be specified for different time periods.
- Copy the parameters of the current template to the channel and date.
- Click “Apply” to save the configurations.
Holiday Plan:
You can configure holiday video plan of the year. When holiday plan is enabled, the video plan will be implemented first during holiday time.
- Select “Main Menu -> Storage Setting -> Recording -> Holiday Plan” to enter the “Holiday Plan” interface, as shown in the figure below.

| No. | Holiday Name | Status | Start Date | End Date | Edit |
|---|---|---|---|---|---|
| 01 | Holidayl | Close | 2020/01/01 | 2020/01/03 | |
| 02 | Holiday? | Close | 2020/01/01 | 2020/01/03 | |
| 03 | Holidays | Close | 2020/01/01 | 2020/01/03 | |
| 04 | Holiday4 | Close | 2020/01/01 | 2020/01/03 | |
| 05 | Holidays | Close | 2020/01/01 | 2020/01/03 | |
| 06 | Holiday6 | Close | 2020/01/01 | 2020/01/03 | |
| 07 | Holiday? | Close | 2020/01/01 | 2020/01/03 | |
| 08 | Holidays | Close | 2020/01/01 | 2020/01/03 | |
| 09 | Holiday9 | Close | 2020/01/01 | 2020/01/03 | |
| 10 | HolidaylO | Close | 2020/01/01 | 2020/01/03 | |
- Click a holiday in the selected list, and click “Edit” or double click the
left mouse button to enter the “Holiday Setting” interface.
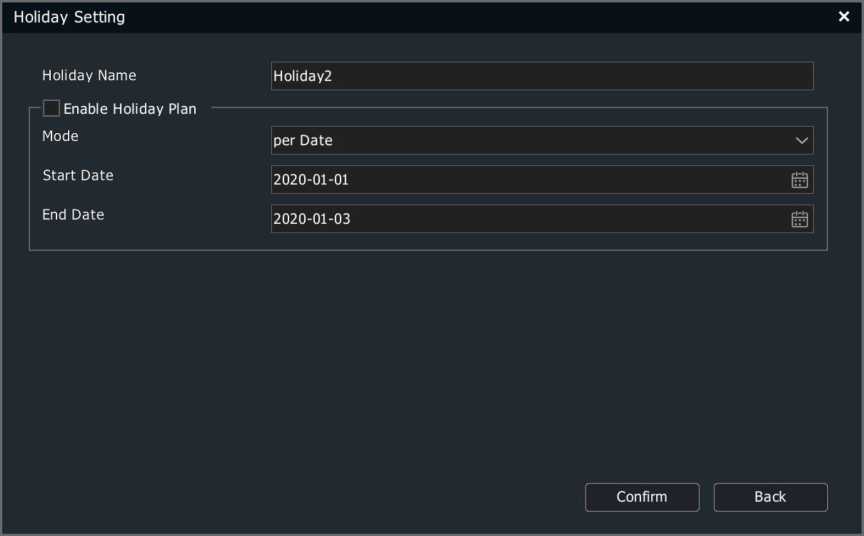
- Check “Enable Holiday Plan” and choose the setting mode of the holiday “per Date”, “per Month” or “per Week”. Enter the start date and end date of the holiday. Click “OK” to save the configurations.
- After enabling the holiday plan, you can select the holiday from the “Date” in “Advanced ” and set the corresponding video template for the holiday. Videos will be recorded according to this template for all enabled holiday plans.
J Note:
• All configurations by week take Sunday as the first day of the weekday, unless otherwise specified.
-
-
- Parameter
-
- Select “Main Menu -> Storage Setting -> Parameter” to enter the video policy setting interface, as shown in the figure
below.

Not Enough Disk Capacity
0 Overwrite file
Delete Non-alarm Record
Stop Recording
Back
- Select the processing method of the system when the disk space is insufficient, such as “Overwrite Files”, “Delete Non-alarm Record” or “Stop Recording”.
- Click “Apply” to save the configurations.
-
- Diskgroup Allocation
-
- Select “Main Menu -> Storage Setting -> Diskgroup Allocation” to enter the disk pack configuration interface, as shown in the figure below.
| Tiandy | E | a | iki | D3 | H | s | X | |||
| Playback | Backup | Alert Ma… | VCA | Cameras | Storage … | Alarm Se… | System S… | System … | a o |
Recording
| Parameter | Mode Selection | Disk Group v* |
| Images Setting | ||
| Diskgroup Allocation | Disk Group |
Reindex p0 Select All Disks
| 001 | 002 | •y 03 | •y 04 | 005 | 006 | •y 07 | •y os | Prompt:The max bitrate for one single disk-group is 100Mbps, there might be |
| 009 | V 10 | v’ 11 | •y 12 | 013 | @14 | v’ 15 | 016 | risk of losing recorded video if actual bitrate is higher than this limit. |
| 1^17 | @18 | 0 19 | 020 | 021 | 022 | 023 | v’ 24 |
v* Select All Channels In This Page
001 002 003 004 005 006 007 008 009 010
011 012 013 014 015 016 017 018 019 020
| | | Back
- Set disk group or quota.
Disk Group: Divides hard disks mounted on the NVR multiple disk packs. You can specify the disk pack where the video files are located for each channel.
Quota: Specifies the maximum disk space a channel’s video files can use. Different channels can be configured with different video space.
NO Note:
• Mode switching can come into effect only after the device is restarted.
Warning
A Recording mode changed needs reboot to take effect, reboot now?
Cancel
Confirm
- Set the disk group.
- Select “Disk Group” under “Mode Selection”.
| Tiandy | E
Playback |
a
Backup |
Alert Ma… | iki
VCA |
D3
Cameras |
ffll
Storage … |
E
Alarm Se… |
s
System S… |
X
System … |
a o |
| Recording | ||||||||||
| Parameter | Mode Selection | Disk Group |
Images Setting
| Diskgroup Allocation | Disk Group | 01 | 2 | |||||||
| Reindex | O Select All Disks | |||||||||
| □ oi | 002 | 003 | •y 04 | 005 | 006 | •y 07 | •y os | Prompt:The max bitrate for one single disk-group is 100Mbps, there might be | ||
| ‘Z 09 | 010 | 011 | •y 12 | ■ 13 | 014 | v’ 15 | 016 | risk of losing recorded video if actual bitrate is higher than this limit. | ||
| ‘Z 17 | 018 | 019 | ■ 20 | ■ 21 | 022 | V 23 | xZ24 | |||
Select All Channels In This Page
![]()
■ 03 ■ 04
■ 13 ■ 14
■ 05 ■ 06
■ 15 H16
■ 07 []08
■ 17 |18
■ 09 |10
■ 19 |20
Apply Back
- Select disk group. There are disk groups 1 – 8 to choose from the drop-down box.
- Select disks for a disk group. Sets which disks belong to the disk pack. Check “All Disks” to select all available disks. A disk cannot be assigned to more than one disk pack at the same time.
- Select a channel for a disk group. Select which channels to record in the pack.
- Click the “Apply” button to save the settings.
^Notes:
- The storage bitrate of a single disk pack can be up to 100Mbps; otherwise there is a risk of video loss.
- When ESATA is a non-backup disk, it appears in the All Disks box.
- There are 20 channels in one disk pack for NVR by default. The rest can be done in the same manner.
- Quota Configuration
- Select “Quota” under “Mode Selection”.
| Tia ndy | E | a | iki | D3 | E | s | X | |||
| Playback | Backup | Alert Ma… | VCA | Cameras | Storage … | Alarm Se… | System S… | System … | a o |
Recording
| Parameter | Mode Selection | Quota | 3 | |
| Images Setting | ||||
| Diskgroup Allocation | Remaining Quota/Total Quota | 9.P4TB/9.04TB | ■ | |
| Reindex | Channel | [01]Channel 1 | ||
| Used Recording Quota | 576.00G | ■ | ||
| Record Quota(GB)
Used Pictures Quota Picture Quota(GB) Copy To Channel |
0
2.00G 0 All |
0 means no limit (the minimum is 10G) ■
0 means no limit (the minimum is 5G) Copy |
| | | Back
- Select the channel to set. Select the channel where you want to set the quota from the “Channel” drop-down box.
- Set the video quota. Sets the maximum storage space that video files of the channel occupy, in GB. 0 indicates unlimited.
- Set the image quota. Sets the maximum storage space for the image files of the channel, in GB. 0 indicates unlimited.
- Save the settings. Click the “Apply” button to save your settings.
- Quota mode is not recommended for devices with over 40
channels.
-
-
- Images Setting
-
- Select “Main Menu -> Storage Setting -> Image Setting” to enter the snapshot setting interface, as shown in the figure below.
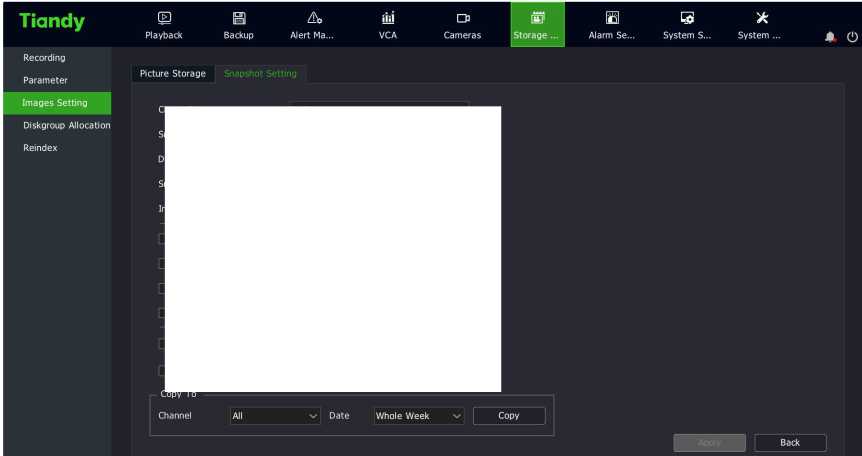
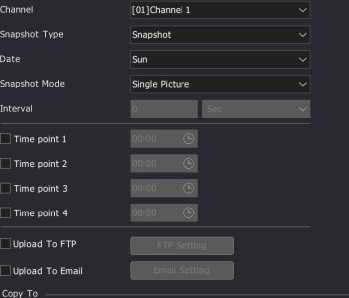
- Select the target channel number for the snapshot setting
operation.
- Set snapshot type: “Snapshot” and “Alert Snapshot”. When “Alert Snapshot” is selected for snapshot type, the snapshot setting interface is shown in the figure below.

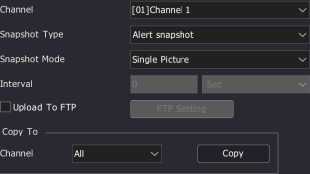
![]()
- Set snapshot mode: “Single Picture” and “Multiple Pictures”.
- Set the time interval of snapshot, in seconds.
- Choose whether to upload captured pictures via FTP. Click the “Upload To FTP” button to enter the FTP setting interface. For details about FTP settings, refer to the corresponding section.
- Choose whether to upload the captured pictures via SNMP. Click the “Upload To Email” button to enter the Email setting interface. For details about settings, refer to the corresponding section. On this interface, Email Setting is unavailable for alarm snapshot.
- The snapshot setting parameters of the current channel can be copied to the specified channel.
- Click “Apply” to save the configurations.
![]()
ote:
• The system can snapshot at most 2000 pictures per channel within 24 hours. The snapshot count will be cleared after the system is restarted.
-
-
- Reindex
-
When HDD exception or video loss occurs, lost videos can be retrieved to the maximum extent by rebuilding the index.
- Select “Main Menu -> Storage Setting -> Reindex” to enter the “Reindex” interface, as shown in the figure below.
Tia ndy
Recording
Parameter
E
Playback
a
Backup
A
Alert Ma…
■id
VCA
o H E S X
Cameras Storage … Alarm Se… System S… System …
Rebuilding a index may take some time and pause time lapse,are you sure to continue?
Images Setting
Diskgroup Allocation
Reindex
Apply Back
- Click the “Continue” button to start the rebuild operation.
- When rebuilding the index, users can exit the interface for other operations.
4.8 Playback
-
-
- Instant Playback
-
On the preview screen, play back the video file of the selected channel within 5 minutes.
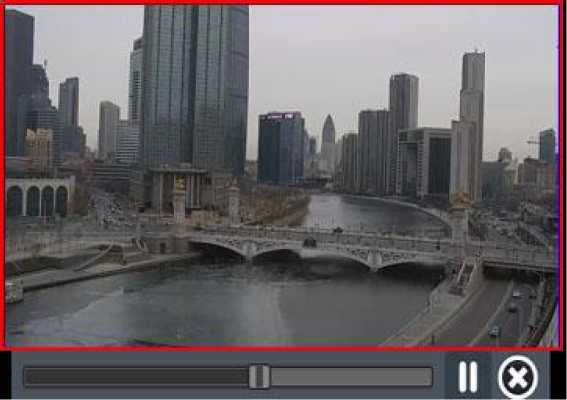
In preview state, select the channel to played back by using the left

mouse button, and click the
button on the shortcut menu, and
enter the “Playback” interface, as shown in the figure above.
-
-
- Description of Playback Interface
-
Here, the composition and function modules of the playback interface are introduced.
To enter the menu playback interface: preview and use “Right-Click Menu-> Playback” to enter the playback interface, as shown in the figure below.
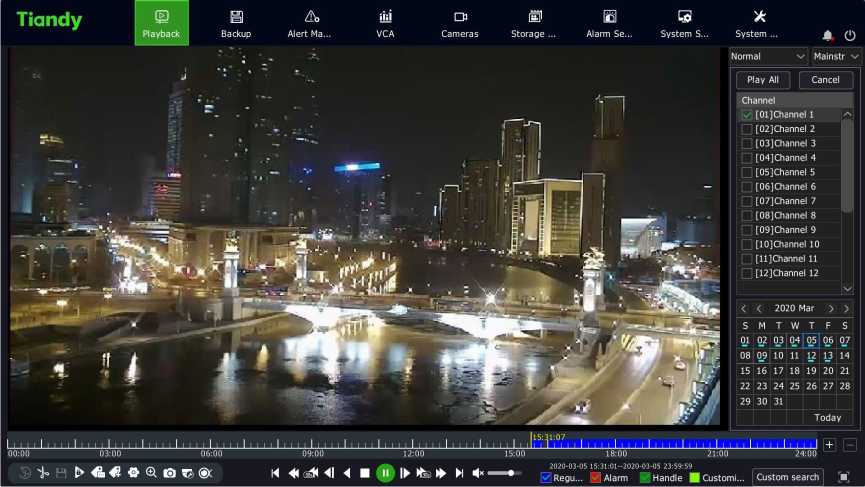
Description of playback control bar
| Button | Description | Button | Descripti on | Button | Description |
| □ □ | Turn sound
on/off |
Q 1 | Start/en
d clip |
□ | File
manageme nt |
| Save clips | ^3 | Add
default tag |
□ | Add
custom tags |
|
| a | Digital zoom | □ | Intellige nt retrieval | □ E | Tripwire/pe rimeter search |
| People | □ | Face | 0 | Search |
| count | detectio n | OK/cancel/ exit | ||||||||||||
| n e | Pause/rever se | Forward
by 30s |
ii | Pause/play | ||||||||||
| 1 | □ | |||||||||||||
| D | Stop | ^2 | Reverse
by 30s |
Step
forward |
||||||||||
| Fast
forward |
Slowly
into the |
The day
after |
||||||||||||
| ►► | 44 | ►1 | ||||||||||||
| Step back | The day before | s | Timeline
reduction |
|||||||||||
| ◄1 | 14 | |||||||||||||
| Playback timeline | □ | Timeline magnific ation | 1
E> |
Lock file | ||||||||||
| WMterrkJ | Playback
location/sn apshot |
Snapsho t | ||||||||||||
-
-
- Normal Playback
-
Retrieve the corresponding video files by channel and date, and play video files in turn from the generated play bar that meets the criteria. The playback steps are as follows:
1 Select “Main Menu -> Playback” to enter the “Normal” interface, as shown in the figure below.
2X Select the channel to play back and the calendar automatically displays the recordings of the month.
3X Use your mouse to click the date you want to play back.
4X The system automatically plays the video files that meets the criteria.
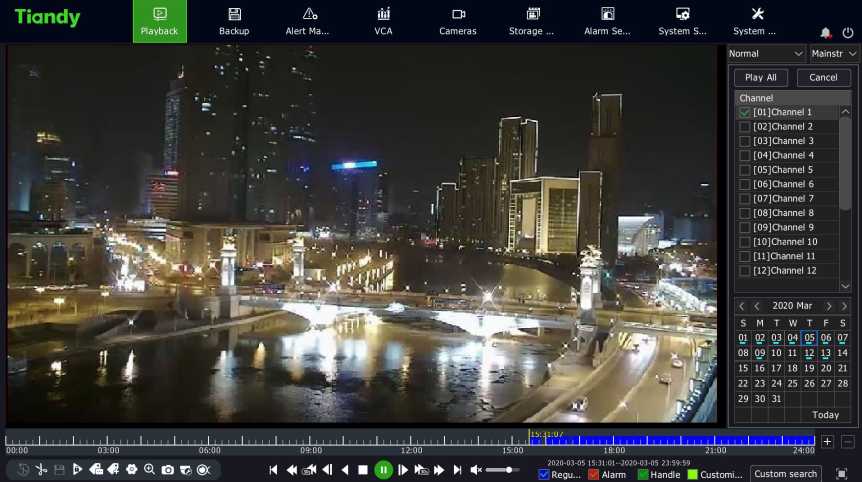
5X Other playback operations.
- Use the “Full Screen” key in the upper right corner to enable full screen playback.
- If there is no operation for a period of time during playing, it will automatically enter the full-screen playing mode. You can operate the mouse or keyboard again to exit the full-screen.
- Use “Fast Forward” or “Slow Forward” key to fast or slowly play
back videos.
_]Note:
- Up to 16 channels can be played back at a time. The playback performance differs depending on the device model and video recording.
4.8.4 Event Playback
Query a video file in a certain time period by event type (port alarm, motion detection, video loss, video occlusion, intelligent analysis), and play the video from the generated list that meets the query criteria. The operation steps are as follows:
- Enter the playback interface, and select “Event” for the playback mode.
2S Select event type in the upper right corner of the playback screen.
3S Select the channel to play back.
4S Click the date you want to play back.
5S The system automatically plays the video files that meet criteria.
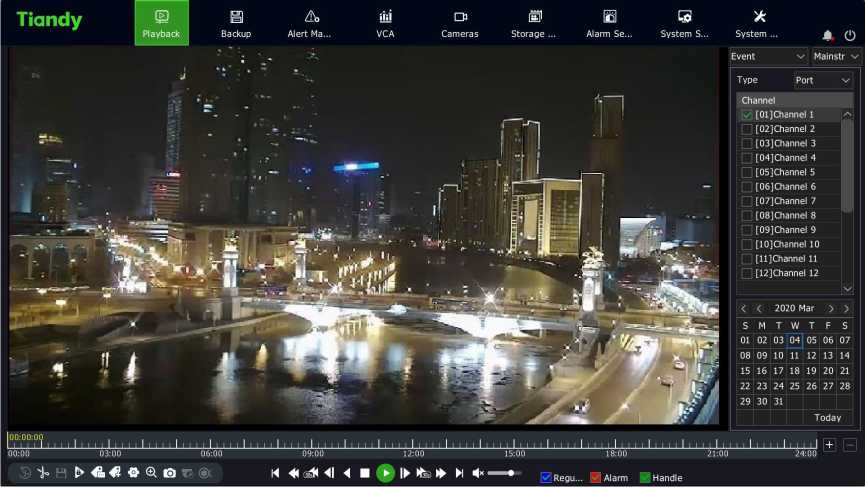
![]()
Note:
• During event playback, the player will skip the time period without alarm video according to the alarm time period of the video.
4.8.5. Tag Playback
The video label function allows users to record the relevant personnel or on-site information at a certain time when the video is played back, so that users can retrieve the information at any time to search and locate the video.
Add/Manage Labels
1 Enter the video playback interface Click El to add the default label.
Click to enter a label name and add a custom label.
![]() 2S Label management
2S Label management
Click
to enter the “File Management” -> “Label Management”
interface, as shown in the figure below, where you can view, edit, and
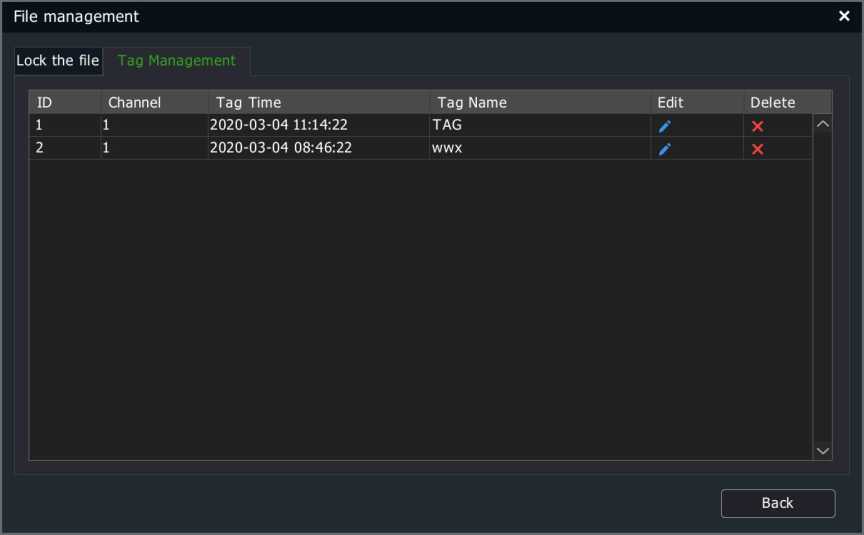
delete added labels.
Tag Playback
1 Enter the playback interface, select “Tag” for playback mode, and enter the “Tag” interface, as shown in the figure below.
2S Select a channel.
3S Enter the label keyword. If no keywords are entered, all labels within
the specified date of the selected channel are retrieved by default.
4S Select a date.
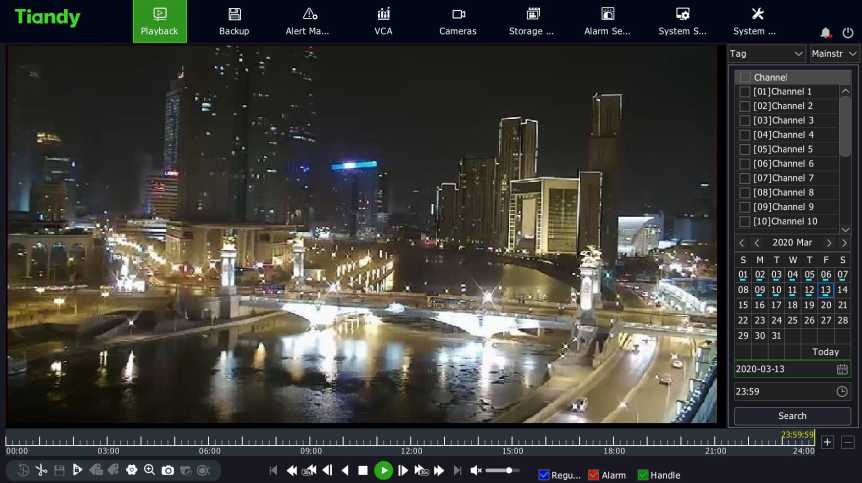
5X The playback progress bar shows a label marked with an inverted
green triangle. When the mouse cursor is moved over the position
marked by the inverted triangle, the label name information will be
displayed automatically, as shown in the figure below.
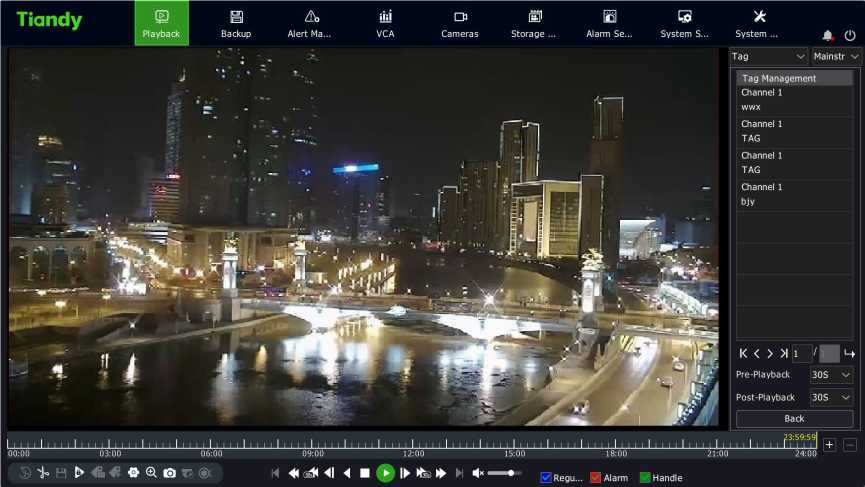
- Video playback begins with the value set in “Pre-Playback” before the time of adding labels, and ends with the value set in “Post-Playback” after the time of adding labels. When finished, the system automatically jump to the next label for playback.
- Playback Advance Time and Playback Delay Time can be set separately.
4.8.6 Smart Search Playback
Smart search playback refers to the intelligent analysis of video files. Options include “Perimeter Search”, “Tripwire Search” and “Face Detection”.
The operation steps are as follows:
- Enter the playback interface and select “Smart Search” for the playback mode, as shown in the figure below.
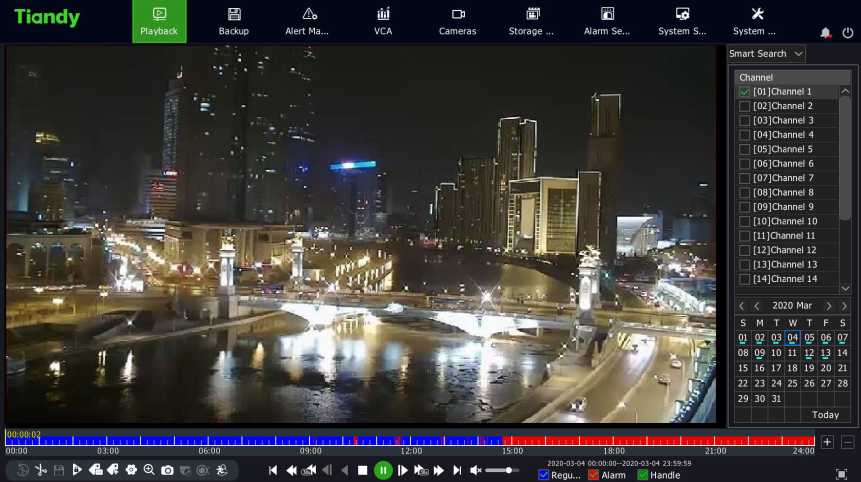 . The play operation begins after the channel and date are selected.

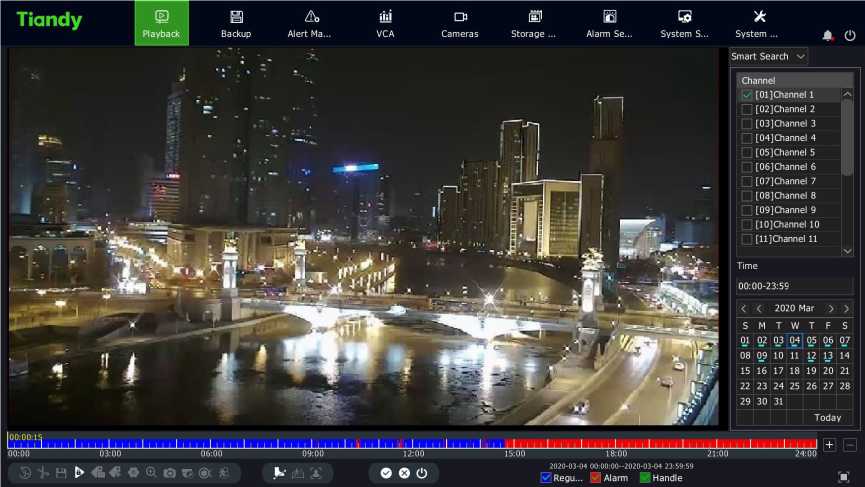
 in the lower left corner of the interface to enter the
3. Click
intelligent retrieval interface, as shown in the figure below.
button at the bottom of the interface and
4.
Click the
select the retrieval type.

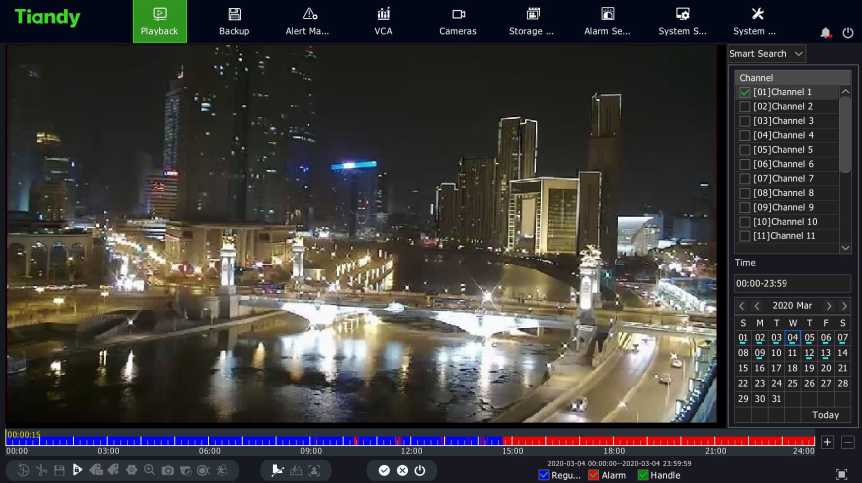
1. Click
or _
figure below.
- .8.6.1 Tripwire and Perimeter Search
button to enter the drawing interface of
intelligent playback and draw lines on the video, as shown in the
![]()
2.Click the
button to start searching. During the search process,
“VCA SEARCHING…” appears in the top left of the screen and the
progress bar will show the progress and results of the search.
- .During the search process, the system automatically jumps to the search results to start playing.
- . Click on another channel or other date during the search process will automatically stop searching. You can also click the Stop button or Exit button to manually stop searching or exit the intelligent search.
4.8.6.2 Face Detection
![]()
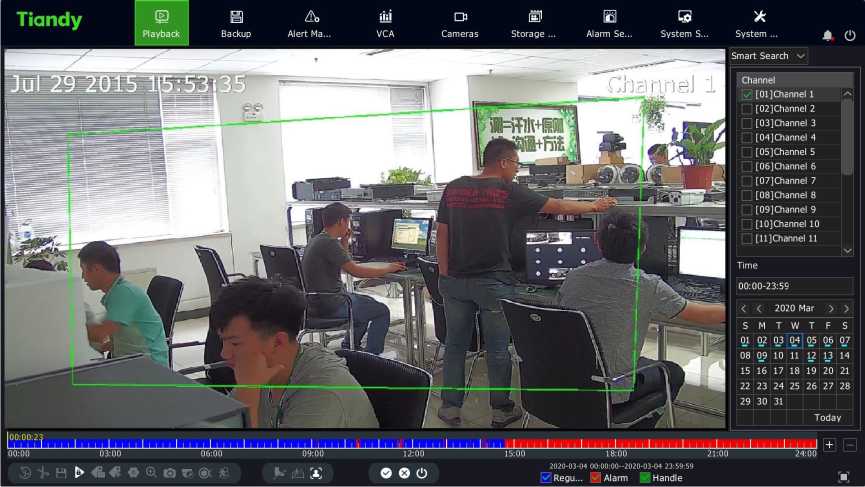
![]()
1.
Click
to enter the “Face Detection” interface of intelligent
playback, as shown in the figure below.
button to start searching. During the search process,
2.Click the
“VCA SEARCHING…” appears in the top left of the screen. At the same
time, the progress bar will display the search progress, and one the right side is the face detection search results.
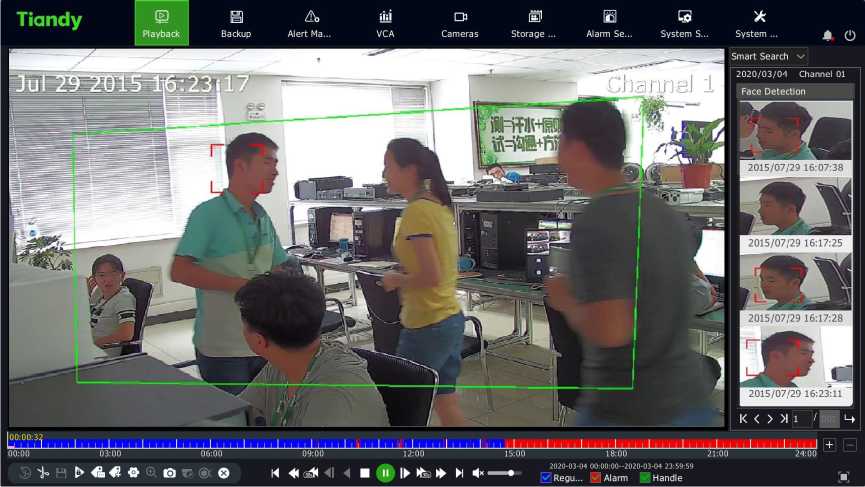
3. Click on the Stop search during the search process will stop searching. When you click the search results on the right, the video will be positioned to the corresponding location.
4.8.7 Video Concent Playback
The video summary playback function is to superimpose multiple moving targets at different time points into the same background for simultaneous playback, which can shorten video time and greatly improve the efficiency of video playback. Before playing back video summary, make sure that the front end device connected to the selected channel supports and enables the intelligent analysis function.
The operation steps are as follows:
1. Enter the playback interface, and select “Video Concent” for the playback mode, as shown in the figure below.
| Tiandy | E | a | iki | a | ffll | E | s | X | ||
| Playback | Backup | Alert Ma… | VCA | Cameras | Storage … | Alarm Se… | System S… | System … | a o |
![]()
 Video Concent
00:00:00
0%
2. Select a channel, set the start and end times, click “Search”,
and play back the video summary video file, as shown in the
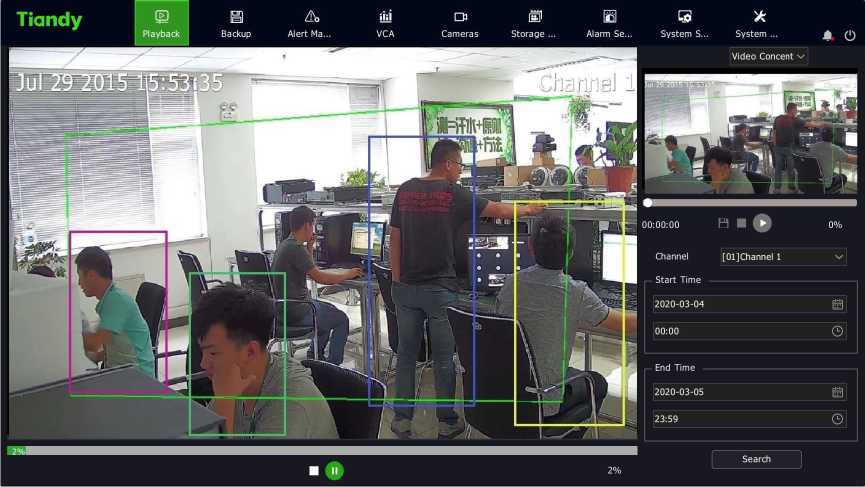
figure below.
3. Double-click the rectangular box stacked on the left side to
locate the time to play in the small window on the right, and
then play the video of 30s before and after the time point.
Notes:
- Stop and Pause options are available on the large screen on the left, and both the progress bar and percentage can be displayed but dragging over the progress bar is impossible.
- Stop and Pause options are available on the small screen on the right. And both the progress bar and percentage can be displayed, and dragging over the progress bar is possible. In addition, current files can be backed up.
- 4 decoding channels can be superimposed on the target simultaneously. The actual number of superimposing layers depends on the decoding ability. With the real-time playback screen of channel 1 as the background, the targets of other channels are superimposed on channel 1.
- The time period of each decoding channel is generally evenly distributed according to the time length of target information.
- Video summary playback is only available for some models.
4.8.8 Time-phased Playback
The time-phased playback function means that the recording time of a channel in a day is averaged to multiple screens for asynchronousplayback according to the number of split screens, which can effectively improve playback efficiency.
The operation steps are as follows: 1. Enter the playback interface and select “Time-phased Playback”, as
shown in the figure below.
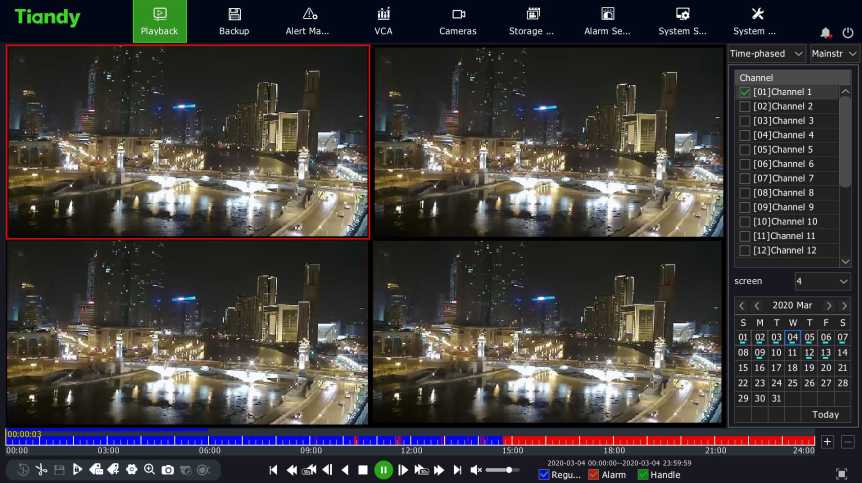
2. Select the playback channel and set the number of split screens. Here,
4 split screens are taken as an example.
3. Select the date on the right side or click the Play button for time-phased playback.
-
-
- . Picture Playback
-
The picture playback function refers to the playback of the pictures stored in the hard disk, as shown in the figure below.
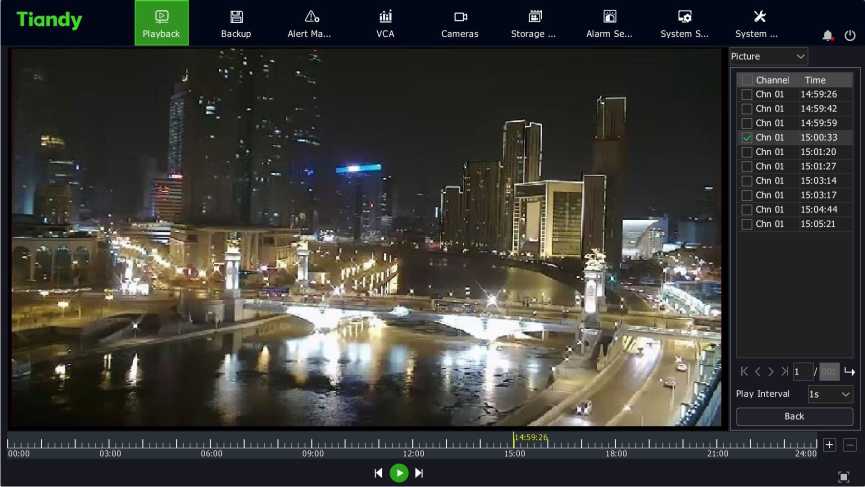
![]()
Notes:
- Users can define a play interval for play pictures automatically.
- You can also pause the playback and click on the left or right side
of a picture to display the previous or the next picture.
-
-
- External File Playback
-
The external file playback function refers to playback of video files stored in external storage media such as USB flash drive, mobile hard disk or CD-ROM.
The operation steps are as follows:
- Enter the playback interface and select “External File “, as shown in the figure below.
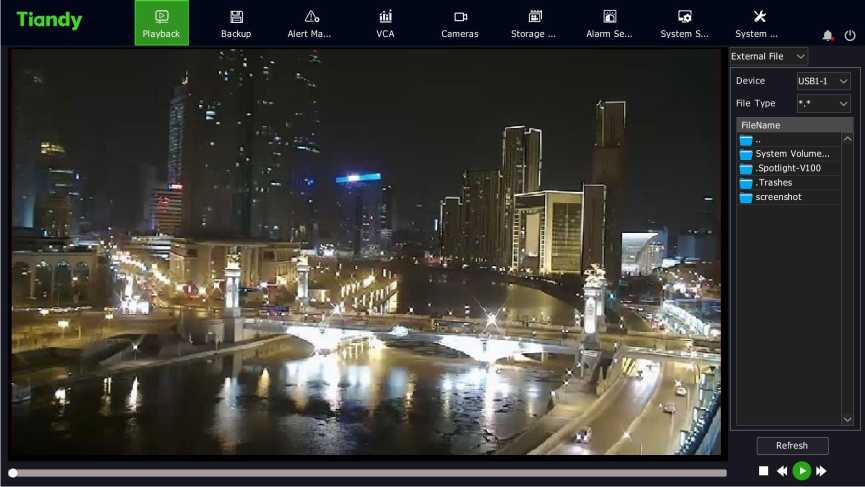
Device type and file type are optional
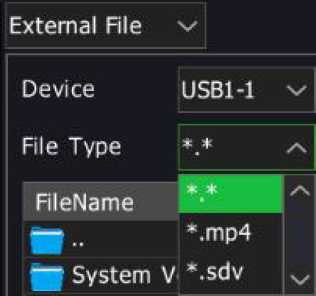
- Select “Refresh” to read external storage media.
- Click the file to play to play back external video file, as shown in the figure below.
• Before playing back external files, make sure that USB flash drive or mobile hard disk or USB drive has been connected to the device.
-
-
- Log Management
-
Play the video file corresponding to the log information.
The operation steps are as follows: 1 Select “Main Menu -> System Maintenance -> Log Management” to
enter the “Log Management” interface, as shown in the figure below.
| Tiandy | E | a | iki | a | H | E | s | * | ||
| Playback | Backup | Alert Ma… | VCA | Cameras | Storage … | Alarm Se… | System S… | System … | a o |
Information
| Log Management | Channel AH | — | -1 | Start Time 2020-03-13 j|| | 00:00 | ©I | ||||
| Configuration | Type All | End Time 2020-03-13 || | 23:59 | q| | ■ | Search | ||||
| Reset To Default | Record Time | Type | Channel | User | Content | Play | Details | |||
| 2020-03-13 00:00:59 | Alarm | 09 | Motion detection alarm happened! | • | ||||||
| Automatic Mainta… | 2020-03-13 00:00:54 | Alarm | 09 | Motion detection alarm disappeared! | • | § | ||||
| System Upgrade | 2020-03-13 00:00:45 | Alarm | 09 | Rule8 Parking Alarm Stopped. | • | |||||
| 2020-03-13 00:00:45 | Alarm | 09 | Rule7 Running Alarm Stopped. | • | S | |||||
| Network Detect | 2020-03-13 00:00:44 | Alarm | 09 | Rule8 Parking Alarm. | • | S | ||||
| Disk Detection | 2020-03-13 00:00:44 | Alarm | 09 | Rule7 Running Alarm. | • | S | ||||
| 2020-03-13 00:00:42 | Alarm | 09 | Rule8 Parking Alarm Stopped. | • | S | |||||
| 2020-03-13 00:00:42 | Alarm | 09 | Rule7 Running Alarm Stopped. | • | S | |||||
| 2020-03-13 00:00:40 | Alarm | 09 | Motion detection alarm happened! | • | S | |||||
| 2020-03-13 00:00:39 | Alarm | 09 | Rule8 Parking Alarm. | • | S | |||||
| 2020-03-13 00:00:35 | Alarm | 09 | Motion detection alarm disappeared! | • | S | |||||
| 2020-03-13 00:00:32 | Alarm | 09 | Rule7 Running Alarm. | • | S | |||||
| 2020-03-13 00:00:29 | Alarm | 09 | Motion detection alarm happened! | • | ||||||
| < | >J | |||||||||
| 472/473 page | < | 1 … 470 471 472 473 > | jump to 0 | page| go [ | ||||||
Export Current Export All
Back
2X Select “Channel” , “Type” , and “Start/End Time” , and click
“Search”.
3X Double-click a log in the log list to enter the “Playback” interface, as
shown in the figure below.
Notes:
- The playback progress can be controlled by the playback time bar on the bottom.
- There shall be video files at the channel and time point corresponding to the selected log and these video files can be played.
-
- Playback Assist Function
-
Single-Frame Playback
During video playback, single-frame playback allows checking of the detail change of the screen.
On the playback interface, left-click O or □ or adjust the playback speed to “Single Frame”. Step forward one frame for each click on the □ button, and step back one frame for each click on the d button.
The single-frame playback interface is shown in the figure below.
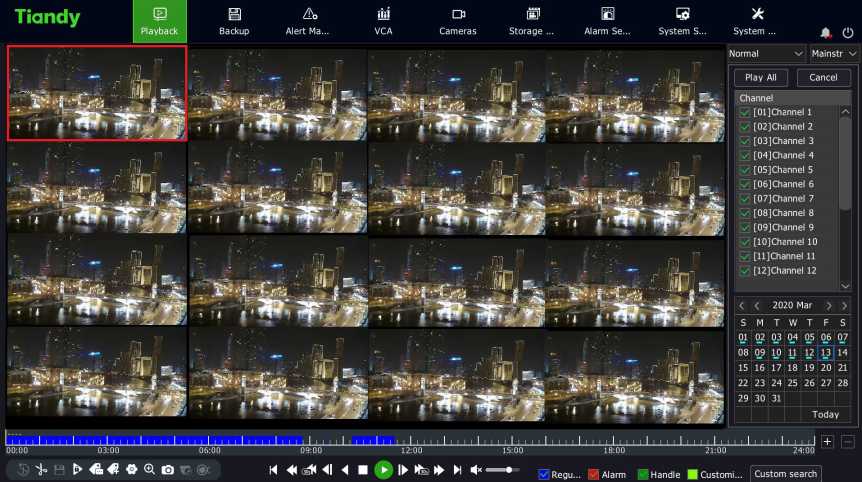
Digital Zoom
The partial picture of the video is enlarged to the full screen display in the process of playback or playback pause.
The operation steps are as follows:
- Enter the playback interface.
- . Select the B button on the playback control bar to enter the digital
zoom interface.
- .The drag bar on the top left or your mouse wheel can be used to
adjust the zoom factor.
4.Press and hold and drag the left mouse button to see different areas.
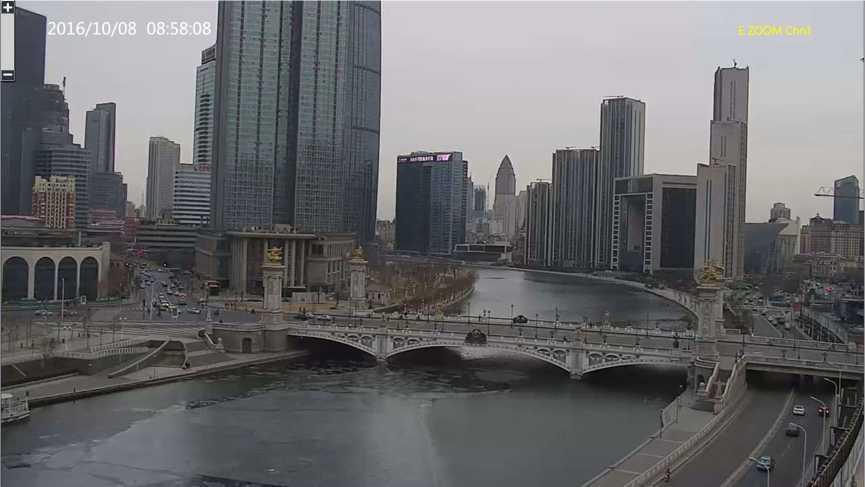
Snapshot
Snapshot in the process of video playback.
The operation steps are as follows:
1.Enter the playback interface.
2.Select a screen and click theEl button on the playback control bar.
nO Note:
• Images captured during playback need to be saved on a USB flash drive. When carrying out the snapshot operation, make sure the USB flash drive is correctly connected to the device.
Progress Bar Preview
On the playback interface, when playback mode is selected as regular playback, event playback, or label playback, and single screen is selected, the system will automatically display the time point and the images before and after the time point when your mouse slides over the play progress bar. The operation steps are as follows:
- Select playback mode as one of the above and start playback.
- Hover your mouse over a section of the progress bar that has video footage, and a preview image will appear, as shown in the figure below.
- Click any of small screens, and then locate to the time point to play.
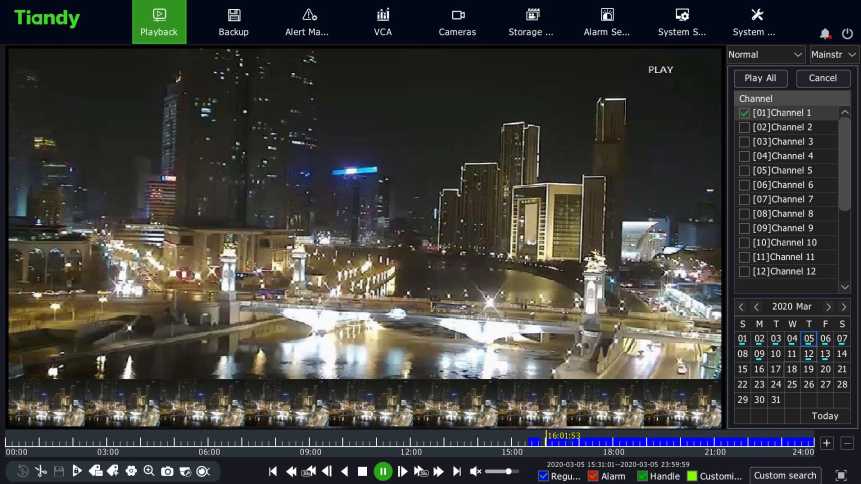
![]()
Notes:
- The progress bar preview operation is impossible when the decoding performance reaches the upper limit.
- The progress bar preview operation is impossible on the current channel when no video is available at the selected time point.
- No progress bar preview is available for non-single screen.
Quick Drag to Play
When playing on a single screen, you can quickly drag the progress bar. In this case, the progress bar will be dragged to play video quickly to facilitate viewing.
Backup allows backing up of video files in the system to the backup disk or USB storage device (USB, mobile hard disk, esata).
- Select “Main Menu -> Backup” to enter the backup interface, as shown in the figure below.
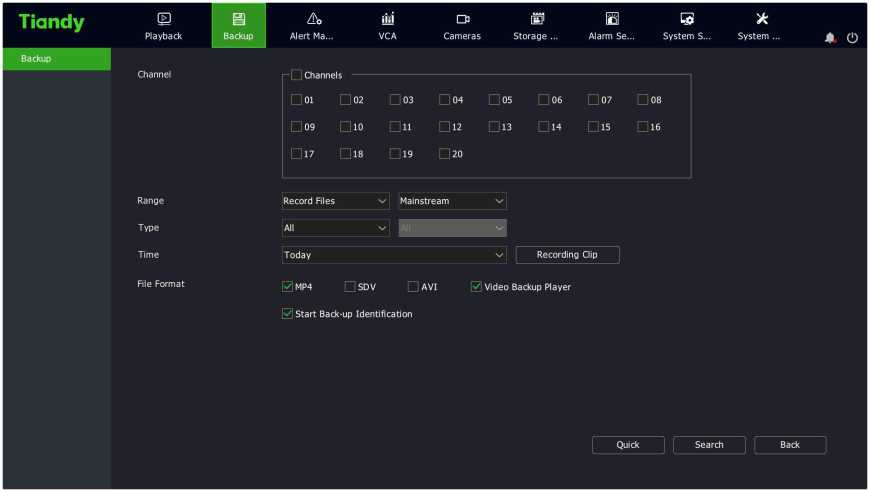
- Click “Video Snapshot” to visually display recordings of the specified date. After the date is selected, click “OK” to help the user select the start and end time of video querying according to the date. After returning to the interface in step 1, you can check it from “Start Date”, “Start Time”, “End Date”, and “End Time”.
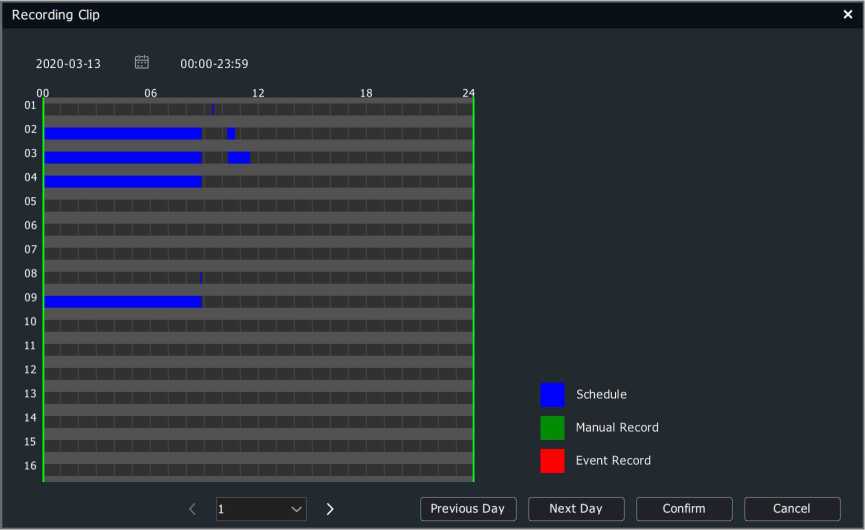
![]()
Note:
• Image files do not support video snapshot.
- After identifying the query conditions, if “Enable Backup Authentication” is checked, click on “Backup” or “Query Backup” button will display the authentication form. You need to conduct authentication first before proceeding to the next step.
code verification
Username
Password
Cancel
Confirm
- After identifying the query conditions, click the “Backup” button. If the backup destination is a USB storage device, it will enter the backup interface where you can select the destination folder for backup. If the backup destination is a backup disk, then proceed to the backup operation directly.
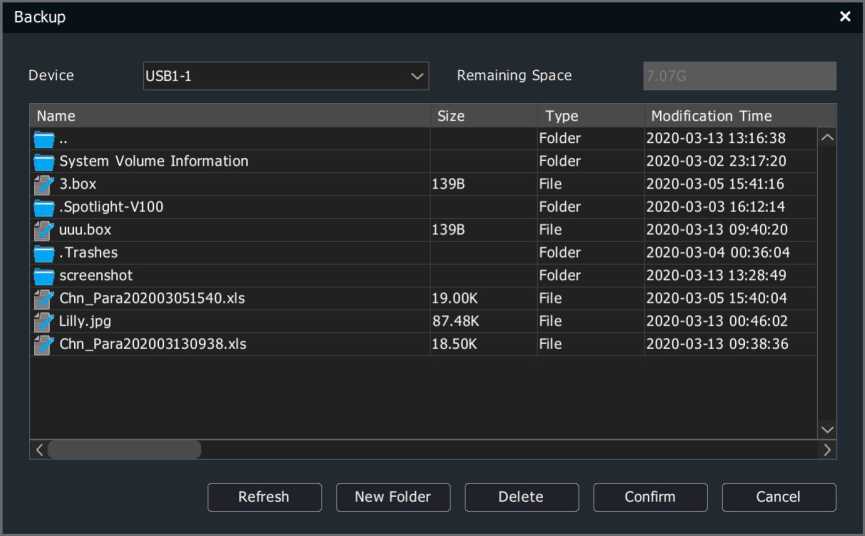
- After identifying the query conditions, click the “Query Backup” button for video file querying.
The video query results are presented in a list or a chart manner.
List:
To play the file, click the “Playback” icon or double-click the line where the file is located.
Click the “Lock” icon to lock and unlock the file.
Chart:
Click to select a certain screen to play the 10s video after the time
point. Double-click the preview image to play it back.
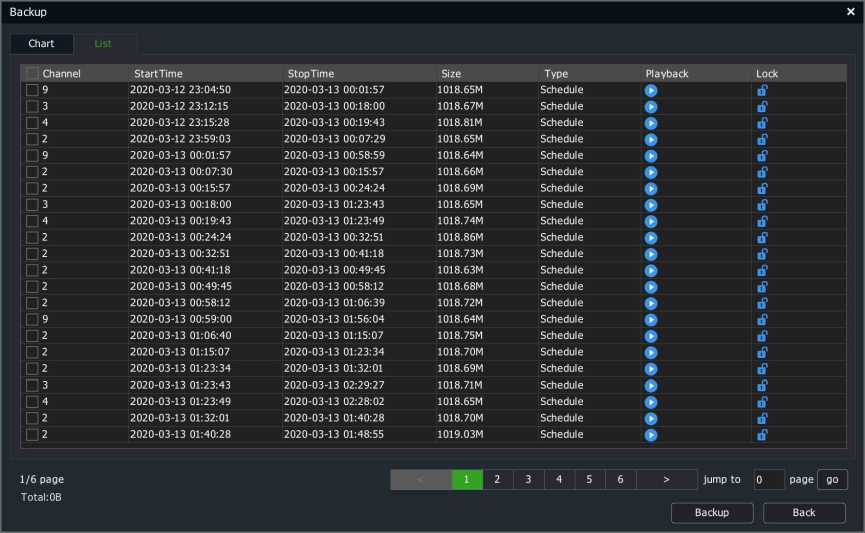
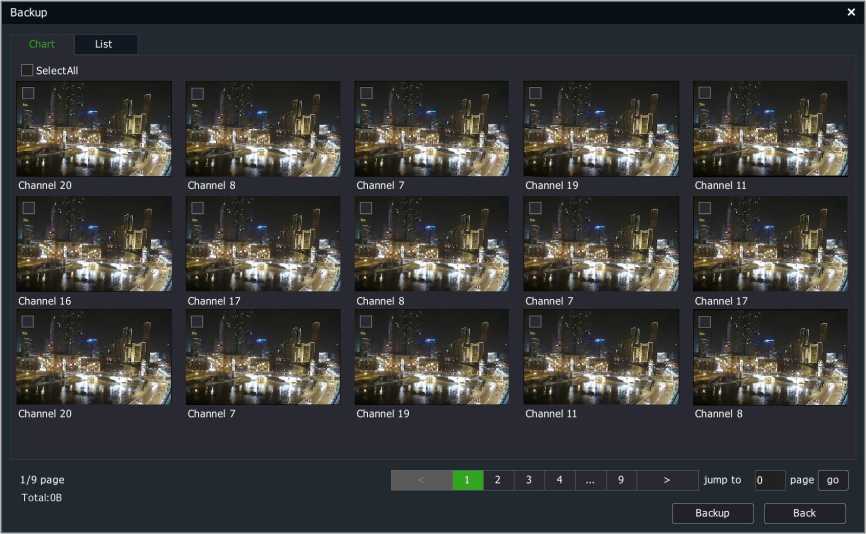
- Select the video file to back up from the list or chart, and click the “Backup” button to enter the backup screen.
System Information
- Select “Main Menu -> System Maintenance -> Information -> System Information” to enter the system information interface, as shown in the figure below.
| E | a | iki | a | ffll | E | s | X | |||
|---|---|---|---|---|---|---|---|---|---|---|
| Playback | Backup | Alert Ma… | VCA | Cameras | Storage … | Alarm Se… | System S… | System … | o |
Tiandy
System Information Channel status Recording status Alert status Network State Disk status Online User
Manufacturer
Factory ID
Serial Number
Firmware Version
Hardware Version
UI Version
SDK Version
Web Version
Access Module
System Time
Information
Log Management
Configuration
Reset To Default
Automatic Mainta…
System Upgrade
Network Detect
Disk Detection
Back
- The manufacturer, serial number, kernel version, hardware version, SDK version, webpage version, UI version, and system time can be checked under System Info.
Channel Status
- Select “Main Menu -> System Maintenance -> Information -> Channel
Status” to enter the channel status interface, as shown in the figure
below.
Back
| Tiandy | E
Playback |
a
Backup |
Alert Ma… | iki
VCA |
Cameras Storage … | Alarm Se… | s
System S… |
*
System … |
4 | o | ||
| Information | ||||||||||||
| Log Management | System Information Channel status Recording status | Alert status Network State Disk status Online User | ||||||||||
| Configuration | Channel | Name | Connect Status Motion | VideoMask | VideoLost | Smart Alarm | ||||||
| Reset To Default | 01 | Channel 1 | Do not support | Do not support | Do not support | Do not su… | – | |||||
| 02 | Channel 2 | Do not support | Do not support | Do not support | Do not su… | |||||||
| Automatic Mainta… | 03 | Channel 3 | Do not support | Do not support | Do not support | Do not su… | ||||||
| System Upgrade | 04 | Channel 4 | Do not support | Do not support | Do not support | Do not su… | ||||||
| 05 | Channel 5 | Do not support | Do not support | Do not support | Do not su… | |||||||
| Network Detect | 06 | Channel 6 | Do not support | Do not support | Do not support | Do not su… | ||||||
| Disk Detection | 07 | Channel 7 | Do not support | Do not support | Do not support | Do not su… | ||||||
| 08 | Channel 8 | Do not support | Do not support | Do not support | Do not su… | |||||||
| 09 | Channel 9 | Do not support | Do not support | Do not support | Do not su… | |||||||
| 10 | Channel 10 | Do not support | Do not support | Do not support | Do not su… | |||||||
| 11 | Channel 11 | Do not support | Do not support | Do not support | Do not su… | |||||||
| 12 | Channel 12 | Do not support | Do not support | Do not support | Do not su… | |||||||
| 13 | Channel 13 | Do not support | Do not support | Do not support | Do not su… | |||||||
| 14 | Channel 14 | Do not support | Do not support | Do not support | Do not su… | |||||||
| 15 | Channel 15 | Do not support | Do not support | Do not support | Do not su… | |||||||
| 16 | Channel 16 | Do not support | Do not support | Do not support | Do not su… | |||||||
| 20 | Channel 20 | A | Do not support | Do not support | Do not support | Do not su… | ||||||
| X | ||||||||||||
Bandwidth Remain
- Channel number, channel name, connection status, motion detection status, video occlusion status and video loss status can be checked under Channel Status.
Devices not supporting video occlusion alarm function will not
display the video occlusion column on the screen.
Record Status
1. Select “Main Menu -> System Maintenance -> Information -> Recording Status” to enter the record status interface, as shown in the figure below.
Tia ndy
| E | a | iki | a | H | s | * | ||||
|---|---|---|---|---|---|---|---|---|---|---|
| Playback | Backup | Alert Ma… | VCA | Cameras | Storage … | Alarm Se… | System S… | System … | o |
Information
Log Management
Configuration
Reset To Default
Automatic Mainta…
System Upgrade
Network Detect
Disk Detection
| Channel | Recording status | StreamType | FrameRate | BitRate | Resolution | Record Type | |
|---|---|---|---|---|---|---|---|
| 01 | X | Audio/Video | 0/25 | 0/512 | – | ||
| 02 | X | Audio/Video | 0/25 | 0/512 | |||
| 03 | X | Audio/Video | 0/25 | 0/512 | |||
| 04 | X | Audio/Video | 0/25 | 0/512 | |||
| 05 | X | Audio/Video | 0/25 | 0/512 | |||
| 06 | X | Audio/Video | 0/25 | 0/512 | |||
| 07 | X | Audio/Video | 0/25 | 0/512 | |||
| 08 | X | Audio/Video | 0/25 | 0/512 | |||
| 09 | X | Audio/Video | 0/25 | 0/512 | |||
| 10 | X | Audio/Video | 0/25 | 0/512 | |||
| 11 | X | Audio/Video | 0/25 | 0/512 | |||
| 12 | X | Audio/Video | 0/25 | 0/512 | |||
| — | |||||||
System Information Channel status Recording statu Alert status Network State Disk status Online User
| When the device doesn’t record a video, please check: | |
| 1. Whether the video template is set correctly. | Recording |
| 2. Whether the record policy is set correctly. | Parameter |
| 3. Whether the disk group or configuration is set correctly. | ^Diskgroup All… |
| 4. Whether the disk status is good. | Disk status |
5. Channel number, recording status, stream type, real-time frame rate/set frame rate, real-time bitrate/set bitrate, video resolution, video type, compression parameters, redundancy status can be checked under Record Status.
6X When you click video template, video strategy and disk page setting, the HDD status can jump to the corresponding interface to view the device configuration status.
Alert Status
- Select “Main Menu -> System Maintenance -> Information -> Alert
Status” to enter the alarm status interface, as shown in the figure below.
| Tiandy | E | a | iki | a | H | s | * | |||
| Playback | Backup | Alert Ma… | VCA | Cameras | Storage … | Alarm Se… | System S… | System … | a o |
Information
System Information Channel status Recording status Alert status Network State Disk status Online User
Log Management
Configuration
Reset To Default
Automatic Mainta…
System Upgrade
Network Detect
Disk Detection
| No. | Alarm Name | Circuit Type | Status | Channel in recording | ||
|---|---|---|---|---|---|---|
| Alarm | Inputl | Host Alarm Input 1 | Normally open | Disable | – | |
| Alarm | Input? | Host Alarm Input ? | Normally open | Disable | ||
| Alarm | Input3 | Host Alarm Input 3 | Normally open | Disable | ||
| Alarm | Input4 | Host Alarm Input 4 | Normally open | Disable | ||
| Alarm | Inputs | Host Alarm Input 5 | Normally open | Disable | ||
| Alarm | Input6 | Host Alarm Input 6 | Normally open | Disable | ||
| Alarm | Input? | Host Alarm Input 7 | Normally open | Disable | ||
| Alarm | Inputs | Host Alarm Input 8 | Normally open | Disable | ||
| Alarm | Input9 | Host Alarm Input 9 | Normally open | Disable | ||
| Alarm | Inputl 0 | Host Alarm Input 10 | Normally open | Disable | ||
| Alarm | Inputl 1 | Host Alarm Input 11 | Normally open | Disable | ||
| Alarm | Inputl? | Host Alarm Input 1? | Normally open | Disable | ||
| Alarm | Outputl | Local Alarm Output 1 | Normally open | Enable | ||
| Alarm | Output? | Host Alarm Output 1 | Normally open | Enable | ||
| Alarm | Outputs | Host Alarm Output ? | Normally open | Enable | ||
| Alarm | Output4 | Host Alarm Output 3 | Normally open | Enable | ||
| Alarm | Outputs | Host Alarm Output 4 | Normally open | Enable | ||
| Alarm | Outputs | Host Alarm Output 5 | Normally open | Enable | ||
| Alarm | Output? | Host Alarm Output 6 | Normally open | Enable | ||
| Alarm | Outputs | Host Alarm Output 7 | Normally open | Enable | ||
Back
- Serial number, name, annunciator type, ON/OFF status, channel triggering of the local alarm and alarm host can be checked under Alarm Status.
Network State
- Select “Main Menu -> System Maintenance -> Information -> Network State” to enter the network status interface, as shown in the figure below.
System Information Channel status Recording status Alert status Network State Disk status Online User
Tiandy
Information
Log Management
Configuration
Reset To Default
Automatic Mainta…
System Upgrade
Network Detect
Disk Detection
| E | a | iki | a | H | s | X | ||||
|---|---|---|---|---|---|---|---|---|---|---|
| Playback | Backup | Alert Ma… | VCA | Cameras | Storage … | Alarm Se… | System S… | System … | o |
Back
| Network information | Network card 1 | POE LAN Card | |
|---|---|---|---|
| MAC address | 3c:da:6d:00:13:ff | 3c:da:6d:00:14:00 | |
| IPv4 address | 192.168.15.34 | 192.168.3.2 | |
| IPv4 subnet mask | 255.255.255.0 | 255.255.255.0 | |
| IPv4 default gateway | 192.168.15.1 | 192.168.3.1 | |
| IPv4 Preferred DNS | 8.8.88 | 192.168.1.1 | |
| IPv4 Reserved DNS | 8.8.4.4 | 192.168.1.1 | |
| Automatically obtain IPv4 address | Disable | Disable | |
| IPv6 mode | Router announcement | ||
| Link local address | fe80::3eda:6dff:fe00:13ff/64 | ||
| IPv6 address | fdae:5ddd:f720:0:3eda:6dffife00:13ff | ||
| IPv6 default gateway | fe80::8eab:8eff:fed8:1409 | ||
| IPv6 Preferred DNS | |||
| IPv6 Reserved DNS | |||
| Enable PPPOE or not | Disable | ||
| PPPOE connection status | Disconnected | ||
| PPPOE IP address | 0.0.0.0 | ||
| PPPOE subnet mask | 0.0.0.0 | ||
| PPPOE default gateway | 0.0.0.0 | ||
| – | |||
| < – >1 | |||
- Network card-related network information can be checked under
Network Status.
Note:
• Devices not supporting dual network cards will not display the
network card 2 column on the screen.
Disk Status
- Select “Main Menu -> System Maintenance -> Information -> Disk
Status” to enter the HDD status interface, as shown in the figure below.
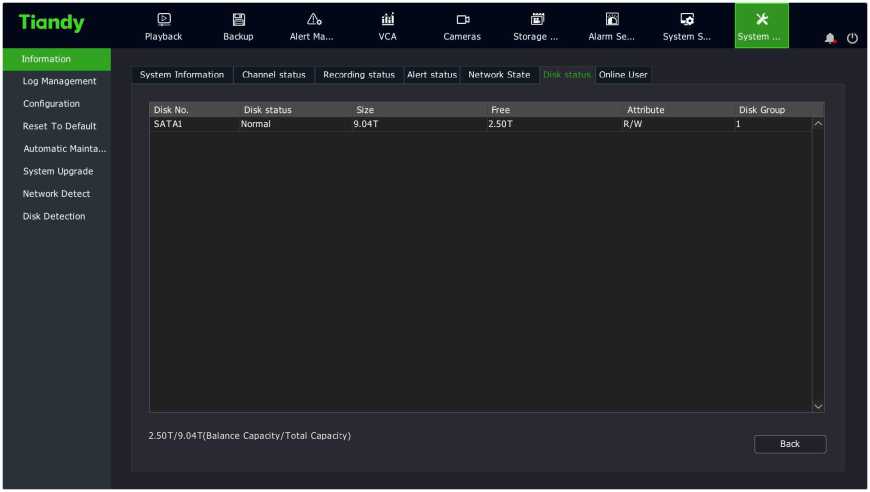
- HDD number, SMART detection status, size, idle, property, disk pack, total remaining capacity and total capacity of all hard disks can be checked under HDD status.
Online User
1. Select “Main Menu -> System Maintenance -> Information -> Online
User” to enter the online users interface, as shown in the figure below.
- Select “Main Menu -> System Maintenance -> Log Management” to
enter the log querying interface, as shown in the figure below.
Tiandy
Information
Log Management
Configuration
Reset To Default
Automatic Mainta…
System Upgrade
Network Detect
Disk Detection
E
Playback
a
Backup
Alert Ma…
iki
VCA
O H3 S
Cameras Storage … Alarm Se… System S…
*
| System
Channel All
Type All
Record Time
Type
Channel User
Start Time
End Time
Content
2020-03-13 j|| 00:00 ©
2020-03-13 H 23:59 ©] | Search
Play Details
![]()
1/1 page
Export Current Export All
Back
- After selecting query conditions such as channel, type, start and end times, click “Query” button for log querying.
- After logs are obtained, you can use the button to select the previous page or next page to view the logs, or input the number of pages. Click OK to jump to the page, select the log and click to check log details. Select alarm logs and click O to preview the video in the alarm time period.
- Log export operation:
- To export the current page: After querying the log, click “Export Current Page” to display the following form. Select the path and click “OK” to backup the log on the currently viewed page to the specified path.
| Device | USBl-l v |
|---|
Log export
Refresh
| New Folder | | Delete | Confirm | Cancel |
|---|
| Name | Size | Type | Modification Time | |
| — .. | Folder | 2020-03-13 14:26:25 | – | |
| System Volume Information | Folder | 2020-03-02 23:17:20 | ||
| 3.box | 139B | File | 2020-03-05 15:41:16 | |
| —? 20200313 | Folder | 2020-03-13 13:32:26 | ||
| .Spotlight-VlOO | Folder | 2020-03-03 16:12:14 | ||
| “J uuu.box | 139B | File | 2020-03-13 09:40:20 | |
| “* .Trashes | Folder | 2020-03-04 00:36:04 | ||
| TJ’ screen shot | Folder | 2020-03-13 14:28:49 | ||
| f Chn_Para202003051540.xls | 19.00K | File | 2020-03-05 15:40:04 | |
| Q* Lilly.jpg | 87.48K | File | 2020-03-13 00:46:02 | |
| “J Chn_Para202003130938.xls | 18.50K | File | 2020-03-13 09:38:36 | |
| <1^ | > |
Remaining Space
- To export all pages: Click “Export All Pages” to export all the logs that have been obtained. The backup path operation is the same as above.
Configuration Export
- Select “Main Menu -> System Maintenance -> Configuration -> Configuration Export” to enter the config export interface, as shown in the figure below. Performing the “Export” operation on configuration files of the device will facilitate timely backup of configuration file.
| Tiandy | E | a | iki | a | H | E | s | * | ||
| Playback | Backup | Alert Ma… | VCA | Cameras | Storage … | Alarm Se… | System S… | System … | a o |
Information
Configuration Export Configuration Import Log Management
Configuration ._ . .
Export to U
Reset To Default
File name
Automatic Mainta…
System Upgrade
Network Detect
Disk Detection
Export j | Back
- Select Config Export and add the export file name and destination to export device configurations.
Configuration Import
1. Select “Main Menu -> System Maintenance -> Configuration -> Configuration Import” for import operation. If the same configuration is used for multiple devices, the “Import” operation will allow saving device configuration time.

![]()
Tiandy
Information
Log Management
Configuration
Reset To Default
Automatic Mainta…
System Upgrade
Network Detect
Disk Detection
E a sisi
Playback Backup Alert Ma… VCA
Configuration Export Configuration Import
Import file list
3.box uuu.box
D H
Cameras Storage …
B S X
Alarm Se… Systems… System…
Note:
- The device will restart automatically after successful import.
Reset To Default
- Select “Main Menu -> System Maintenance -> Reset To Default ” to enter the restore defaults interface, as shown in the figure below.
| Tiandy | E
Playback |
a
Backup |
& iki
Alert Ma… VCA |
a
Cameras |
|---|---|---|---|---|
| Information | ||||
| Factory default configuration | ||||
| Log Management | All | |||
| Configuration | 1 I All | |||
| Reset To Default | 1 Network | Alarm | ||
| Automatic Mainta… | Storage | I Channel | ||
| System Upgrade | System | Preview | ||
| Disk Detection | Restore to factory default setting and reboot, continue ? | |||
ffll
Storage …
E
Alarm Se…
s
System S…
X
System …
Back
- The users can select the module to restore defaults according to their own needs. Click the “Continue” button, and the selected module will be restored to default configurations.
nO Note:
• The device will restart automatically after restoring the defaults.
- Select “Main Menu -> System Maintenance -> Automatic Maintenance -> Device Maintenance” to enter the device maintenance setting interface, as shown in the figure below, where you can set the device name, number and automatic restart time.
Tiandy EaAiiiioiSfflsx
Playback Backup Alert Ma… VCA Cameras Storage … Alarm Se… System S… System …
Information
, t Auto Reboot Each year xz IMonth x/I IDay 00:00
Log Management
Configuration
Reset To Default
Automatic Mainta…
System Upgrade
Network Detect
Disk Detection
Apply Back
- Select “Main Menu -> System Maintenance -> System Upgrade -> Cloud Upgrade” to enter the cloud upgrade interface, as shown in the figure below.
| Tiandy | E | a | iki | a | H | s | X | |||
| Playback | Backup | Alert Ma… | VCA | Cameras | Storage … | Alarm Se… | System S… | System … | a o |
Information
Cloud Update Upgrade from local Upgrade from FTP
Log Management
Configuration _ . .
Current Version
Reset To Default f
Latest Version Manual Detect
Automatic Mainta…
Release Date
System Upgrade
Automatically detect the NVR new version
Network Detect
Disk Detection
Click Manual Detection to check whether there is the latest version available. If there is a new version available, click Upgrade to upgrade to the new version.
1 Select “Main Menu -> System Maintenance -> System Upgrade -> Upgrade from local” to enter the local file upgrade interface, as shown in the figure below.
Tiandy
Information
Log Management
Configuration
Reset To Default
Automatic Mainta…
System Upgrade
Network Detect
Disk Detection
E a sisi
Playback Backup Alert Ma… VCA
Cloud Update Upgrade from local Upgrade from FTP
File Name
o H E S X
Cameras Storage… Alarm Se… Systems… System…
Files
Back
- Click Browse to select the file you want to upgrade, and then upgrade it, as shown in the figure below.
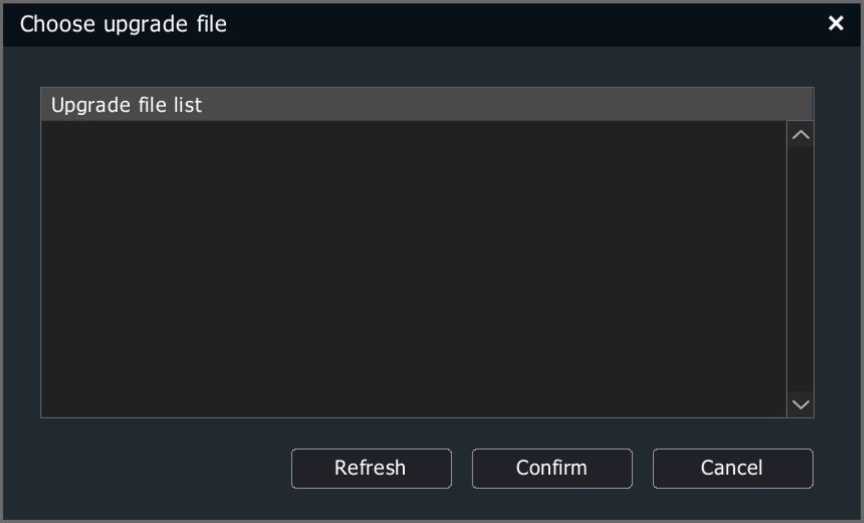
3X Select “Main Menu -> System Maintenance -> System Upgrade ->
Upgrade from FTP” to enter the FTP upgrade interface, as shown in
the figure below.
![]()
Tiandy
Information
Log Management
Configuration
Reset To Default
Automatic Mainta…
System Upgrade
Network Detect
Disk Detection
E
Playback
a
Backup
A
Alert Ma…
■id
VCA
D H
Cameras Storage …
Cloud Update Upgrade from local Upgrade from FTP
Server 192.168.001.001
Username
Password I Upgrade
E S
Alarm Se… System S…
X
System …
Note:
- After the upgrade is successful, the device will automatically restart and the new version comes into effect after restart.
- If it is suggested that the upgrade fails or the equipment cannot operate normally after restart, please contact your vendor for solutions.
Network Detect
- Select “Main Menu -> System Maintenance -> Network Detect -> Packet Backup” to enter the packet snapshot backup interface, as shown in the figure below.
| Status Detect j
USB1-1 | Refresh |
Packet Backup
| Tiandy | E | a | iki | a | H | s | * | ||
| Playback | Backup | Alert Ma… | VCA | Cameras | Storage … | Alarm Se… | System S… | System … |
Information
Packet Backup Network Flow Network Resources Statistics Log Management
Configuration
Reset To Default
Automatic Mainta…
System Upgrade
Network Detect
Network Card Selection
Destination Address
Current Network Card
Device
Network cardl
Test
©
Disk Detection
Back
- In the network testing field, enter the destination address to test whether the address can be pinged through.
- Click the “Packet Snapshot Backup” button to capture the current network card and save it to the specified storage medium.
- Click the “Status Detection” button to check whether the gateway and DNS of the current network card are accessible.
- Select the “Main Menu -> System Maintenance -> Network Detect ->Network Flow” interface to view and display real-time network data, as shown in the figure below.
Tia ndy
E
Playback
a
Backup
O H3 S
Cameras Storage … Alarm Se… System S…
X
System …
Information
Log Management
Configuration
Reset To Default
Automatic Mainta…
System Upgrade
Network Detect
Disk Detection
Packet Backup Network Flow Network Resources Statistics
Network Flow Network cardl
Uploading Speed
Downloading Speed
Total uploading flow
Total downloading flow
Refresh Back
- Select the “Main Menu -> System Maintenance -> Network Detect -> Network Resource Statistics” interface to check the usage of network resources, as shown in the figure below.
Tiandy
Information
Log Management
Configuration
Reset To Default
Automatic Mainta…
System Upgrade
Network Detect
E
Playback
a
Backup
zto
Alert Ma…
■id
VCA
Packet Backup Network Flow Network Resources Statistics
Disk Detection
D H
Cameras Storage …
E S
Alarm Se… System S…
X
System …
| Type | Broadband | |
|---|---|---|
| Digital channel access | 0Mb | – |
| Remote preview | 0Mb | |
| Remote replay and download | 0Mb | |
| Network receiving remaining | 400Mb | |
| Network Sending remaining | 200Mb |
Refresh Back
S.M.A.R.T.
- Select “Main Menu -> System Maintenance -> Disk Detection ->
S.M.A.R.T.” to enter the SMART setting interface.
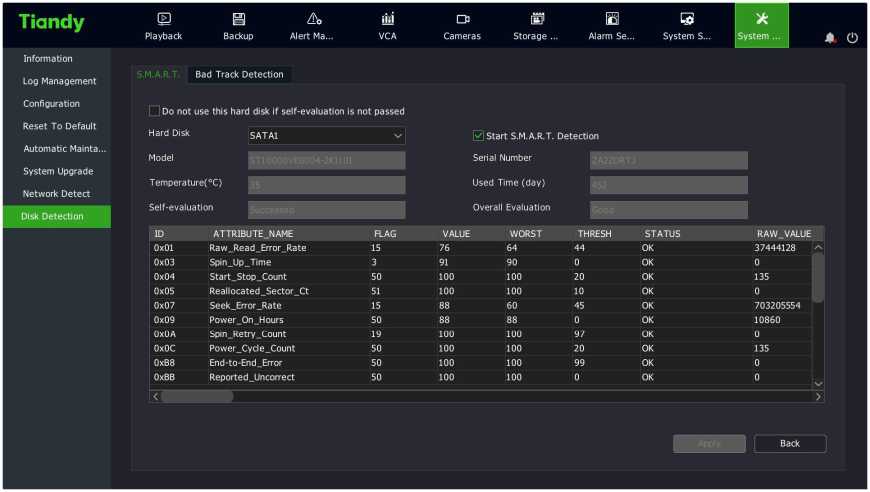
- Select the disk to detect and check “Enable S.M.A.R.T Detection” to enable the S.M.A.R.T detection function of the disk. S.M.A.R.T detection information is displayed in the corresponding interface.
- When “Do not use the HDD when it fails self-assessment”, do not use the HDD if there is any problem with the self-assessment after the S.M.A.R.T test.
Bad Track Detection
- Select “Main Menu -> System Maintenance -> Disk Detection -> Bad
Track Detection” to enter the bad track detection interface.
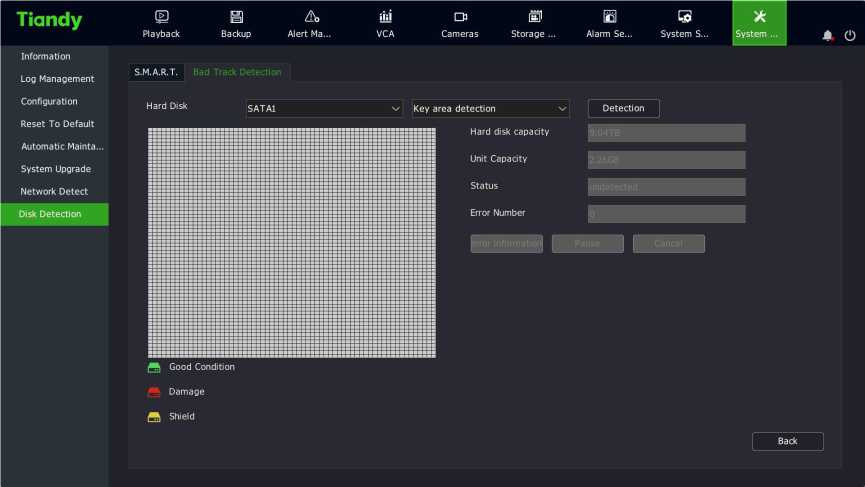
- Select the hard disk and detection method and click the Detection button to enter the detection status.
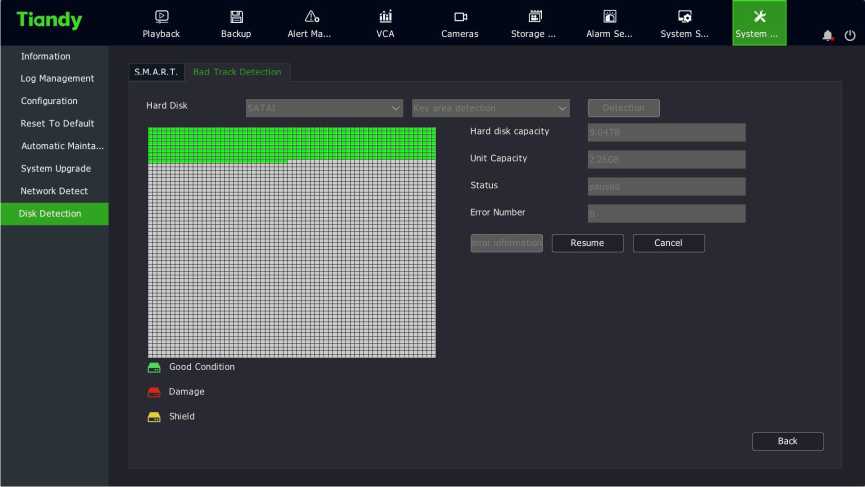
- Click Pause to suspend the bad track detection; Click Restore to resume the bad track detection;
- Click Cancel to cancel the bad track detection;
- Click the Error Message button to check the bad track of the hard disk.
Note:
- The Error Message button is available only if the number of errors on the hard disk is greater than 0.
- When the number of errors on the hard disk is 100, bad trace
 detection stops.
 “means the corresponding area of the hard disk is in good
condition,”
“means the corresponding area of the hard disk is

damaged,”
“means the corresponding area of the hard disk is
shielded.
For unified management of device attributes in the system.
Basic Setting
- Select “Main Menu -> System Setting -> General Setting -> Basic Setting” to enter the basic setting interface, as shown in the figure below, where you can set the local output display parameters of the device.
Tiandy
General Setting
Network Setting
Preview Setting
Disk Management
Error Management
User Management
Other Setting
E
Playback
a
Backup
A
Alert Ma…
Basic Setting Time Setting Plan Setting
■id
VCA
D H E
Cameras Storage … Alarm Se…
s
System S…
X
System …
Language English
Screensaver Time 5 Mins
Device Name DVRS
Device ID 18
Mouse Cursor Speed — + 80
Enable Startup Guide
Hide icon of video, alarm and facial recognition on preview interface
I I Send warning if equipment decoding performance reaches up limit
I | Allow access of third-party IPCs H265
Enable screen resolution adaptive reminder
Hidden target detection face attribute
Back
![]()
Note:
• Language: Selects the system language.
- Screensaver Time: Selects the interface timeout time.
- Enable Startup Guided: Selects whether to enable boot wizard settings.
- Buzzer when pressing button: Turns on the buzzer.
- Hide icon of video, alarm and facial recognition on preview interface: Selects whether to display video, alarm, face recognition icons on the preview interface.
- Send warning if equipment decording performance reaches up llimit: Selects whether to display the prompt message when the decoding performance reaches the upper limit.
- Mouse Cursor speed: Selects the mouse movement speed, 0-100 adjustable.
Time Setting
1. Select “Main Menu -> System Setting -> General Setting -> Time Setting” to enter the time setting interface, as shown in the figure below, where you can set system time, time zone, and NTP timing parameters.
| Tiandy | E | a | iki | a | H | E | s | X | ||
| Playback | Backup | Alert Ma… | VCA | Cameras | Storage … | Alarm Se… | System S… | System … | a o |
General Setting
| Network Setting
Preview Setting Disk Management Error Management User Management Other Setting |
Ba | sic Setting Time Setting Plan Setting | ||
| TimeZone (GMT+08:00)Beijing,Urumchi,Singapore xzi
Time Format yyyy/mm/dd hh:mm:ss xz Time 2020-03-13 j|| 15:05:10 ©] |
||||
| StartTime jan xz First xz Sun xz 00 xz O’clock
StopTime j3n xz First xz Sun xz 00 xz O’clock DST Bias jsOMin xz |
||||
| MTP QpfHnri | ||||
| IP Address 0.0.0.0
Port Setting 123 Interval(Minute) 60 |
||||
Back
Plan Setting
- Select “Main Menu -> System Setting -> General Setting -> Plan Setting” to enter the preplan setting interface, as shown in the figure below. When an alarm situation occurs, the linkage preplan is displayed on the preview interface, and the on-duty personnel shall deal with it according to the preplan, such as alarming, notification, asking for helps, etc.
- Click the preplan name or preplan content to directly edit them, as shown in the figure below.
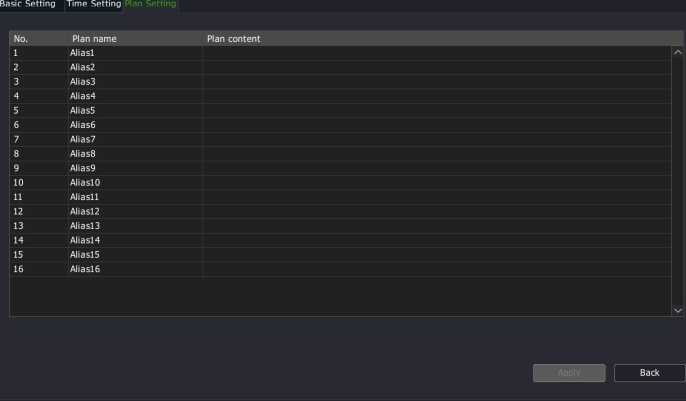
Network Card
- Select “Main Menu -> System Setting -> Network Setting -> Network
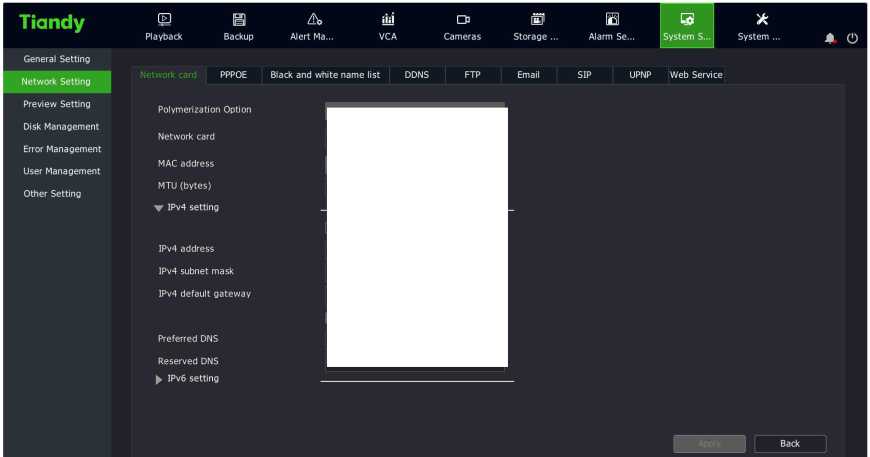
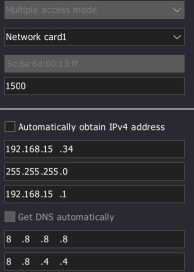
Card” to enter the network card setting interface.
- Choose to automatically obtain or manually set the IP address. If auto obtain is selected, the system will automatically obtain the IP address from the DHCP in the network.
- When selecting “Automatically obtain IPv4 address”, information including device’s IP address, subnet mask, and gateway should be specified.
- Aggregated options. There are three modes in the drop-down box: multiple access, load balance and redundancy:
- Network multiple access: In this mode, Network Card 1 and Network Card 2 work independently.
- Load balance: In this mode, the network load is evenly shared by two network cards.
- Network redundancy: In this mode, one network card works and the other is in standby mode. Once the working network card fails, the standby one will be immediately started to complete the seamless connection of network switching.
- If multiple access mode is enabled, the configuration method of network card 2 is the same as that of network card 1.
- Click the “Apply” button to make the settings effective.
Notes:
- This interface is displayed only for devices with dual network cards, and aggregated options are unavailable for devices without dual network cards.
- Once the aggregation mode is set, the network parameters of network card 2 will be automatically filled in, with no need of user intervention.
PSE Network Card
Note:
- PSE series NVR models support PSE network card settings. This setting is unavailable for other models.
- Select “Main Menu -> System Setting -> Network Setting -> Network Card” to enter the network card setting interface and select the PSE network card.
I | Automatically obtain IPv4 address
| IPv4 address | 192.168.15 .34 | |
| IPv4 subnet mask | 255.255.255.0 | |
| IPv4 default gateway | 1192.168.15 .1
H Get DNS automatically |
1 |
| Preferred DNS | 8 .8 .8 .8 | 1 |
| Reserved DNS | 8 .8 .4 .4 | |
| W IPv6 setting |
E
Playback
a
Backup
Alert Ma…
iili D H E
VCA Cameras Storage … Alarm Se…
s
System S…
X
System …
General Setting
Network Setting
Preview Setting
Disk Management
Error Management
User Management
Other Setting
Network card PPPOE Black and white name list DDNS FTP Email
SIP UPNP Web Service
| Polymerization Option | |
|---|---|
| Network card | Network cardl v |
| MAC address | |
| MTU (bytes) | 1500 |
| ▼ IPv4 setting |
Back
- After setting the network address, the network address of the plug&play camera will be automatically set to the address of the network segment.
Note:
• This interface will not be displayed for non-PSE devices.
PPPOE
- Select “Main Menu -> System Setting -> Network Setting -> PPPOE” to enter the PPPOE setting interface.
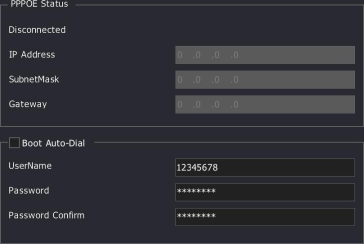
General Setting
Network Setting
Preview Setting
Disk Management
Error Management
User Management
Other Setting
Network card PPPOE Black and white name list DDNS FTP Email
| E | a | iki | a | H | s | X | ||||
| Playback | Backup | Alert Ma… | VCA | Cameras | Storage … | Alarm Se… | System S… | System … | o |
SIP UPNP Web Service
Connect Back
- Set whether to dial automatically on startup.
- Enter the account and password of PPPOE dial.
- Click the “Connect” button to immediately start the PPPOE dial operation.
- Click “Apply” button to save the setting of PPPOE dial into the system. If the “Auto Dial on Startup” is selected, the system will automatically dial in the next startup.
NO Notes:
- This interface is not displayed for devices not supporting PPPOE.
- If you cannot dial properly due to network interruption or change of the modem, please manually click the “Disconnect” button and then try again.
Black and White Name List
- Select “Main Menu -> System Setting -> Network Setting -> Black and
White Name List” to enter the black and white list setting interface.
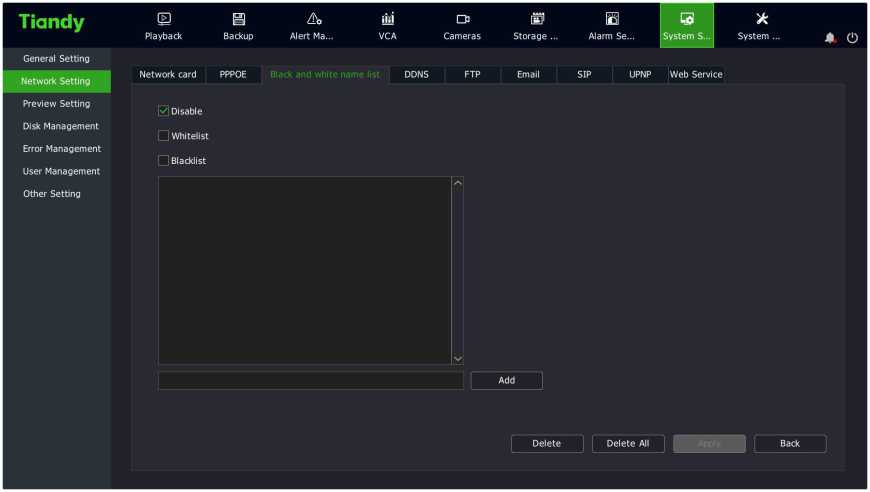
2. Choose the way how IP right is used: “Disable”, “Whitelist” or
“Blacklist”.
- Enter the IP address that needs to be disabled or enabled in the IP address input box.
- Click the “Add” button to add the IP address to the list.
- Click “Apply” to save the configurations.
DDNS
1, Select “Main Menu -> System Setting -> Network Setting
->DDNS” to enter the DDNS setting interface.
| Tiandy | E | a | iki | a | H | s | X | |||
| Playback | Backup | Alert Ma… | VCA | Cameras | Storage … | Alarm Se… | System S… | System … | a o |
| General Setting | ||
| Network Setting | Network card PPPOE Black and white name list DDNS FTP Email SIP UPNP Web Service | |
Preview Setting
Enable
Disk Management
Server Domain
Error Management
DDNS Domain
User Management
DDNS ID
Other Setting
DDNS Password
Back
- Set whether to enable the DDNS service.
- Enter the device domain name.
- Enter the domain name or IP address of the DDNS server.
- Enter the login account and password of the DDNS server.
- Click “Apply” button to save the configurations.
FTP
- Select “Main Menu -> System Setting -> Network Setting -> FTP” to enter the FTP setting interface.
Tia ndy E 3 A iia a
Playback Backup Alert Ma… VCA Cameras
H E
Storage … Alarm Se…
s
System S…
X
System …
| General Setting | ||
|---|---|---|
| Network Setting | Network card PPPOE | |
| Preview Setting
Disk Management Error Management User Management Other Setting |
FTP Server Address
Port Number Path Username Password |
|
Black and white name list DDNS FTP
192.168.1.1
21
Email SIP UPNP Web Service
Back
- Enter the server address, port number, account and password of the FTP server.
- Click “Apply” button to save the configurations.
- Select “Main Menu -> System Setting -> Network Settings ->Email” to enter the Email setting interface.
| Tiandy
General Setting |
e a
Playback Backup |
Alert Ma… | iki
VCA |
a
Cameras |
a
Storage … |
E
Alarm Se… |
s
System S… |
X
System . |
A | o | |
| Network Setting | Network card PPPOE | Black and white name list DDNS | FTP | SIP UPNP | Web Service | ||||||
| Preview Setting | Email Server Address | 0 | 1 | ||||||||
| Disk Management | |||||||||||
| Port Number | 0 | [ | |||||||||
| Error Management | |||||||||||
| Username | 0 | I– | |||||||||
| User Management | — | ||||||||||
| Password | * | 1 | |||||||||
| Other Setting | 1. | ||||||||||
| Log Mode | off | V | |||||||||
| Encryption | Not Encrypted | V | |||||||||
| Send Email | — | ||||||||||
| Subject | 0 | ! | |||||||||
| Main Email Address | 0 | 1′ | |||||||||
| Email Address 1 | 0 | T | |||||||||
| Email Address 2 | 0 | ||||||||||
| Email Address 3 | 0 | ||||||||||
| Test | 1 ■ Apply 1 | ■ n | Back | ||||||||
- Enter the server address, port number, account, password, encryption mode, recipient address and subject of the Email server.
- Click “Apply” button to save the set parameters.
SIP
- Select “Main Menu -> System Setting -> Network Setting -> SIP” to enter the SIP interface.
General Setting
Network Setting
Preview Setting
Disk Management
Error Management
User Management
Other Setting
| E | a | iki | a | H | s | X | ||||
| Playback | Backup | Alert Ma… | VCA | Cameras | Storage … | Alarm Se… | System S… | System … | o |
Network card PPPOE Black and white name list DDNS FTP Email SIP UPNP Web Service
Address 1192.168.3 .200 Port ,5060 (1~65535)
Server ID 34020000002000000001 Device ID 34020000001110000011
User Name Admin Password ********
Heartbeat Inte… 60 Heart Rate 3
RegValidity 100 ] (l~2000000000)
Select Channel [01]Channel 1 Channel ID 987654321021111112
Alarm Input Remote Alarm Input 1 v Alarm Input No. 987654321021111112
Auto Filling Set j j Back
- Enter address, server ID, account, heartbeat interval, term of validity, port, device ID, password, heartbeat rate, channel selection, channel number, alarm input and alarm input number.
- Click “Apply” button to save the set parameters.
- Click the “Auto Fill” button, and the channel number and alarm input number of the current channel will be incremented by one in turn.
UPNP
- Select “Main Menu -> System Setting -> Network Setting -> UPNP” to enter the UPNP interface.
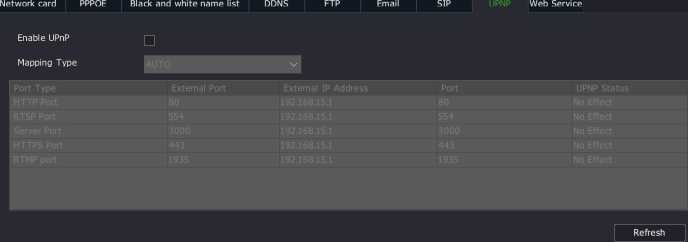
General Setting
Network Setting
Preview Setting
Disk Management
Error Management
User Management
Other Setting
E
Playback
a
Backup
Alert Ma…
iili D H E
VCA Cameras Storage … Alarm Se…
s
System S…
X
System …
Back
- Check the “Enable” option to enable “Mapping Type” check box.
- When “Mapping Type” is selected as “Auto”, the default external port is used for corresponding services; when “Manual” is selected, the external port can be edited and then used for corresponding services. HTTP port and RTSP external port support 1-65535, and external ports for service ports support 1-65534.
- Click the “Save” button to save the settings.
Network Services 1. Select “Main Menu -> System Setting -> Network Setting -> Network
Service” to enter the network service interface.
General Setting
Network Setting
Preview Setting
Disk Management
Error Management
User Management
Other Setting
| E | a | iki | a | H | s | X | ||||
| Playback | Backup | Alert Ma… | VCA | Cameras | Storage … | Alarm Se… | System S… | System … | o |
Network card PPPOE Black and white name list DDNS FTP Email
SIP UPNP Web Service
FTP Port 21
HTTP Port 80
□ Enable SNMP
RTSP
RTSP Port 554
rtsp://<username>:<password>@<ip>:<port>/<channel>/<stream>
channel:channel,l to N;stream:Stream type,Main stream 1,Sub-stream 2,third …
Sample:rtsp://admin:admin@l 92.168.1.3:554/1/I
v Start the intranet for searching
Back
- The FTP and HTTP ports of the device can be modified on this interface, where you can also set whether SNMP service is enabled or not.
- Check the “Enable Intranet search” option to search devices in
different segments under the same route.
Basic Configuration
- Select “Main Menu -> System Setting -> Disk Management -> Basic Configuration” to enter the basic setting interface. When the device is connected to two or more disks and configured as the same disk pack, the edit column in the list displays Z. Click Z to modify the purpose of the disk, including read-write, backup, redundancy, and read-only.
| Tiandy | E | a | iki | a | H | E | s | X | ||
| Playback | Backup | Alert Ma… | VCA | Cameras | Storage … | Alarm Se… | System S… | System … | * o |
General Setting
, „ . Basic Configuration NFS Setting
Network Setting
Preview Setting
Disk Management
Error Management
User Management
Other Setting
Device Size Used Free Sleep Attribute Disk Group Edit
| □ SATAI 9.04T |6.54T |2.50T |N R/W |1 | —
| □ USB1 7.23G 1.13G 6.10G N Backup — –
2.50T/9.04T(Balance Capacity/Total Capacity)
| [ Disk recovery j [ Initialization
- The interface can display the total remaining capacity and total capacity of the current HDD and virtual disk.
- Hot-swap. Select a disk from the disk list and click the “Hot-swap” button. The system will display “Hot-swap will lead to the offline of the disk, which can only be online by restarting the device or plugging the disk.”
![]()
Note:
• The hot plug button is disabled for devices that do not support hot plug function.
- HDD detection. Sets whether all disks are detected when the device is powered off and restarted, and whether corrupted disks are fixed. Click the “Disk Detection” button to display the disk detection form, as shown in the figure below.
Disk recovery
Device will detect all disks after power off reboot.
Repair damaged disks
Confirm
Cancel
- Initialization: Initializes the selected disk, and an initialization format can be selected for the USB flash drive.
![]()
Do
Note:
Disk initialization
Caution: Disk initializing will erase all data and take up big part of the system capacity, please close other applications, continue?
Back
• The file system is not displayed for devices that does not support
the initialization format selection for the USB flash drive.
NFS Setting
- Select “Main Menu -> System Setting -> Disk Management -> NFS
Setting” to enter the NFS setting interface.
| Tiandy | E | a | iki | a | H | X | ||||
| Playback | Backup | Alert Ma… | VCA | Cameras | Storage … | Alarm Se… | System S… | System … | a o |
General Setting
, _ Basic Configuration NFS Setting
Network Setting
| Preview Setting | Web Storage(NFS) – | |
| Disk Management | Server 0 | |
| Error Management
User Management |
Directory /nfs |
Other Setting
Back
- Set the IP address (domain name) and directory of the “NFS” service.
- Click “Apply” to save the configurations.
TC-NR2020M7-E8, TC-NR2040M7-E8, TC-NR2080M7-E8,
TC-NR2080M7-E16, TC-NR2160M7-E16, TC-NR2020M7-S,
TC-NR2040M7-S8 and TC-NR2080M7-S8 support disk array. Disk array shall be set before being used.
Physical Disk
- Select “Main Menu -> System Settings -> Array Management -> Physical Disk” to enter the physical disk interface, where the basic information of all physical disks of the current device is displayed, including capacity, related array, disk type, disk status and disk model.
| E | a | iki | a | H | s | X | ||||
|---|---|---|---|---|---|---|---|---|---|---|
| Playback | Backup | Alert Ma… | VCA | Cameras | Storage … | Alarm Se… | System S… | System … | o |
Physical Disk Array
Disk No. Capacity Array Type Status Model
General Setting
Network Setting
Preview Setting
Disk Management
Array Management
Hot-spare Setting
Error Management
User Management
Other Setting
Array Name
Back
Enable Array
- Enable array. Check “Enable Array” and the operation will take effect after reboot.
- One-key config. After entering “Array Name”, click the One-key Config button, and the device will automatically create an array.
- Disk setting. After selecting a disk, click the “Disk Setting” button to set the disk as “Idle Disk”, “Array Hot Standby Disk” or “Global Hot Standby Disk”.
![]()
Notes:
- Rules for creating arrays with One-key Config: The system first creates a global hot standby disk and then creates up to 3 RAID5 arrays based on the number of remaining disks. At least three hard disks are required to create a RAID5 array and up to 8 disks are supported; If there are less than 3 disks left, set the remaining disks as idle disks.
- The device supports only one global hot standby disk.
Array
- Select “Main Menu -> System Settings -> Array Management -> Array” to enter the array interface.
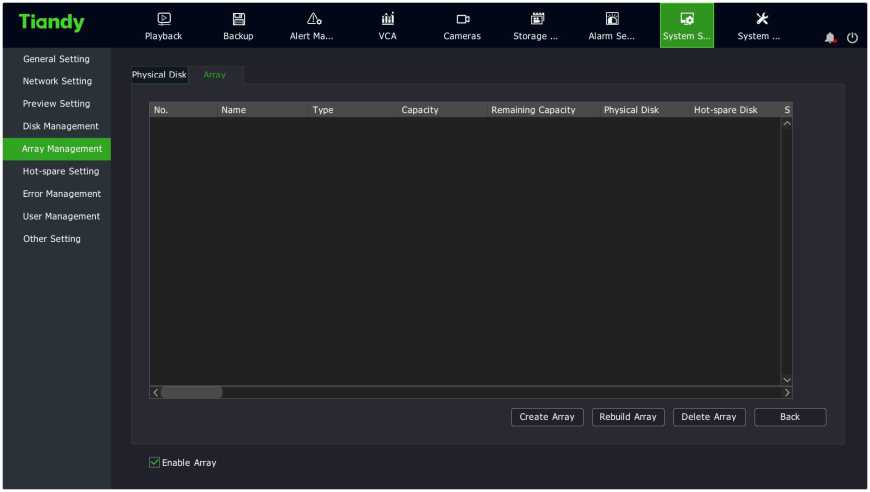
- Create an array. Click the “Create Array” button to enter the Create Array interface, as shown in the figure below. To create an array, you must specify a array name, array type, physical disk that makes up the array, and the hot standby disk number. When all the information is set, click the OK button to start creating the array.
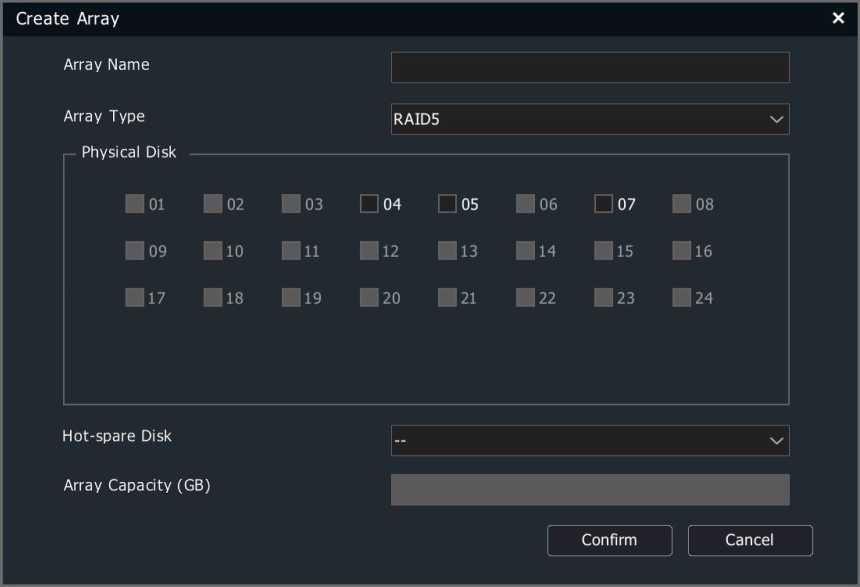
Notes:
- Array hot backup disks are not supported for JBOD and RaidO.
- Each array supports only one array hot standby disk.
- Rebuild array. When an array is “Degraded”, the array can be rebuilt. Select the disk number to be substituted into the array and click the OK button to begin rebuilding.
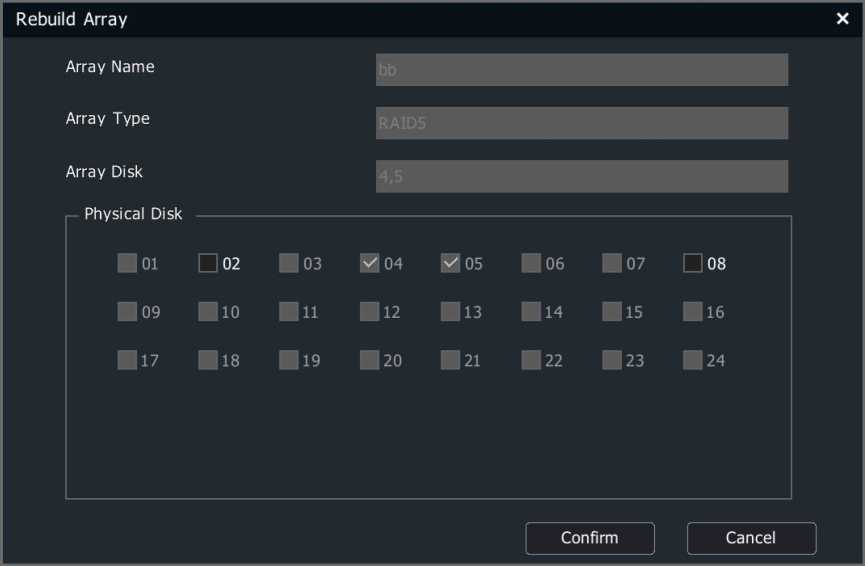
5, Delete array. Select the array to delete from the array list and click the
“Delete” button to delete the selected array from the system.
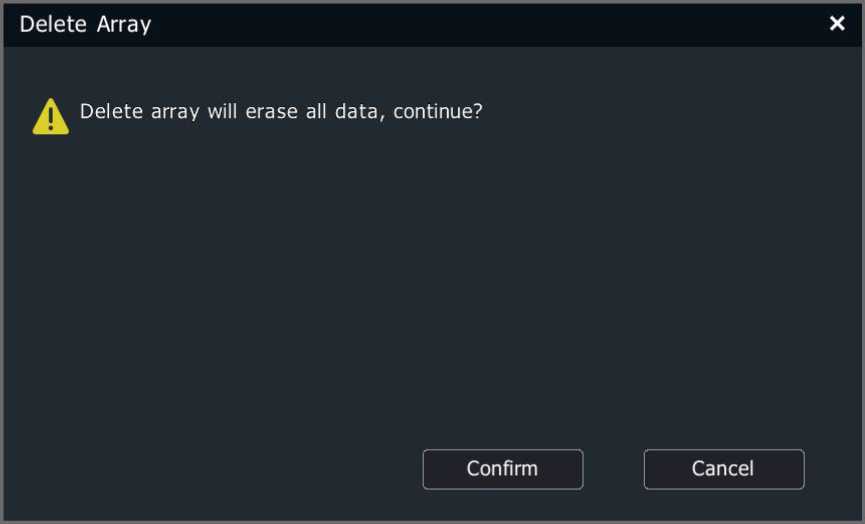
Enable the hot standby system (Note: The hot standby function is unavailable for 4- and 8-channel NVR and PSE series NVR). When a device in the hot standby system fails, the system will automatically switch to the hot standby unit which will work to ensure the continuity of video recording.
A hot standby system consists of several active units and hot standby units. An active unit can be set with up to 16 hot standby units. When the hot standby unit detects that the active unit is disconnected, the hot standby unit will actively connect to the front IPC connected to the active unit and start recording. When the hot standby unit detects that the active unit is connected, it will actively disconnect from the front IPC and upload the previous backup video to the active unit.
Active Unit Setting
1. Select “System Settings -> Hot-spare Setting” from the Main Menu to enter the hot standby setting interface.
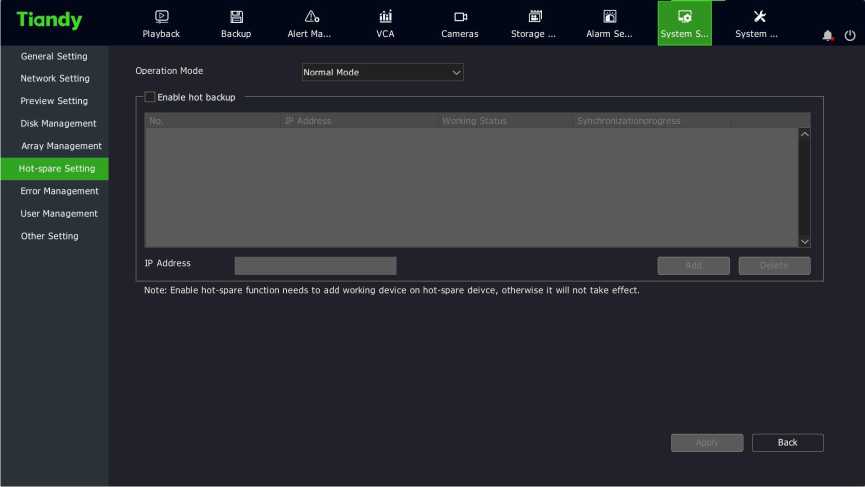
2. Select the Normal working mode.
- Check Enable Hot Standby, set the IP address of the hot standby unit, and click “Add”; or select the IP to delete and click “Delete”.
- After the specified hot standby unit is set and connected to the system successfully, the working status will be updated to “Connected Successfully”; When the hot standby unit actively uploads the backup video files, the working status is shown as “Sync Now”, and the synchronization progress bar shows the synchronization percentage.
Hot Standby Unit Setting
- Select “System Settings -> Hot-spare Setting ” from the Main Menu to enter the hot standby setting interface.
- Select the Hot Standby mode.
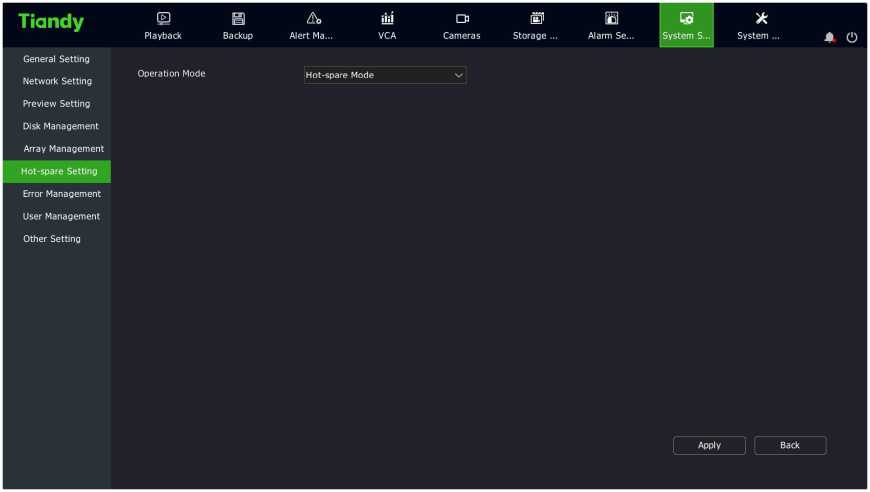
- Click the “Apply” button, and the system prompts that the device needs to be restarted to make the setting effective.
- When the device restarts and enters the hot standby working mode, the main interface of the system will change accordingly, and only hot standby setting, video setting, system setting, user management and shutdown options are available.
- Select “System Setting -> Hot-spare Setting ” from the Main Menu to enter the hot standby setting interface.
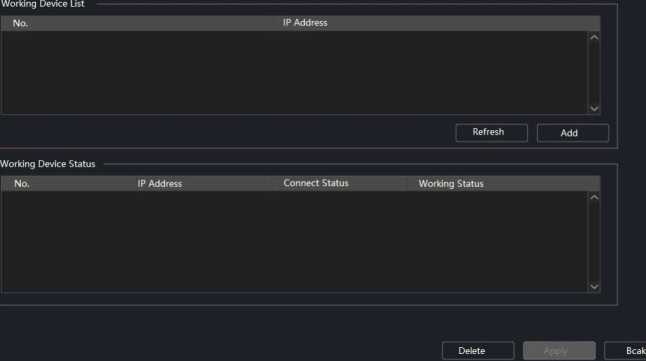
Hot-spa re Setting
Tiandy ® I s @ *
Hot-spar… Storage… Systems… System… 0 Q
Operation Mode Hot-spare Mode
- Click the “Refresh” button to display active units with hot standby function enabled in the active unit list. Select the active unit to set hot standby mode.
- Click the “Add” button, and the system will prompt you to enter the login username and password of this active unit. After verification, the IP and connection status of the active unit will be displayed in the active unit status list. If the password is wrong, the active unit status list will also show the IP of the active unit, but the status of the hot standby unit will be shown as “Connection failed”.
- Click “Apply” to save the configurations.
- On the hot standby configuration interface of the hot standby unit, select “Normal mode” to switch the hot standby unit back to the active unit.
![]()
otes:
- After the hot standby unit is changed to the active unit, the defaults should be restored manually.
- The system time of the active unit shall be the same as that of the hot standby unit.
Network error
- Select “Main Menu -> System Setting -> Error Management -> Network error” to enter the network exception setting interface, as shown in the figure below.
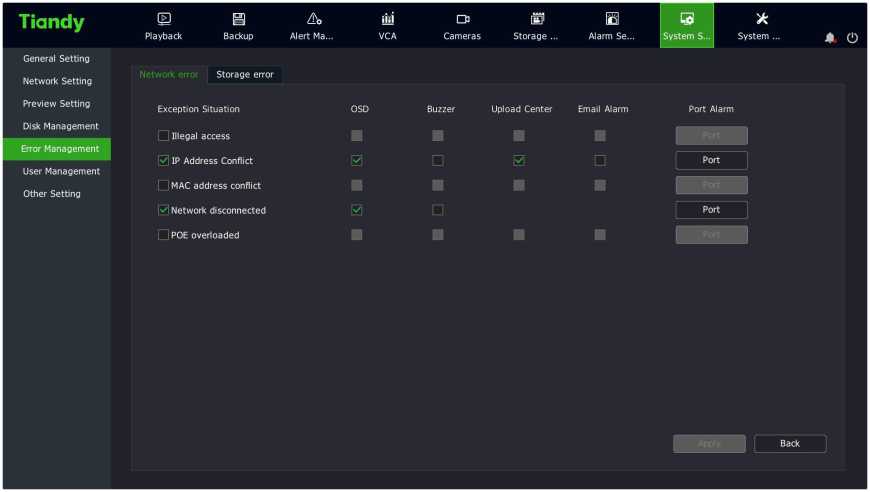
- If exceptions are checked, the corresponding linkage actions of the system, including screen display, voice prompt and upload center, can be checked when these exceptions occur.
Storage error 1. Select “Main Menu -> System Setting -> Error Management -> Storage error” to enter the storage exception setting interface, as shown in the figure below.
| Tiandy | e a a.
Playback Backup Alert Ma… |
iki
VCA |
a
Cameras |
ffll
Storage … |
E
Alarm Se… |
S X
System S… System … |
a o | |
| General Setting | ||||||||
| Network error Storage error | ||||||||
| Network Setting | ||||||||
| Preview Setting | Exception Situation | OSD | Buzzer | Upload Center | Email Alarm | Port Alarm | ||
| Disk Management | . . | |||||||
| 0 Disk full | 0 | □ | 0 | □ | Port | |||
| Error Management | ||||||||
| 0 No disk | 0 | □ | 0 | □ | Port | |||
| User Management | ■ | |||||||
| 0 Disk R/W error | 0 | □ | 0 | □ | Port | |||
| Other Setting | ‘ • | |||||||
| Unavailable redundant disk | □ | ■ | ■ | ■ | ||||
| 0 Disk is overload | 0 | □ | 0 | □ | Port | |||
| 0 Video Adnormal | 0 | □ | 0 | □ | Port | |||
| Abnormality found in smart of disk | 0 | □ | 0 | □ | Port | |||
| –z Abnormal temperature of the disk | 0 | □ | 0 | □ | Port | |||
| SHM detection is abnormal | ■ | ■ | ■ | ■ | I — 1 | |||
| 1 Back |
1, If exceptions are checked, the corresponding linkage actions of the system, including screen display, voice prompt and upload center, can be checked when these exceptions occur.
Add User
- Select “Main Menu -> System Setting -> User Management” to enter the user management interface, as shown in the figure below:
Tiandy
General Setting
Network Setting
Preview Setting
Disk Management
Error Management
User Management
Other Setting
E a sisi
Playback Backup Alert Ma… VCA
User List
D H E
Cameras Storage … Alarm Se…
s
System S…
X
System …
Username Group Permission Edit Delete
Admin Administrator /’
Default Default user
Add User Back
![]()
Note:
• The Default user is added. The Default user is active after logoff. Only local preview right can be configured for this user.
- Click “Add User” to enter the “Add User” interface, where you can set the user group, account, password, etc., as shown in the figure below:
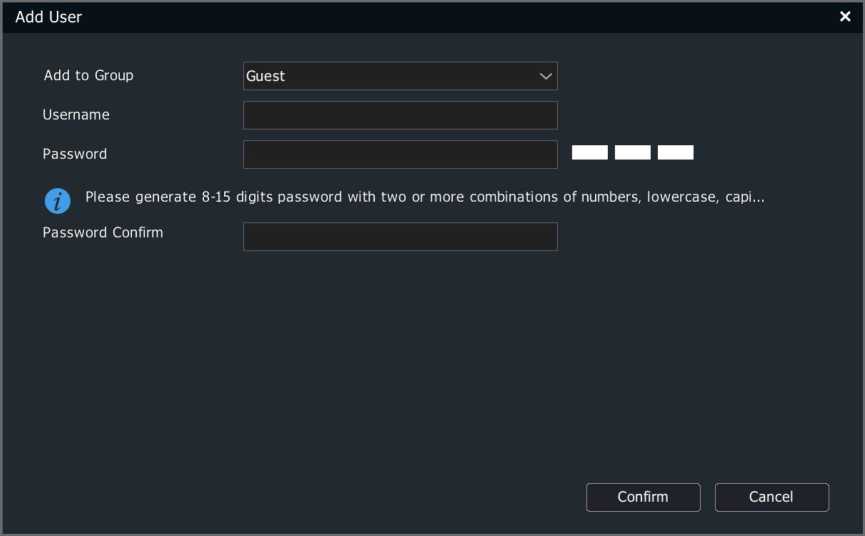
Notes:
- After a user is successfully added, the information about the added user is displayed in the Basic Config -> User List.
- Up to 16 users can be added.
- There are three user groups in the system: “Default users”, “Normal users”, and “Administrator”. The default permissions for each user group are as follows:
Default users: browse videos
Normal users: browse videos
Administrator: browse videos + device control + parameter setting
+ user management
User Permission Management
- Click the in the user list to display the user permission editing form,
as shown in the figure below:
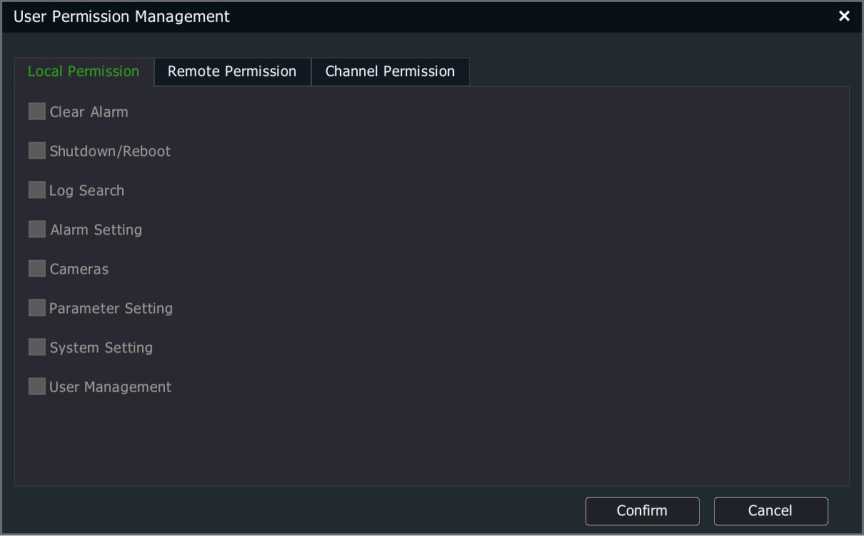
2. Descriptions of permissions:
- Local permissions: i.e. local operation permissions, including manual alarm clearing, shutdown/restart, log search, alarm setting, channel management, parameter setting, system setting and user management.
- Remote permissions: i.e. operation permission on a remote client, including manual alarm clearing, shutdown/restart, voice intercom, log search, alarm setting, channel management, parameter setting, system setting and user management.
- Channel permissions: Local preview, remote preview, local playback/snapshot browsing, remote playback/snapshot browsing, local PTZ control, and remote PTZ control.
3. Descriptions of channel permissions:
If the current user does not have the local preview permission for a channel, the channel will be unchecked (channel 4 as shown in the figure below). If the user has the local preview permission for the channel, the channel will be checked.
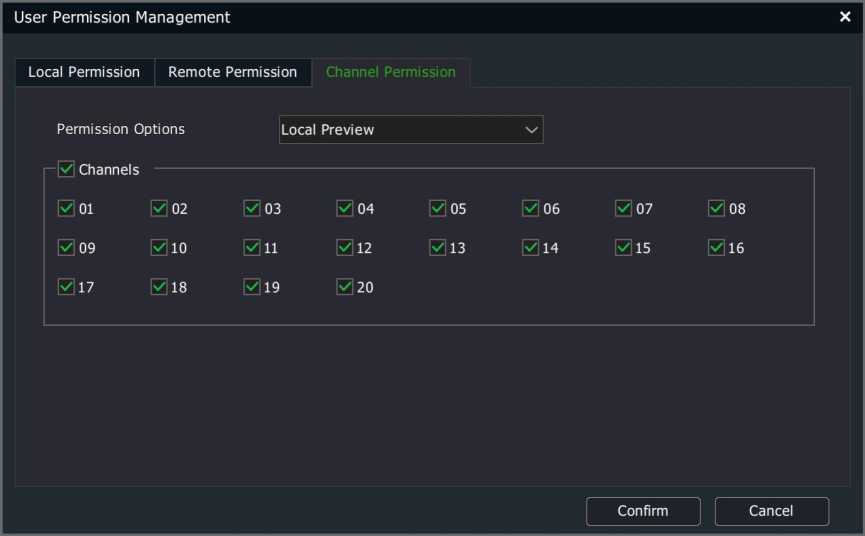
Edit User
1. Click / in the user list to display the edit user form, as shown in the
figure below:
Note:
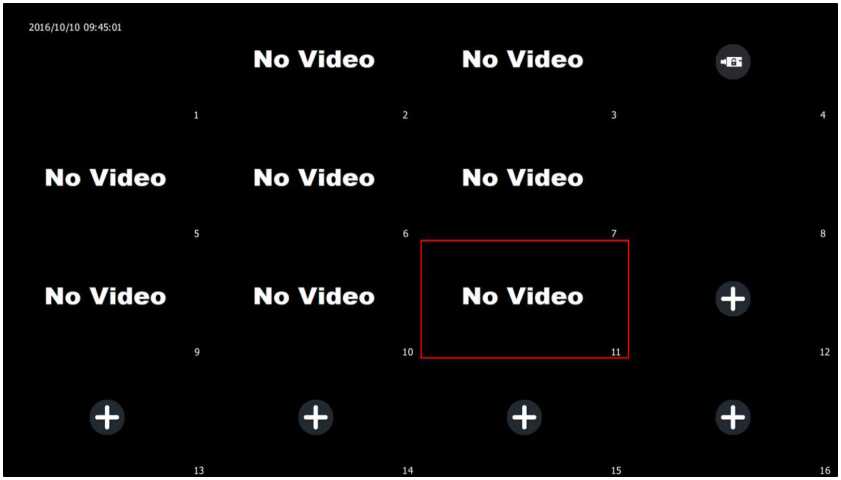
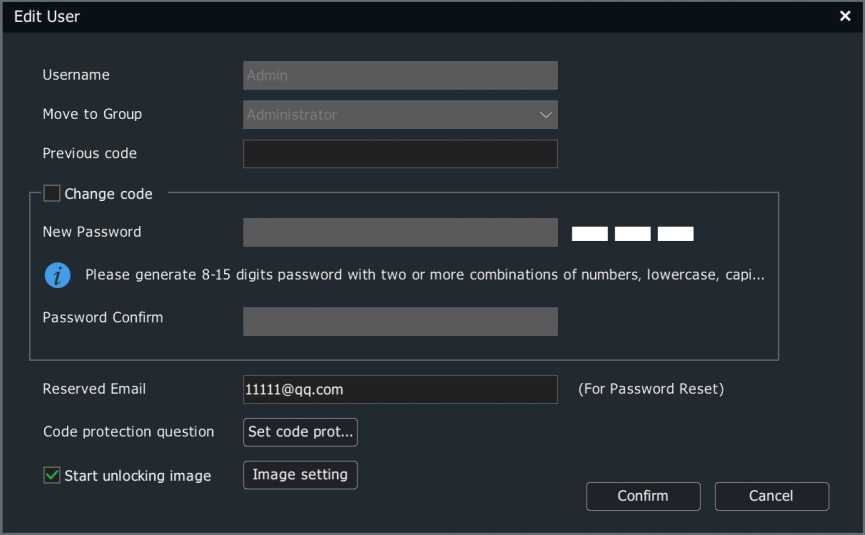
![]()
• Pattern unlocking and security problems are only available for admin user; The original password shall be entered to edit the admin user and click “OK”.
- Pattern Unlocking
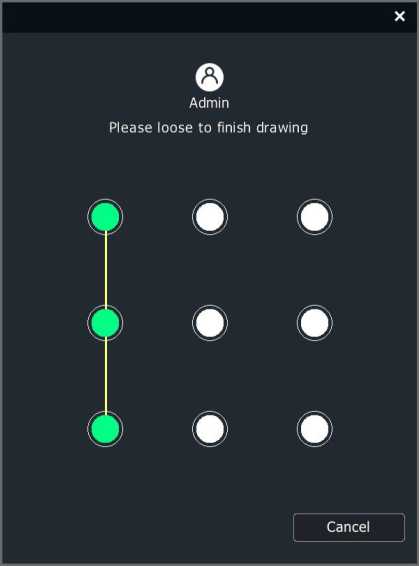
- After checking Enable Pattern Unlocking, the form as below will appear. The unlocking pattern can be correctly set only when a pattern composed of the same 4 points or more is drawn twice as instructed.
- Pattern unlocking is only available for the admin user.
- Pattern unlocking is not enabled by default on startup. After setting successfully, you can click pattern setting to modify the pattern.
- Security Problems
- Set security problems: After the admin user logs in, edit the user, and click the “Set Security Problems” button to enter the security problems setting interface, as shown in the figure below.
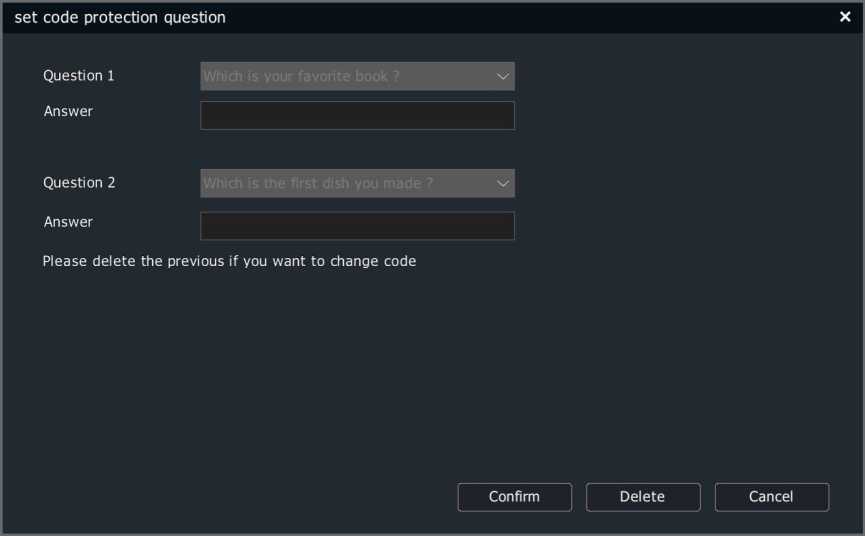
Users can set 2 security problems. If custom problems are selected,
the problems shall not be left empty.
- Security verification: In case that security verification is set, when the admin user logs in with his password, he can click the “Forget Password” button to change the password, as shown in the figure below:
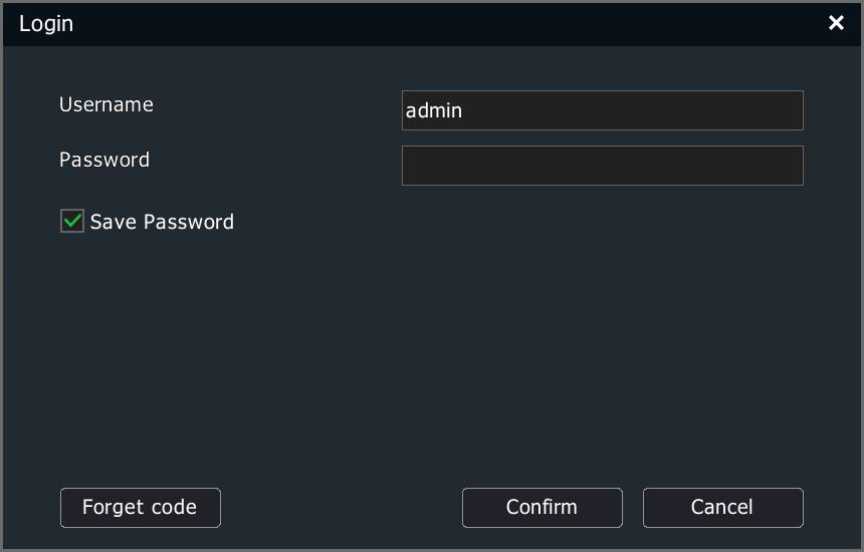
Click the “Forget Password” button to enter the security verification
interface, as shown in the figure below:
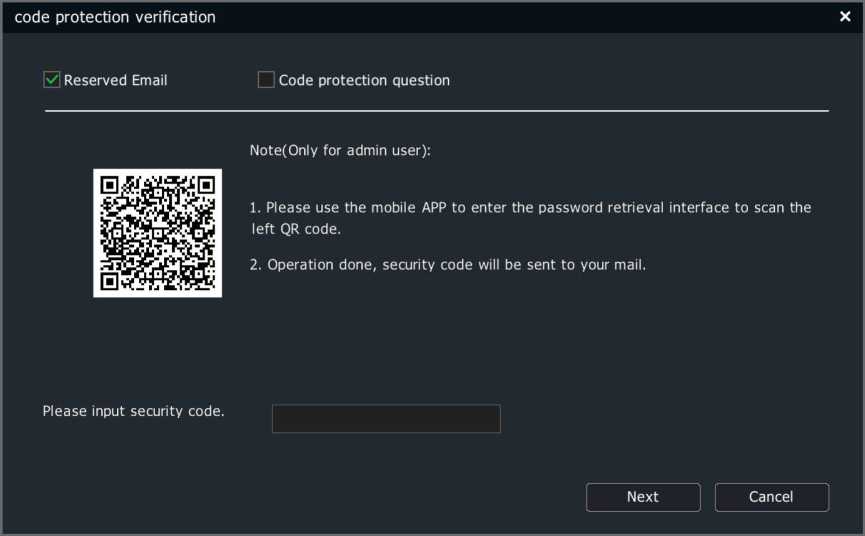
Email:
- Download the mobile APP to enter the password retrieval interface. (For the mobile APP download website, see Section 4.15 Mobile Monitoring “Mobile APP”)
- Scan the QR code on the left (the picture is for reference only).
- After scanning the QR code, the Email you leave will receive the security code.
4) Enter the security code to reset the new password.
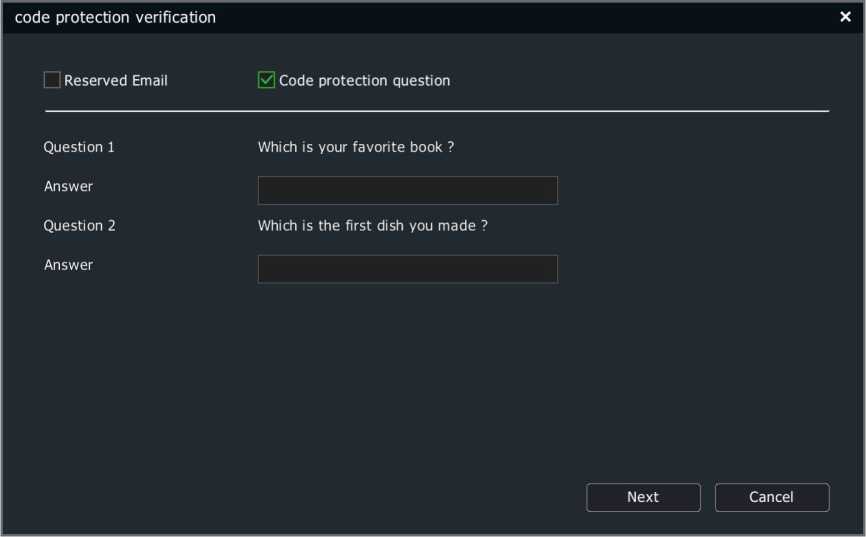
Security problems:
1) After entering the correct security answer and the new password, click the “Next” button.
2)Change your password.
3) If no new password is entered, the original password will not be changed after the security answer is verified.
(3) Delete security problems: In case that security problems are set, , clicking the “Security problems” button will enter the security problems setting interface. In this case, no security problem can be set. Instead, the original security problems shall be deleted. You can click the “Delete” button to delete the original security problems, as shown in the figure below:
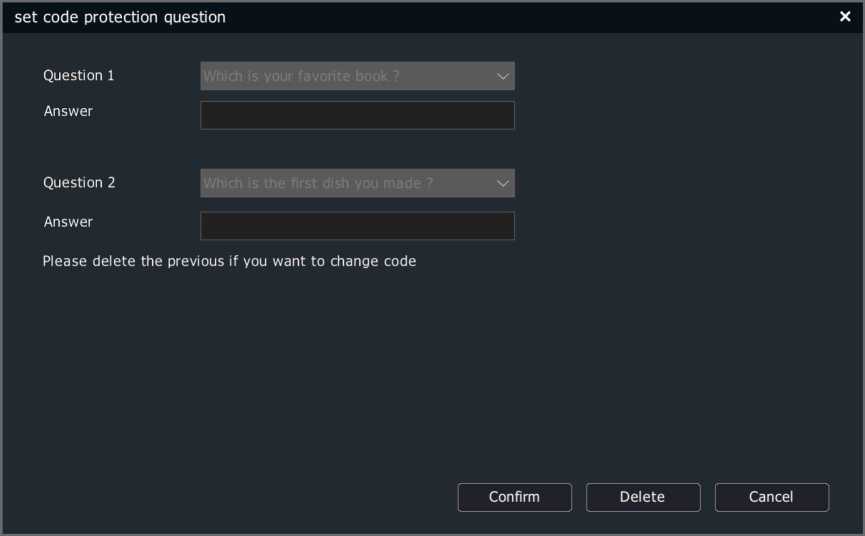
Device Lock
The device lock interface as shown in the figure below will appear after password unlocking fails for 5 times. The lock time will be 5 minutes.
It is locked
Lock the remaining time 4:55
Confirm
Video Encryption
1. Select “Main Menu -> System Setting -> Other Setting -> Video Encryption” to enter the video encryption interface, as shown in the figure below.
| Tiandy | E | a | iki | a | H | X | ||||
| Playback | Backup | Alert Ma… | VCA | Cameras | Storage … | Alarm Se… | System S… | System … | a o |
General Setting
, _ Video Encryption Type Management
Network Setting
Preview Setting T r. j
Input Password
Disk Management
Confirm Password
Error Management
User Management
Other Setting
Apply Back
Type Management 1. Select “Main Menu -> System Settings -> Other Settings -> Type Management” to enter the type management interface, as shown in the figure below, where you can set the video type name.
| Tiandy | E | a | iki | a | H | X | ||||
| Playback | Backup | Alert Ma… | VCA | Cameras | Storage … | Alarm Se… | System S… | System … | a O |
General Setting
, „ . Video Encryption Type Management
Network Setting
| Preview Setting | Type No. | Type Name | I | |
| Disk Management | 32 | VCA | – | |
| 33 | Record Type 02 | |||
| Error Management | 34 | Record Type 03 | ||
| User Management | 35 | Record Type 04 | ||
| 36 | Record Type 05 | |||
| Other Setting | 37 | Record Type 06 | ||
| 38 | Record Type 07 | |||
| 39 | Record Type 08 | |||
| 40 | Record Type 09 | |||
| 41 | Record Type 10 | |||
| 42 | Record Type 11 | |||
| 43 | Record Type 12 | |||
| 44 | Record Type 13 | |||
| 45 | Record Type 14 | |||
| 46 | Record Type 15 | |||
| 47 | Record Type 16 | |||
| 48 | Record Type 17 | |||
| 49 | Record Type 18 | |||
| 50 | Record Type 19 | |||
| xz | ||||

By setting alarm inputs, when an alarm occurs in the local NVR, users can be prompted, or perform video recording, etc.
- Select “Main Menu -> Alarm Setting -> Alarm Input” to enter the alarm input setting interface, as shown in the figure below.


![]()
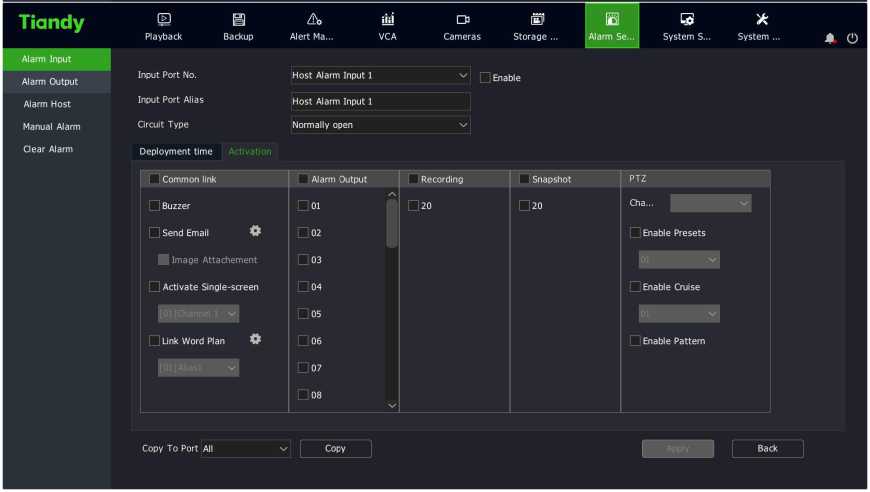
Wed
Thu
Sat
Sun
Copy
Back
Copy To Port All
- Select the input port number to set. On the interface, users can set local and host alarm input port numbers.
- Set the input port alias. Users can set a custom name for the current input port.
- Choose the annuciator type.
_]Notes:
- Open alarm: On when the alarm input port is open for the local NVR.
- Closed alarm: On when the alarm input port is closed for the local NVR.
- Check “Enable” to set the alarm input arming time.
- Enter “Activation” to set alarm linkage.
- Options include sound prompt, linkage Email, linkage video, linkage output, linkage snapshot, linkage PTZ, linkage text preplan, linkage single screen.
- After setting, parameters of other alarm input ports can be copied.
- Click “Apply” to save the setting parameters.
- Select “Main Menu -> Alarm Setting -> Alarm Output” to enter the alarm output setting interface, as shown in the figure below.
| Tia ndy | E | a | iki | a | H | E | s | X | ||
| Playback | Backup | Alert Ma… | VCA | Cameras | Storage … | Alarm Se… | System S… | System … | a o |
Alarm Input
| Alarm Output | Port | Local Alarm Output 1 | ZU |
| Alarm Host | Output port alias | Local Alarm Output 1 | I |
| Manual Alarm | Type | Normally open | |
| Clear Alarm | Delay | None | d |
| Date | Sun |
| 0 Time 1 | 00:00 ©I | – | 23:59 | |
| I | Time 2 | – | 00:00 | © | |
| I | Time 3 | – | © | ||
| Time 4 | 00:00 0′ | – | 00:00 | © |
Copy To Port All Whole W Copy
| | | Back
- Select the output port number to set. On the interface, users can set the local and host alarm output port numbers.
- Set the output port alias. Users can set a custom name for the current output port.
- Choose the annuciator type. The type must meet the requirements of the input signal of the external device on the alarm output port.
NO Notes:
- Open alarm: Under normal circumstances, the alarm output port is closed. When there is an alarm in the system and the linked output port acts, the alarm output port is open.
- Closed alarm: Under normal circumstances, the alarm output port is open. When there is an alarm in the system and the linked output port acts, the alarm output port is closed.
- Set signal delay time. The signal delay of the alarm output port can be set according to the actual needs.
- Set alarm output arming time. The arming date is used in conjunction with the time period.
- Copy to port. After setting, the parameters of other alarm output ports can be copied.
- Click “Apply” to save the setting parameters.
The alarm host is added to expand alarm I/O ports on the basis of the local alarm I/O ports. If both network alarm host and serial alarm host are added, the port number of the network alarm host is smaller than that of the serial alarm host.
Network Alarm Host
- Select “Main Menu -> Alarm Setting -> Alarm Host -> Network Alarm Host” to enter the network alarm host setting interface, as shown in the figure below.
Tia ndy
Alarm Input
Alarm Output
Alarm Host
Manual Alarm
Clear Alarm
| E | a | iki | a | H | s | X | ||||
|---|---|---|---|---|---|---|---|---|---|---|
| Playback | Backup | Alert Ma… | VCA | Cameras | Storage … | Alarm Se… | System S… | System … | o |
Network Alarm Host
Alarm Server
I | Enable
IP Address
Port
Alarm Input
Alarm Output
Back
- Set a number for the network alarm host.
- Check “Enable” to enable the network alarm host.
- Set the IP address of the network alarm host.
- Set the communication port of the network alarm host, which is limited to 18803. Only when the alarm host port number in the network alarm host IE is also set to 18803 can communication be normal.
- Set the number of alarm input ports of the network alarm host.
- Set the number of alarm output ports of the network alarm host.
Serial Port Alarm Host
1. Select “Main Menu -> Alarm Setting -> Alarm Host -> Serial Alarm Host” to enter the serial alarm host setting interface, as shown in the figure below.
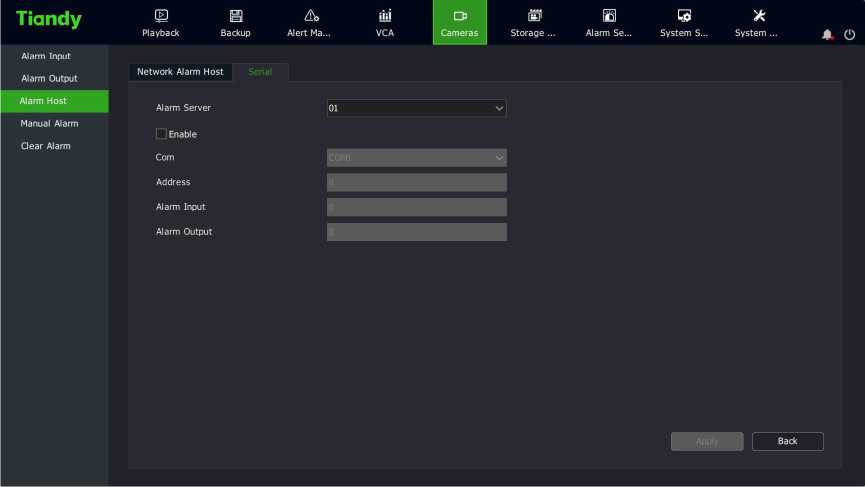
2. Set a number for the serial alarm host.
- Check “Enable” to enable serial alarm host.
- Set the serial port number for the serial alarm host.
- Set the address for the serial alarm host.
- Set the number of alarm input ports of the serial alarm host.
- Set the number of alarm output ports of the serial alarm host.
- Select “Main Menu -> Alarm Setting -> Manual Alarm” to enter the manual alarm setting interface, as shown in the figure below.
(g g] sisi
Tia ndy
Alarm Input
Alarm Output
Alarm Host
Manual Alarm
Clear Alarm
Playback Backup Alert Ma… VCA
Channel Alarm Output Port Alarm Name Activate
o H E S X
Cameras Storage … Alarm Se… System S… System …
| | 01 01 Local Alarm Output 1
Refresh Activate Clear
Back
- Select an alarm output port and click the “Trigger” or “Clear” for triggering or clearing. The alarm output port status bar shows the current status of the port. Click “Trigger All” or “Clear All” to trigger or clear all alarm output ports in the list. Click the “Refresh” button to get current property and status of the alarm output port.
- Select “Main Menu -> Alarm Setting -> Clear Alarm” to enter the manual clearing setting interface, as shown in the figure below.
| Tiandy | E | a | iki | a | H | s | X | |||
| Playback | Backup | Alert Ma… | VCA | Cameras | Storage … | Alarm Se… | System S… | System … | a o |
Alarm Input
| Alarm Output
Alarm Host Manual Alarm |
All | Clear
Port Alarm | Clear Smart detection | Clear |
| Clear Alarm | Video Loss Clear |
| VCA | Clear
Video Mask j Clear |
Back
- Select the alarm type to clear from the manual clearing interface. Options include “All”, “Port Alarm”, “Motion Detection”, “Video Loss”, “Intelligent Analysis”, and “Video Occlusion”. Click the corresponding button to clear this alarm type.
- Enter “Main Menu -> Warning Management -> Front-end Config”, as shown in the figure below.
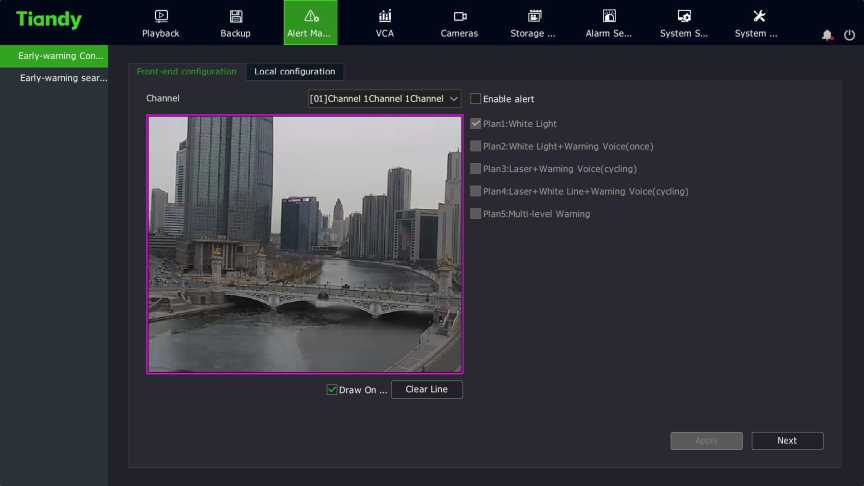
- Users can set warning parameters according to the actual situation or their preferences
3. Plan setting, as shown in the figure below:
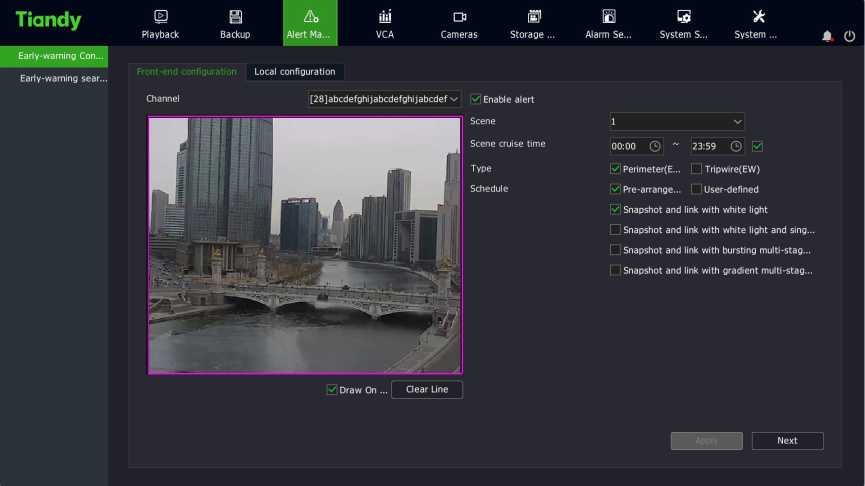
(1) Check “Enable alert”.
- Select warning type: perimeter warning or tripwire warning, and set the effective time of warning scene.
- Adjust the scene and draw a warning area or warning line. By default, the full screen of perimeter warning is the warning area. To adjust, clear lines and draw again.
- Select a preset warning plan.
- Click the “Save” button to complete the algorithm setting, and exit the alarm setting interface to make the settings effective.
4. Customize settings, as shown in the figure below:
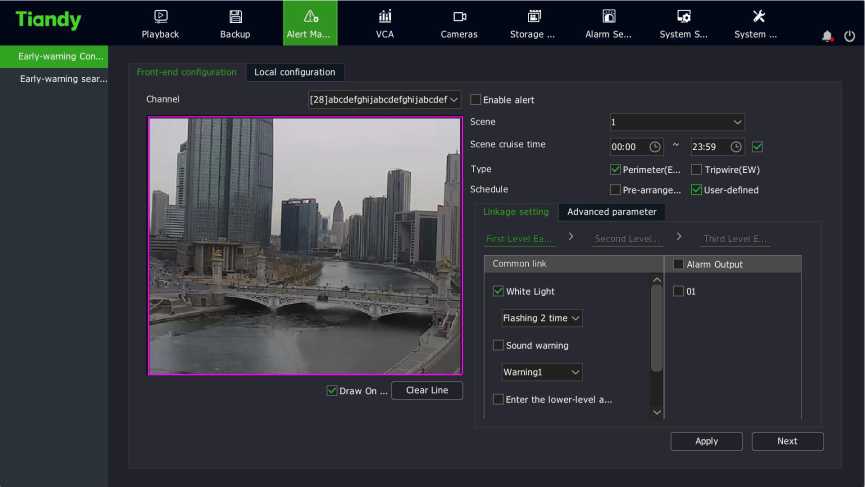
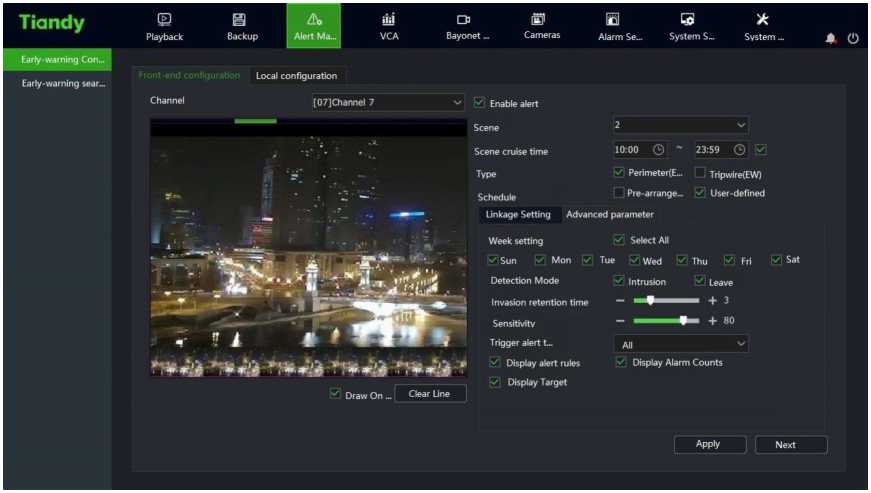
(1) Check “Enable effective warning algorithm”.
- Select warning type: perimeter warning or tripwire warning, and set the effective time of warning scene.
- adjust the scene and draw a warning area or warning line.
- Select Custom for warning template.
- Set linkage items or advanced parameters. Of them, up to three-level warning can be set for linkage item settings, and the warning effect at each level can be set separately.
- Click the “Save” button to complete the algorithm setting, and exit the alarm setting interface to make the settings effective.
Notes:
- Four scenarios are supported for the device. The above steps can be used to set multiple scenes, and scene cruise of different warning types or different linkage items can be realized by setting different cruise periods.
- The “exploded multi-level audible and visual warning” in perimeter warning works as follows: After a target enters the warning area, the white light flashes strongly and the voice prompt is given. The next level mode is enabled after reaching the retention time, and the linkage laser is switched on.
- The “progressive multi-level audible and visual warning” plan works as follows: It is divided into three levels by default, and the warning effect is enhanced step by step. When the retention time in the previous level is greater than the set value, the next level is enabled.
- Up to three levels of linkage can be set for linkage setting in the custom template. The linkage items can be set separately in each level. Among them, linkage tracking and entering the next warning level are mutually exclusive. When the linkage tracking is selected, the next warning level will not be enabled. When linkage tracking is selected, the tracking multiplier shall be set.
Adjust the angle and multiplier to determine an appropriate proportion when a target is in the picture when the monitoring scene is furthest. It is recommended that the target occupies more than 1/2 of the picture height. Click to set the tracking multiplier.
- The normally-on option of linkage white light in linkage setting means that when an alarm occurs, the white light is turned on, and off when the alarm is cleared.
- Advanced parameters in the custom template include arming weekday, detection mode, trigger alarm target, trigger sensitivity, maximum tracking time, display rules and target frame settings.
- Warning types are divided into perimeter warning and tripwire warning, which are aimed at intrusion zone, departure zone and crossing behavior. By default, the perimeter warning is an intrusion zone warning, and users can modify the detection mode in the advanced settings of the custom template.
- Warning detection target is people by default. Users can perform settings in Advanced Settings according their needs.
- The maximum tracking time is effective when the linkage tracking is enabled, which means that tracking action stops and warning
monitoring scene returns when the time is reached. The default is
300 seconds. When it is set to 0 seconds, the dome camera will
keep tracking until the target disappears.
4.13.2 Local Configuration of Early-warning Configuration
Enter the “Main Menu -> Alert Management -> Early-warning Config
-> Local Configuration” interface, as shown in the figure below.
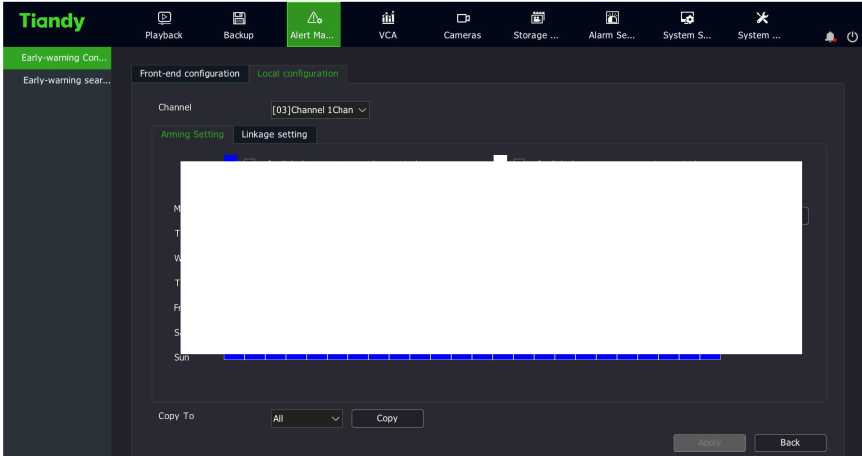

| Tiandy | E | a | Z&> | iki | a | H | s | X | ||
| Playback | Backup | Alert Ma… | VCA | Cameras | Storage … | Alarm Se… | System S… | System … | a o |
Early-warning Con…
_ , Front-end configuration Local configuration
Early-warning sear…
Channel [03]Channel IChan
Arming Setting Linkage setting
| □ Common link | □ Alarm Output | (2 Recording | (2 Snapshot | PTZ | |
| Buzzer | □ 01 | □ 02 | □ 02 | Cha… [02]Channel 1 | |
| OSD | □ 02 | □ 03 | □ 03 | Enable Presets | |
| □ Send Email © | □ 03 | □ 17 | □ 17 | 01 sc | |
| H Image Attachement | □ 04 | □ 18 | □ 18 | Enable Cruise | |
| Activate Single-screen | □ os | 19 | 19 | ot . | |
| □ Link Word Plan © | □ 06
□ 07 |
□ 20 | □ 20 | O Enable Pattern |
Copy To AH v I Copy
Back
- The arming time can be set on the arming setting interface.
- Enter “Linkage Setting” to set alarm linkage. Options include voice prompt, screen display, linkage video, linkage alarm output, linkage PTZ, linkage snapshot, etc.
- Enter the “Main Menu -> Alert Management -> Early-warning Search” interface, as shown in the figure below.


- Retrieval targets are divided into all, people, cars and others; types are: all, tripwire, perimeter – intrusion, perimeter – departure. Select the corresponding target and type and click the Search button to retrieve the corresponding warning data, as shown in the figure below:
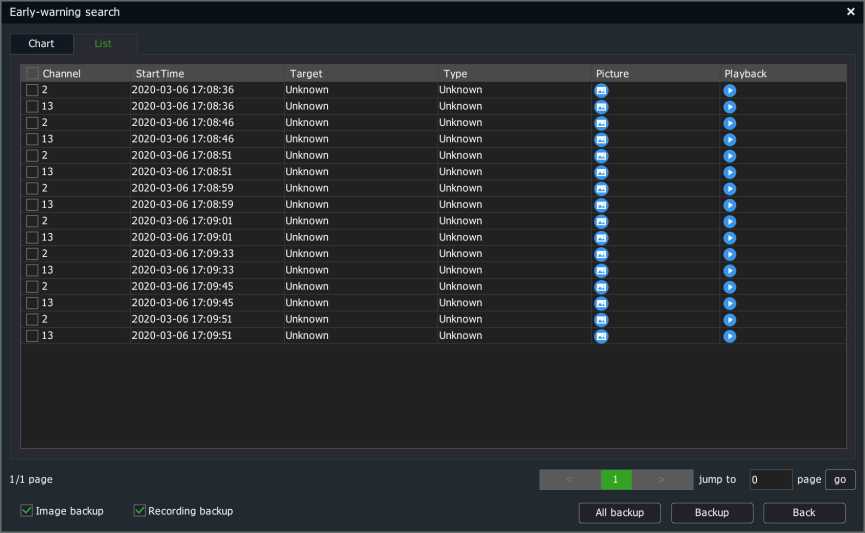
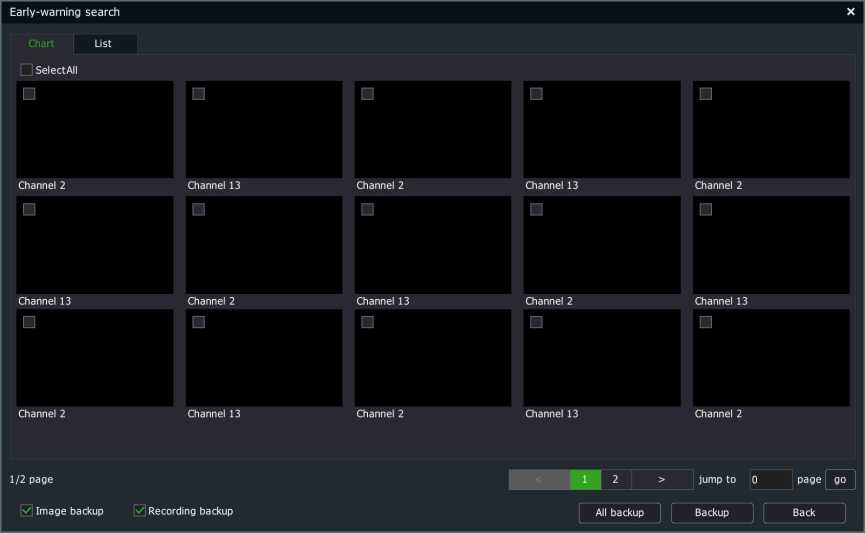
4.14. VCA
- Enter the “Main Menu ->VCA -> Smart Config” and select the “Event
Selection” tab, as shown in the figure below.
Tia ndy
Face library
Facial configuration
Facial search
o H E S X
Cameras Storage … Alarm Se… System S… System …
| Channel | [01]Channel 1 v | 0 Enable VCA |
|---|---|---|
| Behavior Analysis | O People Counting | |
| | On Duty Detection | Crowd Detection | |
| Video Diagnosis | Audio Abnormal Detection |
Face statistics
Smart Config
VCA Report
Alarm Information
E
Playback
a
Backup
Alert Ma…
VCA
1.Event Select 2.Event Parameter 3. Alarm Setting
Next
- Select the channel to set.
- Select whether to enable front-end intelligent analysis.
- Check the algorithm.
- Click the “Save Algorithm” button to save algorithm configurations.
Note:
• Illegal parking and linkage tracking features are available for only
some models. The real product shall prevail.
- Enter the “Main Menu -> VCA -> Smart Config”, and select the “Event Parameters” tab, as shown in the figure below.
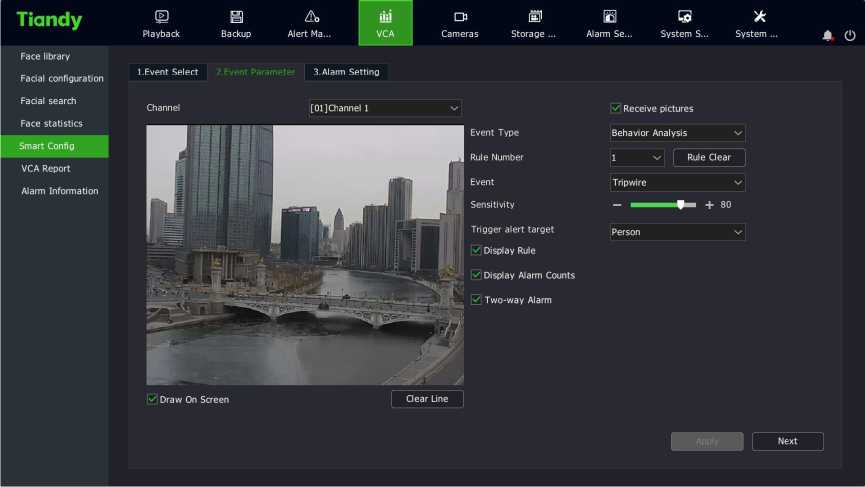
2. Intelligent analysis parameter setting:
- Rule No. : Select the rule for intelligent analysis. Up to 8 rules are supported for each channel.
- Receive pictures: Whether to receive pictures.
- Event: Selects intelligent analysis events. Options include tripwire, double tripwire, perimeter, abandoned object, object loss, wander, run, stop, warning, heat map, etc.
- Sensitivity: When the whole target enters the alarm area exceeding the proportion set, the alarm will be triggered. The sensitivity is between 0 and 100.
- Display rule: Displays rule information on the video.
• Display alarm count: Displays the alarm count on the video, and
alarms are accumulated one by one.
3, Select “Enable line” to start the line setting area for this rule, and
click “Clear line” to clear the border set on the video.
![]()
Note:
![]()
Facial configuration
Facial search
Face statistics
Smart Config
VCA Report
Alarm Information
| Channel | [01]Channel 1 v | Event Type | Behavior Analysis |
|---|---|---|---|
| Rule Number | 1- -I | Event | |
| Arming Setting | Linkage setting |
| Ol Common link | □ Alarm Output | |2 Recording | |2 Snapshot | PTZ | |
|---|---|---|---|---|---|
| □ Buzzer
□ OSD 01 Send Email O [0 Image Attachement Activate Single-screen |
< > cm cn t tn o o o o o o o □ □□□□□ | □ oi
□ 20 |
□ oi
□ 20 |
Cha… [01]Channel 1
Enable Presets Enable Cruise 01 Enable Pattern |
Back
• The event type of behavior analysis is dynamically changed
according to the algorithm supported by the front end.
1. On the event parameter interface, click “Next” to set alarm linkage, as shown in the figure below.
| Tiandy | E | a | a | H | s | X | ||||
| Playback | Backup | Alert Ma… | VCA | Cameras | Storage … | Alarm Se… | System S… | System … | a o |
Face library
1.Event Select 2.Event Parameter 3.Alarm Setting
Copy To |7n □ i Copy
- Select the rule number to set.
- Set the arming time on the arming setting interface.
- Enter “Linkage Setting” to set intelligent analysis alarm linkage. Options include voice prompt, screen display, linkage video, linkage alarm output, linkage PTZ, linkage snapshot, etc.
- When the algorithm is selected as heat map, only the arming time can be set, as shown in the figure below.
Tia ndy
E
Playback
a
Backup
Alert Ma…
| a | ffll | E | s | X |
|---|---|---|---|---|
| Cameras | Storage … | Alarm Se… | System S… | System |
Event Type
Event
Behavior Analysis
Face library
Facial configuration
Facial search
Face statistics
Smart Config
VCA Report
1.Event Select 2.Event Parameter 3.Alarm Setting
Channel [02]Channel 2 v
Rule Number 1 xz |
Arming Setting Linkage setting
Alarm Information
Copy To All V | Copy
Back
- After setting is completed, the parameters of other channels can be
copied.
![]()
Notes:
- Behavior analysis can be linked to the voicing system and front-end; Illegal parking can only be linked to the front end; Other algorithms cannot be linked to the front end and the voicing system. When linkage to the voicing system is set, it is linked to the single screen of this channel by default.
- Linkage to the front end is available for some front ends. The real product shall prevail.
2, Click Apply to save the settings.
- Enter the “Main Menu -> VCA -> VCA Report”, select the “People Counting” tab, select the channel number and report type, click the “Statistics” button for traffic statistics, display the statistical bar graph, select the statistic time, and click “Export” to export the corresponding report.
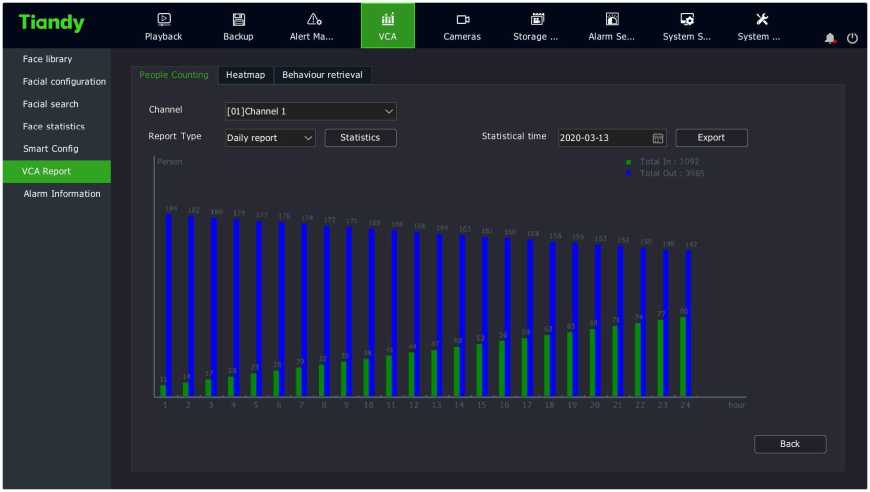
- Enter the “Main Menu ->VCA -> VCA Report”, and select the “Heatmap” tab, as shown in the figure below. Select the channel number and report type, and click the “Statistics” button to conduct heat map statistics by space or time, and display the imaging map or line graph. Click “Export” to export the corresponding picture or report.
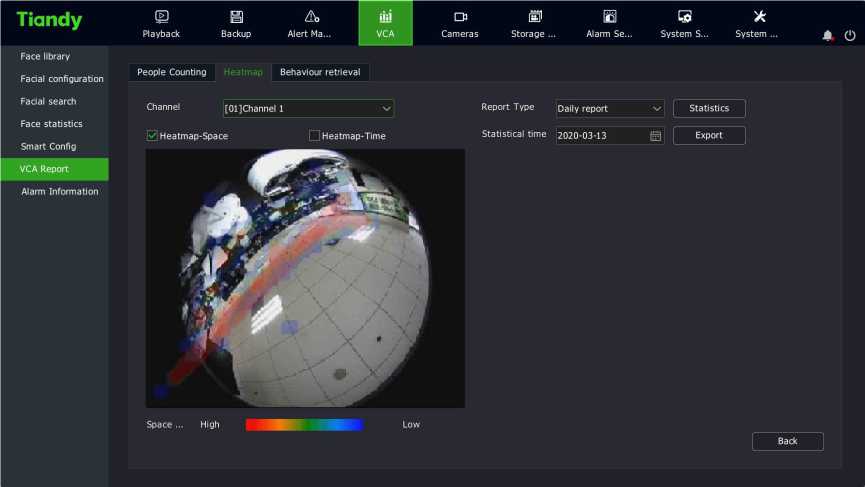
| Tiandy | e a a.
Playback Backup Alert Ma… |
ihi
VCA |
o H E S X
Cameras Storage … Alarm Se… System S… System … 0 0 |
|
| Face library
Facial configuration Facial search Face statistics Smart Config |
People Counting Heatmap Behaviour retrieval | |||
| Channel [01]Channel 1 v- Report Type Daily report v [ Statistics |
□ Heatmap-Space H Heatmap-Time Statistical time 2020-03-13 0 | Export 1 Heat value(second) |
||||
| VC A Report | ||||
| Alarm Information | ||||
Back
- Enter the “Main Menu -> VCA -> VCA Report” interface, and select the “Behavior Retrieval” tab, as shown in the figure below.
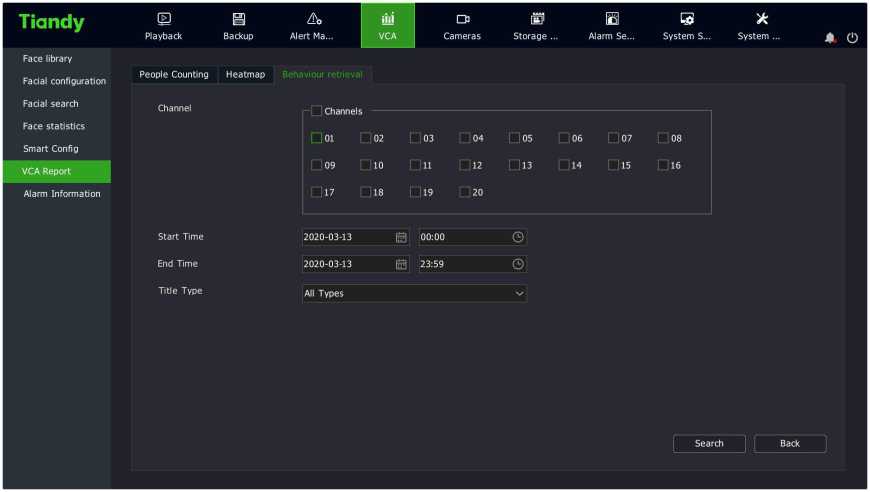
Select the channel, set the start date and time, select the event type, and click the “Search” button to enter the “Behavior Search” interface, which is divided into graph page and list page. You can click any channel on the graph page to view videos and double click to enlarge pictures; and you can click the Playback icon on the list page to enlarge pictures, as shown in the figure below.
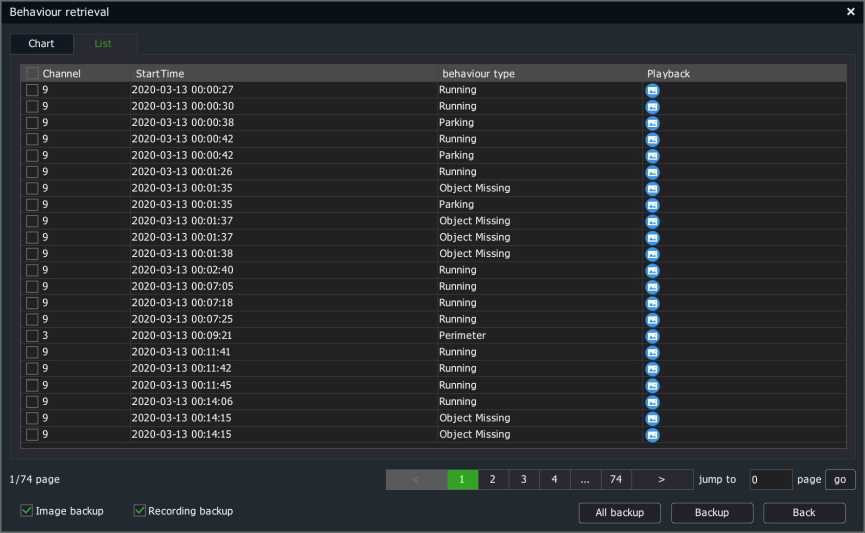
Face database management is intended for managing original face images by groups. Existing face database is shown in tables and the base images in the selected face database are shown in graphs, as shown in the figure below.
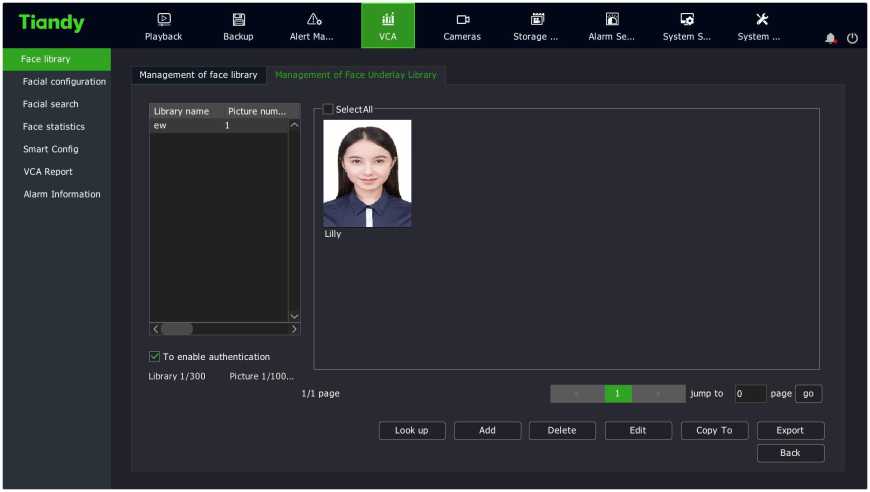
Tia ndy
E
Playback
a
Backup
A
Alert Ma…
iki
VCA
o H E S X
Cameras Storage … Alarm Se… System S… System …
Face library
Facial configuration
Facial search
Management nf face library Management of Face Underlay Library
Face statistics
Smart Config
VCA Report
Alarm Information
Library name □ ew
Picture number
Delete
Edit
Input
Input
Output
Output
Synchronize to front end
Synchronize to fron… P
Create Delete
0 To enable authentication Library 1/300
Picture 1/100000
Back
- The existing face database data can be retrieved from the face database management and the face image library can be managed by using buttons such as “Create” and “Delete”.
[Create]: Click the “Create” button to display a prompt box, where you can add the name and description of the face database. and after this, click the “OK” button to confirm your operations.
[Delete]: Select the face database to delete from the face database list, and click [Delete] to delete it.
[Set]: In the face database list, click “Set” to display a prompt box where you can modify the name and description of the face database, and after this, click the “OK” button to confirm your operations.
[Import]: In the face database list, click [Import] to import a box file containing the face database.
[Export]: In the face database list, click [Export] to export a box file containing the face database.
[Model All]: Click the “Model All” button to model all the base images in the database.
[Synchronize to Front End]: The face database in the NVR can be synchronized to the selected IPC channel. The interface is shown in the figure below:
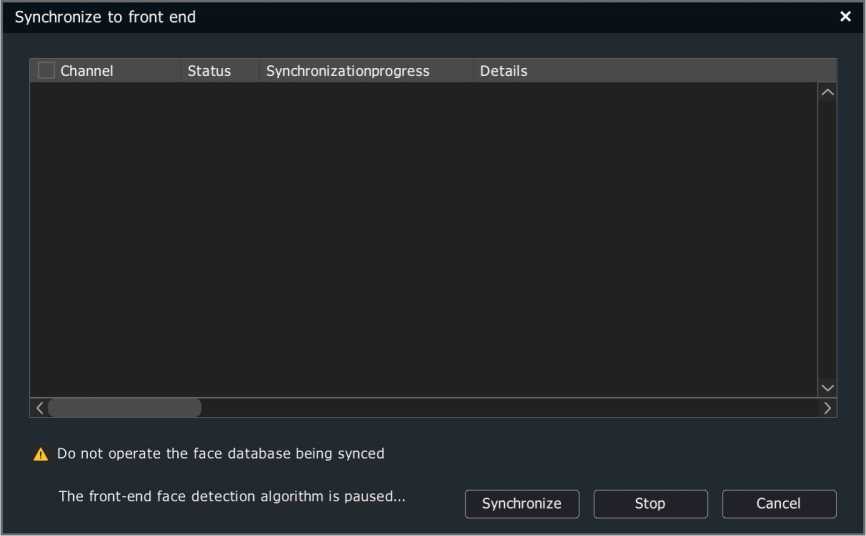
[To enable authentication]: only the administrator user can operate the face database.
- Base image management of the face database. The original face images are the basis of face recognition algorithm. Users can use the following buttons to manage the base images.
[Search]: Allows searching of base images meeting conditions in the face database through information about base images.
[Search by Image]: You can select images from mobile devices such as USB flash drive and then find the corresponding base images in the face database.
[Add]: You can select images from mobile devices such as USB flash drive and add them to the face database. If a folder is selected, you can add the images in the folder meeting the criteria;
[Delete]: The selected base image can be deleted from the face database
[Edit]: Edit the information about the selected base image. The information includes gender, date of birth, company, country, address, ID card type and ID card number. The modeling status indicates whether the base image has been retrieved and whether it can be identified for face recognition, as shown in the figure below:
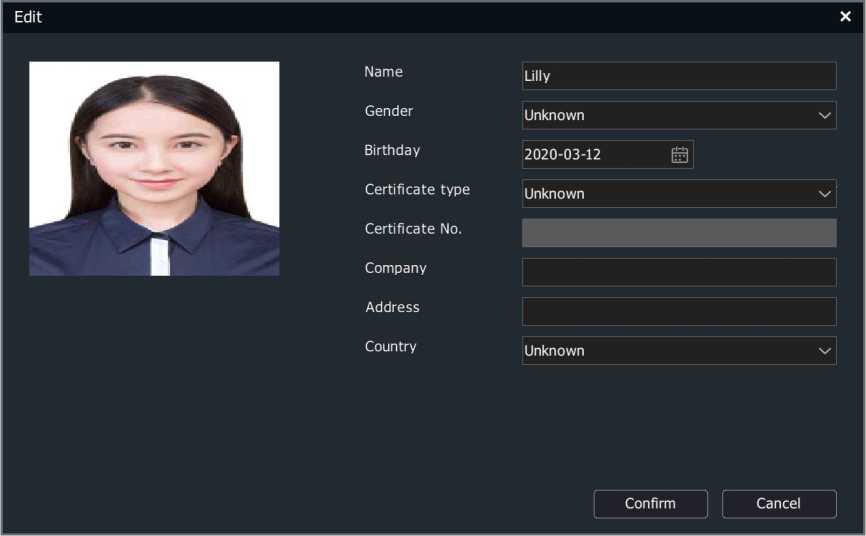
[Copy To]: The selected base image can be copied to other face
databases.
[Export]: The selected base image can be imported to mobile devices
such as USB flash drives.
![]()
Notes:
- The face database remains unchanged when the device is restored to defaults.
- The resolution of the added base images shall be more than 100*100 and less than 1920*1080.
- Up to 32 face databases can be managed. The maximum number of base images supported is subject to the real product.
- HDD shall be connected to import base images.
- It is recommended that the number of base images in a single face database should not exceed 5000.
- Enter the “Main Menu -> VCA -> Face Configuration” and select the “Face Detection” tab, as shown in the figure below.
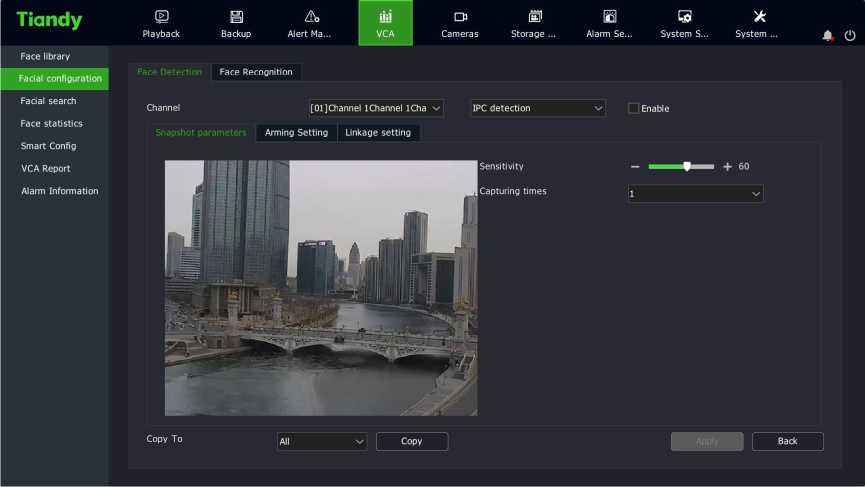
- Select the algorithm type of face detection, and choose to enable
IPC detection /NVR detection.
For IPC detection, the front-end is connected to the snapshot camera, which is used for face detection and NVR detection.
- Set the snapshot parameters.
- Draw face detection area: The detection area can be set on the screen during IPC detection.
Push policy: including optimal policy and fastest policy. “Optimal Policy” is the clearest picture of a person captured from his entrance to departure. The “Fastest Policy” is to snap a picture immediately when detecting a face
Number of snapshots: The number of snapshots taken when a face is detected. 1, 2 or 3 can be set.
Snapshot mode: full snapshot mode, high quality mode and custom mode.
“Full snapshot mode” means that all images are sent to the push module by default without security boundary control and filtering by security boundary threshold.
“High quality mode” refers to filtering by security boundary threshold configured for the system by default and sending the filtered results into the push module.
“Custom mode” refers to filtering by security boundary value set by the user, and sending the filtered results into the push module.
- Set the maximum and minimum face size to represent the percentage of the target width on the screen.
- Set the sensitivity. The larger the value is, the higher the sensitivity is. The increased detection rate will increase the error detection.
- Set the arming time.
- Set linkage settings. Set the local alarm linkages for NVR detection. Options include voice prompt, screen display, linkage video, linkage alarm output, linkage PTZ, linkage snapshot, etc.
^Notes:
- Only IPC detection can be enabled when the front end is a face recognition machine.
- NVR detection uses 1080P as standard. The higher the resolution is, the number of channels decreases. The maximum number of supported channels is subject to the real product.
- The snapshot parameters of IPC detection are changed dynamically according to the algorithm supported by the front end.
- Enter the “Main Menu -> VCA -> Face Configuration” and select the “Face Recognition” tab, as shown in the figure below.

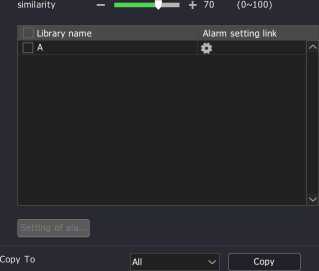
![]()
![]()
- Select the algorithm type for face recognition, and choose to enable
IPC Recognition/NVR recognition.
For IPC recognition, the front end is connected to the recognition camera, which is used to identify and compare the captured face, while NVR recognition refers to the recognition and comparison of the captured face.
- Stay alarm. Select the “Stay Alarm” tab to set the parameters of stay alarm.
- Enable stay. Enable/disable the stay alarm function of the current channel.
- Upload identification info. Enable/disable the upload identification info function.
- Similarity. Set the similarity. The larger the value is, the more similar it will be.
- Stay time. Set the range of stay time from 1 to 99, in minutes and seconds.
- When the white library is checked, the stay alarm will not be triggered.
- Click Linkage Setting to set the arming linkage parameters of the stay alarm.
Note:
• When IPC detection is selected for the channel, up to 16 channels for NVR recognition are supported; When NVR detection is selected for the channel, up to 8 channels for NVR recognition are supported. The maximum number of supported channels is subject to the real product.
- Enter the “Main Menu -> VCA -> Face search”, and select the ” Retrieve by event” tab, as shown in the figure below.
| Tiandy | E | a | ihi | a | H | s | X | |||
| Playback | Backup | Alert Ma… | VCA | Cameras | Storage … | Alarm Se… | System S… | System … | a o |
Face library
| Facial configuration | Retrieve by event | Retrieve by feature | ||||||||||
| Facial search | Channel | Channel | ||||||||||
| Face statistics | ||||||||||||
| □ 01 | □ 02 | □ 03 | □ 04 | □ 05 | □ 06 | □ 07 | □ 08 | |||||
| Smart Config | ||||||||||||
| VCA Report | □ 09 | □ 10 | □ 11 | □ 12 | □ 13 | □ 14 | □ 15 | □ 16 | ||||
| Alarm Information | □ 17 | □ 18 | □ 19 | □ 20 | ||||||||
| Start Time | 2020-03-17 | 0 00:00 | ||||||||||
| End Time | 2020-03-17 | 0 23:59 | © | |||||||||
| Event Type | All | □1 | ||||||||||
Search I Back
“Retrieve by Event”: Users can choose the corresponding channel, and set the statistical type for the channel (options include all, face detection, comparison alarm, stranger alarm, frequency alarm, and stay alarm) to retrieve the corresponding type of data. The retrieved data is a snapshot picture of a face. Double-click the corresponding photo to see a large background image.
- Enter the “Main Menu -> VCA -> Face search”, and select the “Retrieve by Picture” tab, as shown in the figure below.
| Tiandy | E
Playback |
a
Backup |
iisi
Alert Ma… VCA |
a
Cameras |
ffll
Storage … |
E
Alarm Se… |
s
System S… |
X
System … |
a 0 |
| Face library | |||||||||
| Retrieve by event | Retrieve bv feature | ||||||||
| Facial configuration | |||||||||
| Facial search | Channel | Channels | — | — | |||||
| Face statistics | |||||||||
| □ 01 □ 02 □ 03 | □ 04 | □ os | |||||||
| Smart Config | |||||||||
| VCA Report | |||||||||
| Start Time | 2020-03-17 A 00:00 | © | |||||||
| Alarm Information | . , . | — | |||||||
| End Time | 2020-03-17 B 23:59 | ZU | |||||||
| similarity | – + 73 | ||||||||
| |~T~| Upload sample 1… | |||||||||
| ft | |||||||||
| [X7| Upload sample f… | |||||||||
| 5 cache images of sample… | J | ||||||||
| Search | Back | z | |||||||
“Retrieve by Picture”: Users can select the corresponding channel, and set the channel number, similarity and sample picture, and then clicks the “Retrieve” button to filter out alarm pictures of the corresponding similarity from all the alarm pictures.
- Enter the “Main Menu ->VCA -> Face Search”, and select the “Retrieve by Feature” tab, as shown in the figure below.
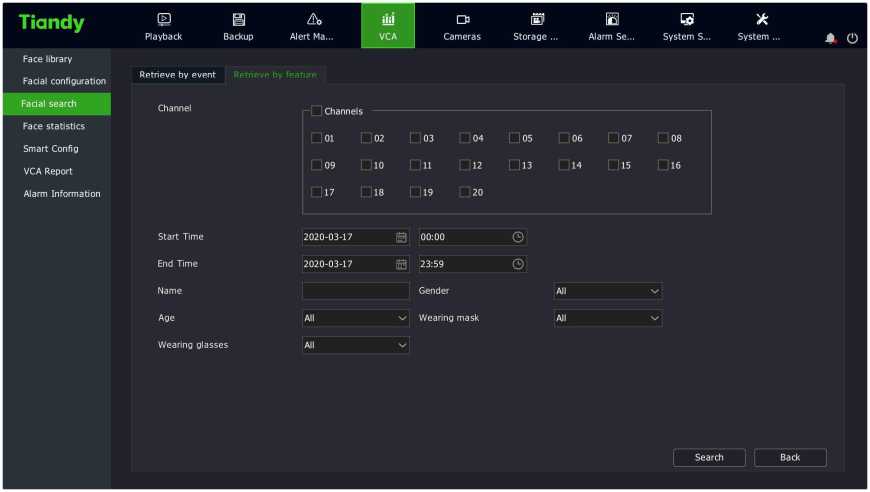
“Retrieve by Feature”: Users can select the corresponding channel, set the channel name, gender, age, glasses and mask, and click the “Retrieve” button to filter out the alarm pictures of the corresponding features from all the alarm pictures.
- Enter the “Main Menu -> VCA -> Face Statistics”, and select the “Feature Statistics” tab. On the “Feature Statistics” interface, select the channel number, report type, and statistic type, and click the “Statistics” button to conduct face data statistics. The data displayed may be different, depending on statistic methods: Age, gender, glasses and mask are displayed in a list or pie graph, and the number of people is displayed in a list, bar graph or line graph. Select the statistics time and
click “Export” to export the corresponding report, as shown in the figure below:
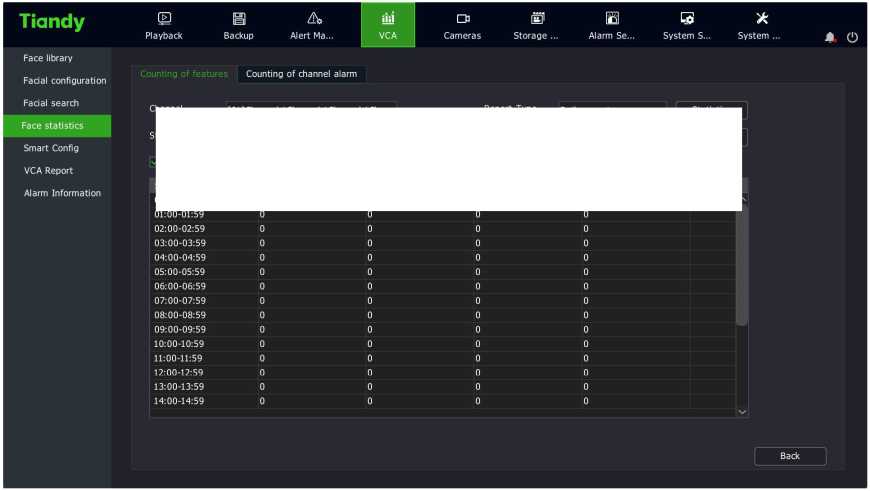

- Select the “Counting of Target Alarm ” tab. The target alarm statistics can include the alarm count of the corresponding library within the time period. Select the target library, report type, statistics time, and click “Statistics” to view the data. Click “Export” to export the corresponding report, as shown in the figure below:
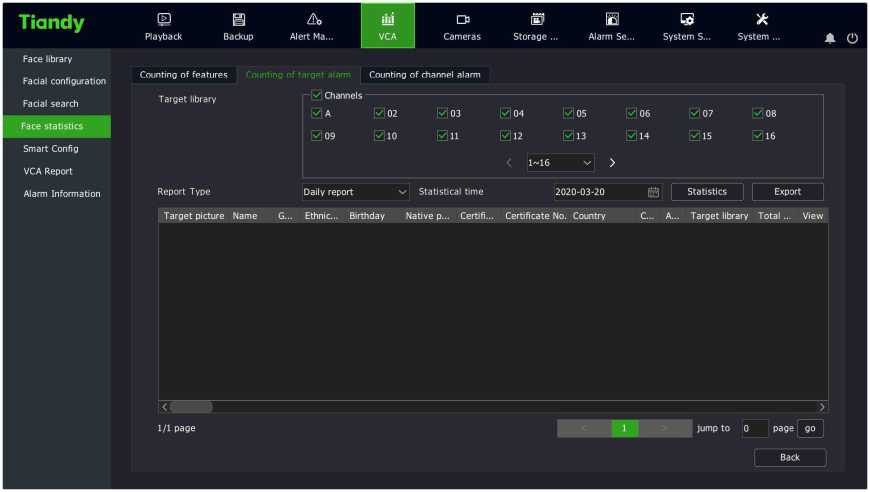
- Select the ” Counting of Channel Alarm” tab. Channel alarm statistics include the alarm count of the corresponding channel within the time period. Select channel, event type, report type, and statistics time, and click “Statistics” to view the data. Click “Export” to export the
corresponding report, as shown in the figure below:
Tia ndy
E
Playback
a
Backup
A
Alert Ma…
o H E S X
Cameras Storage … Alarm Se… System S… System … 0 0
Face library
Facial configuration
Facial search
Face statistics
Smart Config
Counting of features Counting of channel alarm
VCA Report
Alarm Information
Event Type
Statistical time
Channels
001 002 003 004 005 006 007 008 009 010
011 012 013 014 015 016 017 018 019 020
All vj Report Type Daily report [ Statistics j
2020-03-11 j|j | Export
Total number of al
08
Channel N
Drag via mouse to see details
Back
- Enter the “Main Menu -> VCA -> Alarm Infomation” interface to
display the real-time alarm information, as shown in the figure below.
Tiandy
E
Playback
a
Backup
Alert Ma…
| a | ffll | E | s | X |
|---|---|---|---|---|
| Cameras | Storage … | Alarm Se… | System S… | System |
Face library
Facial configuration
Facial search
Face statistics
Smart Config
Channel
Rule Number
Event
Real-time alarm information
[02]Channel 2 v
All v
All v
VCA Report
Alarm Information
Channel Rule Number Target ID Status
Counts Reset
Back
The real-time alarm information of the selected channel can be viewed on this interface.
2. Click the “Counts Reset” to clear the alarm information of the front
end
Users can download the mobile client by scanning the QR code and input the user ID for mobile monitoring.
1, Right-click the mouse button to enter the right-click menu, and select “Mobile Monitoring” to enter the mobile monitoring interface,
as shown in the figure below.
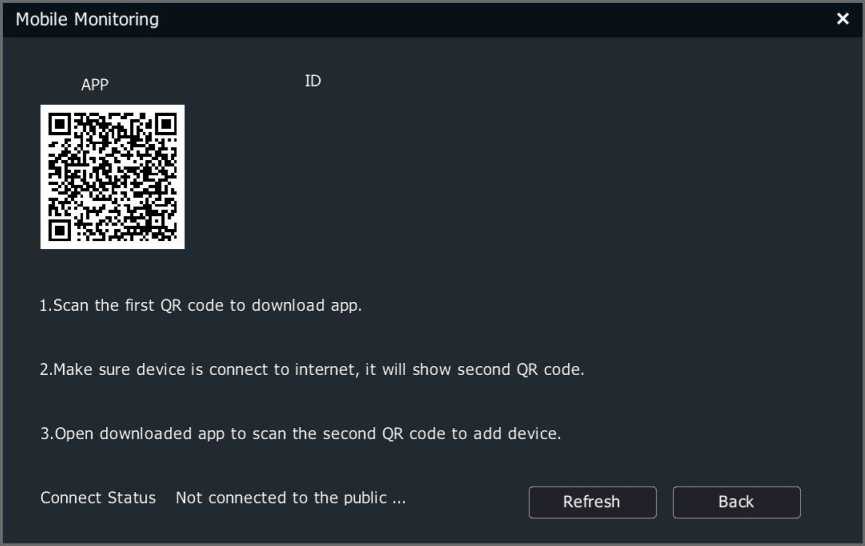
2,Users scan the first “Mobile APP” to download the client, then scan the QR code at the “Device ID”, and operate according to instructions to conduct video preview and control in the mobile phone.
- Internet Keyboard
- Select the communication port. To control embedded DVRs, Ethernet port shall be used.
- Power cable and control cable pass through under the bottom shell and are connected to the correct positions. Install the rubber strip.
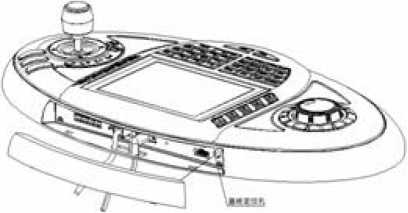
5.2 Description of Keys
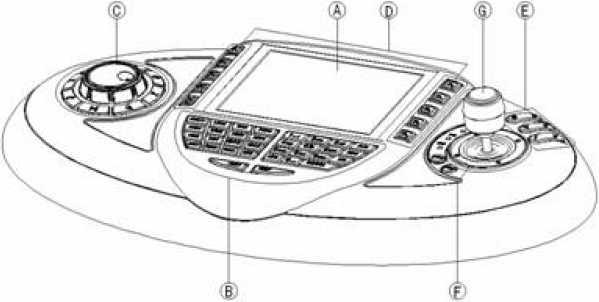
Blue backlit, optional Chinese/English UI, real-time display of device status/programming information.
Green backlit.
Key “1”: 1/symbol
Key “2”: 2/A/B/C
Key “3”: 3/D/E/F
Key “4”: 4/G/H/I
Key “5”: 5/J/K/L
Key “6”: 6/M/N/O
Key “7”: 7/P/Q/R/S
Key “8”: 8/T/U/V
Key “9”: 9/W/X/Y/Z
Key “0”: number 0 or space
ESC: Deletes a character before the cursor
ENTER: Confirmation of menu/various setting interfaces
ACK: Manually clears all alarm outputs
PREV: On the synch playback full screen interface, press F2 to enter the full screen and press this key to enable digital zoom.
NEXT: On multi-screen sync playback full screen, press F2 to enter the full screen and press this key to enable the full single screen.
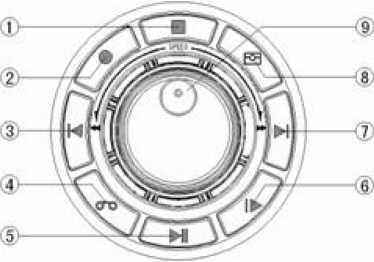
Blue backlit. The functions of each key for controlling embedded DVRs are as follows:
- Stop playing video files
- Enter the manual video setting interface
- Playback: Multi-screen full screen synch playback red box is switched to the previous small screen
- Enter the video preview setting interface
- In playback mode, control the playback and pause of video files
- Single frame step. Play one frame for each press when playing back video files
- Playback: Multi-screen full screen synch playback red box is switched to the next small screen
- Switch to the playback screen.
- Shuttle knob:
Clockwise rotation of the inner ring of the shuttle: Increases preview/playback volume
Anti-clockwise rotation of the inner ring of the shuttle: Reduces preview/playback volume
Clockwise rotation of the outer ring of the shuttle: Fast forward of video playback
Anticlockwise rotation of the outer ring of the shuttle: Fast reverse of video playback
CAM: Recording starts
MON: Recording stops
ALM: Snapshot
Yellow backlit. The functions of each key for controlling embedded DVRs are as follows:
Key F1: Switch to the Main Menu
Key F2: Switch to the PTZ control status or enter the full screen from non-full screen
Key F5: Exit and return to the previous menu or exit full screen during playback
Key F3: Switch the input method between number/pinyin/lowercase English letter/uppercase English letter
Key F4: Switch to logoff menu
Key F6: Intercom (reserved)
Key F7: Reserved
Key F8: call out the system info display interface
Blue backlit. Used to control the action of the camera in PTZ control mode.
t $<0’h
On the digital zoom interface, the Aperture ON/OFF button can be used to zoom in/out the digital zooming area
F Control Device Type Selection and Matrix Override Control Key Area:
Button backlight is supported.
[MODE]: Control device selection, To control embedded NVRs, DVR shall be selected.
[PRI]: Reserved.
Rocker up, down, left and right actions realize the functions, including:
Up: In the control menu, used to select the previous item
In PTZ control mode, control the PTZ to move up
In video preview mode, used to select the previous channel
Down: In the control menu, used to select the next item
In PTZ control mode, control the PTZ to move down
In video preview mode, used to select the next channel
Left: In the control menu, used to select the previous item
In the PTZ control mode, control the PTZ to move left
In video preview mode, used to page up
Right: In the control menu, used to select the next item
In the PTZ control mode, control the PTZ to move right
In video preview mode, used to page down
Calculate the total capacity required a hard disk video recorder according to the video recording requirements (video type, video storage time).
Calculation method:
- According to Equation (1), calculate the storage capacity required by a single channel per hour, in MByte.
,,=rf,+8x 3600.1024,1)
Wherein: – bit rate, in Kbit/s
- After determining the recording time requirement, calculate the storage capacity m‘ required by a single channel according to Equation (2), in MByte.
= = «■ X x A (2)
Wherein: h‘ – recording time per day (hours)
— the number of days the video needs to be stored
- According to Equation (3), calculate the total capacity Qt (total) required for timer recording of all channels of a hard disk video recorder.

(3)
Wherein: c – the total number of channels for a DVR.
 According to Equation (4), calculate the total capacity Qt (total) required alarm recording (including motion detection) for all channels of a hard disk video recorder.
xa%(4)
Wherein: a% – alarm incidence.
| The fault phenomenon | Possible reasons for |
| After the 220V power supply is connected and the power switch is | 1) The power cable is damaged |
| turned on, the “PWR” indicator on the panel (for 2U chassis, it is “Ready”) is not on, and the fan is not running. | 2) The power switch is faulty |
| After the 220V power supply is connected and the power switch is turned on, the “PWR” indicator on the panel (for 2U chassis, it is “Ready”) is on in green, but the fan is not running. |
|
| After the hard disk video recorder is turned on, the monitor connected to VOUT has no signal. |
|
| The hard drive cannot be found on startup. |
|
| 3) The hard disk is damaged | |
| Recording is impossible |
|
| Video and audio network
transmission fail in the client. |
|
| the mother board is
broken |
- Maintenance Instructions
- Dust on the circuit board, if dampened, will cause short circuit, which will affect the normal operation of the equipment and even damage the equipment. To ensure the long-term and stable operation of the equipment, please regularly remove dust inside the cabinet.
- Please ensure that the equipment is well grounded to avoid interference with video and audio signals and damage of equipment by static electricity or surge voltage.
- Do not plug and unplug audio and video signal cables, RS-485, alarm interfaces under live conditions, which may easily damage the port.
- Do not directly cut off the mains power to shut the equipment down, but to use the OFF button on the front panel (press and hold for more than 3 seconds) or on the video interface to allow the system to shut down automatically and then cut off the mains power to avoid damage to the hard disk.
- Please keep the equipment away from heat sources and places.
- Please maintain good ventilation around the equipment case for heat dissipation.
- Please check and maintain the system regularly.
