VMS Integration Best Practices A customer/integrator is using Arecont Vision cameras and running into various issues. They need a process to follow to streamline their troubleshooting issues.
API documentation can be found here: https://http-api.arecontvision.com/
NOTE: VMS vendors (confirmed: Avigilon, ExacqVision, Milestone) are no longer updating the Arecont Vision driver. The focus has shifted to ONVIF compatible cameras. Ensure the functions/features you want are compatible via ONVIF.
NOTE: CostarHD partners listed will only use one license for our OMNI cameras (4 sensors)
- Avigilon
- ExacqVision
- Milestone
NOTE: All Contera cameras must be added as ONVIF.
NOTE: Just because a device is ONVIF compliant does not mean all features/functions (i.e. motion) will be supported. See this link: https://www.onvif.org/conformant-products/ and filter it by CoStar Technologies and then look at the respective model. For example, the AV5255PMIR-SH (MegaDome 2 Series) is ONVIF Profile S compliant. Per the ONVIF Profile Feature Overview motion is not supported in Profile S. If motion is required, the camera must support motion detection and the Arecont Driver must be used when adding the camera to the VMS.
Read Next : ONVIF Device Manager Review Guide and Download
Resolution:
Verify camera functionality.
- Verify the camera Web UI is accessible and that you can see live video in the browser.
- Verify you can view the RTSP stream from the same computer the VMS software is installed on.
- Verify you can see the live stream of the camera using ONVIF Device Manager
- Do not troubleshoot any VMS problem until the above steps pass.
VMS Guidelines:
- Check with the VMS manufacturer if the camera requires a specific firmware version.
- Information on any matrix they provide may be outdated and only show firmware they have had time to certify. There will typically be newer firmware on the Arecont Vision website which resolves camera issues we have identified and resolved.
- NOTE: Downgrading camera firmware is not always possible in the field once you are at a particular revision. It will require the camera to be sent in as an RMA to be reflashed to the required version.
- If there is an issue when the camera is added to the VMS with the Arecont driver, attempt the below:
- Remove the camera from the VMS.
- Re-add it using the ONVIF or RTSP option.
- If it is successful, the Arecont driver they provided is out of date.
- If there is an issue when the camera is added to the VMS with the ONVIF driver, attempt the below:
- Remove the camera from the VMS.
- Re-add it using the Arecont Driver if available or RTSP option.
- If it is successful, verify the camera datasheet states the camera is ONVIF compliant.
- Check the VMS manufacturer for a software update.
Troubleshooting VMS integrations with ONVIF Device Manager
Issue:
A problem is seen in a particular model connected to the Video Management System.
Resolution:
- Verify both the camera and VMS are at the latest software revisions.
- A third-party tool called ONVIF Device Manager (ODM) (https://sourceforge.net/projects/onvifdm/) will be installed on the VMS. This tool will be used to identify if the issue is camera or VMS related.
- Install ODM and launch the program. It will begin auto discovering cameras. If your camera is not populated you can manually add it on the lower left.

- Enter the username (admin) and the password for the camera.

- Once logged in, select the camera. There are links to view the live video from each sensor(s) depending on the camera model.

- Monitor the live video from here to see if the symptoms experienced in the VMS can be replicated.
How to connect to RTSP streams on Arecont cameras
- Click HERE for the API documentation.
- You will need to use VLC to open a network stream. Download VLC from HERE.
- Click on Media and select Open network stream
- Copy and paste the syntax RTSP stream you wish to view.
Single Sensor RTSP URL:
rtsp://CAMERA_IP_ADDRESS/h264.sdp?res=half/full&x0=X0&y0=Y0&x1=X1&y1=Y1&qp=[4..51]&[doublescan=0/1]&bitrate=[upto64Kbps]&ratelimit=[upto64Kbps]&fps&sei=on&iframe=1/0&ssn=[1..65535]
Basic example:
rtsp://192.168.5.10/h264.sdp?res=half
Basic example with authentication:
rtsp://admin:Password2020$@192.168.5.10/h264.sdp?res=half
Dual Sensor RTSP URL:
rtsp://camera_ip/h264.sdp?res=(half|full)&x0=(0..1600)&y0=(0..1200)&x1=(32..1600)&y1=(32..1200)&qp=(16..36)&ssn=(1..65535)&[bitrate=(0..65536)]&[fps=1..100]&[channel=color|mono]
Basic examples:
rtsp://192.168.5.10/h264.sdp1?res=full&doublescan=0&ssn=465
rtsp://192.168.5.10/h264.sdp2?res=full&doublescan=0&ssn=466
Basic examples with authentication:
rtsp://admin:Password2020$@192.168.5.10/h264.sdp1?res=full&doublescan=0&ssn=465
rtsp://admin:Password2020$@192.168.5.10/h264.sdp2?res=full&doublescan=0&ssn=466
Quad Sensor RTSP URL:
rtsp://camera_ip/h264.sdp<channel>?res=(half|full)&x0=(0..1600)&y0=(0..1200)&x1=(32..1600)&y1=(32..1200)&qp=(16..36)&ssn=(1..65535)&[bitrate=(0..65536)]&[fps=1..100]
Basic examples:
rtsp://CAMERA_IP_ADDRESS/h264.sdp1?res=full&doublescan=0&ssn=465
rtsp://CAMERA_IP_ADDRESS/h264.sdp2?res=full&doublescan=0&ssn=466
rtsp://CAMERA_IP_ADDRESS/h264.sdp3?res=full&doublescan=0&ssn=467
rtsp://CAMERA_IP_ADDRESS/h264.sdp4?res=full&doublescan=0&ssn=468
rtsp://192.168.5.10/h264.sdp1?res=full&doublescan=0&ssn=465
rtsp://192.168.5.10/h264.sdp2?res=full&doublescan=0&ssn=466
rtsp://192.168.5.10/h264.sdp3?res=full&doublescan=0&ssn=467
rtsp://192.168.5.10/h264.sdp4?res=full&doublescan=0&ssn=468
Basic example with authentication:
rtsp://admin:Password2020$@192.168.5.10/h264.sdp1?res=full&doublescan=0&ssn=465
How to connect to RTSP streams on Contera cameras
- Click HERE for the API documentation.
- You will need to use VLC to open a network stream (Media > Open Network Stream). Download VLC from HERE.
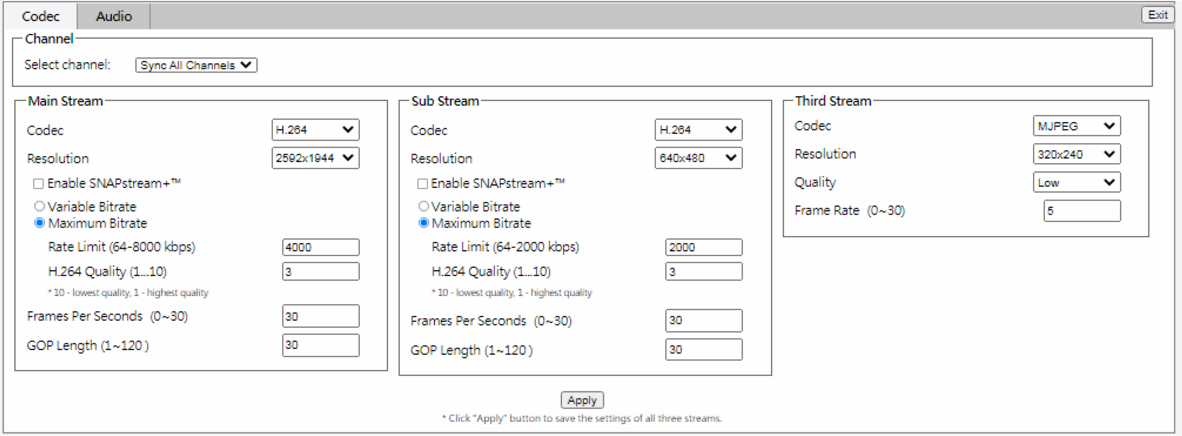
- Log in to the camera web page and click Video & Audio. Confirm your stream settings for the Main, Sub Stream, and MJPEG streams are set to what you want.
- Click Network and select the RTSP tab. What is displayed below is the base string to use. If you want to view another channel append “_X” X being the channel number.
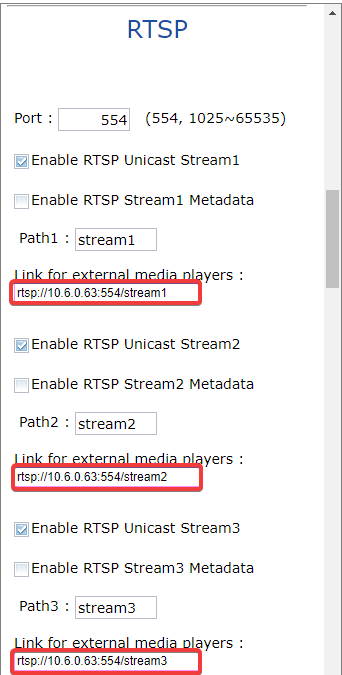
Main Stream:
rtsp://172.18.0.47:554/stream1_1
rtsp://172.18.0.47:554/stream1_2
rtsp://172.18.0.47:554/stream1_3
rtsp://172.18.0.47:554/stream1_4

Sub Stream:
rtsp://172.18.0.47:554/stream2_1
rtsp://172.18.0.47:554/stream2_2
rtsp://172.18.0.47:554/stream2_3
rtsp://172.18.0.47:554/stream2_4

MJPEG Stream:
rtsp://172.18.0.47:554/stream3_1
rtsp://172.18.0.47:554/stream3_2
rtsp://172.18.0.47:554/stream3_3
rtsp://172.18.0.47:554/stream3_4
Exacq: Contera Onvif Driver Integration
Issue:
- Contera cameras will be stuck on “Connecting”.
- Customers using Contera series cameras may be requested by Exacq technical support to downgrade the firmware to an older release.
Downgrading is NOT required as you should be on the latest camera firmware release.
Environment:
Contera series cameras
Resolution:
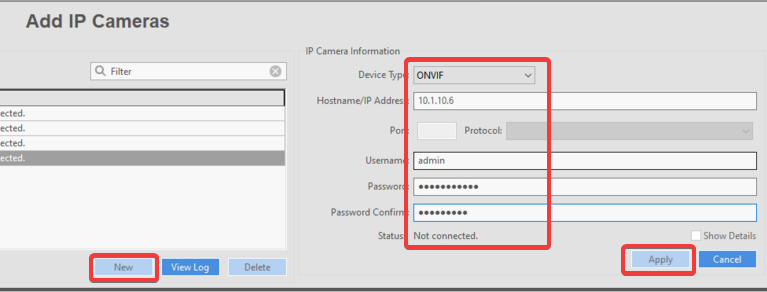
Contera series cameras MUST be added using the ONVIF driver. Attempting to add the camera using the auto discovery method uses the Arecont Vision driver and will not work.

- Click New.
- Select ONVIF from the drop-down.
- Provide the IP address of the camera.
- Provide the username and password.
- Click Apply.
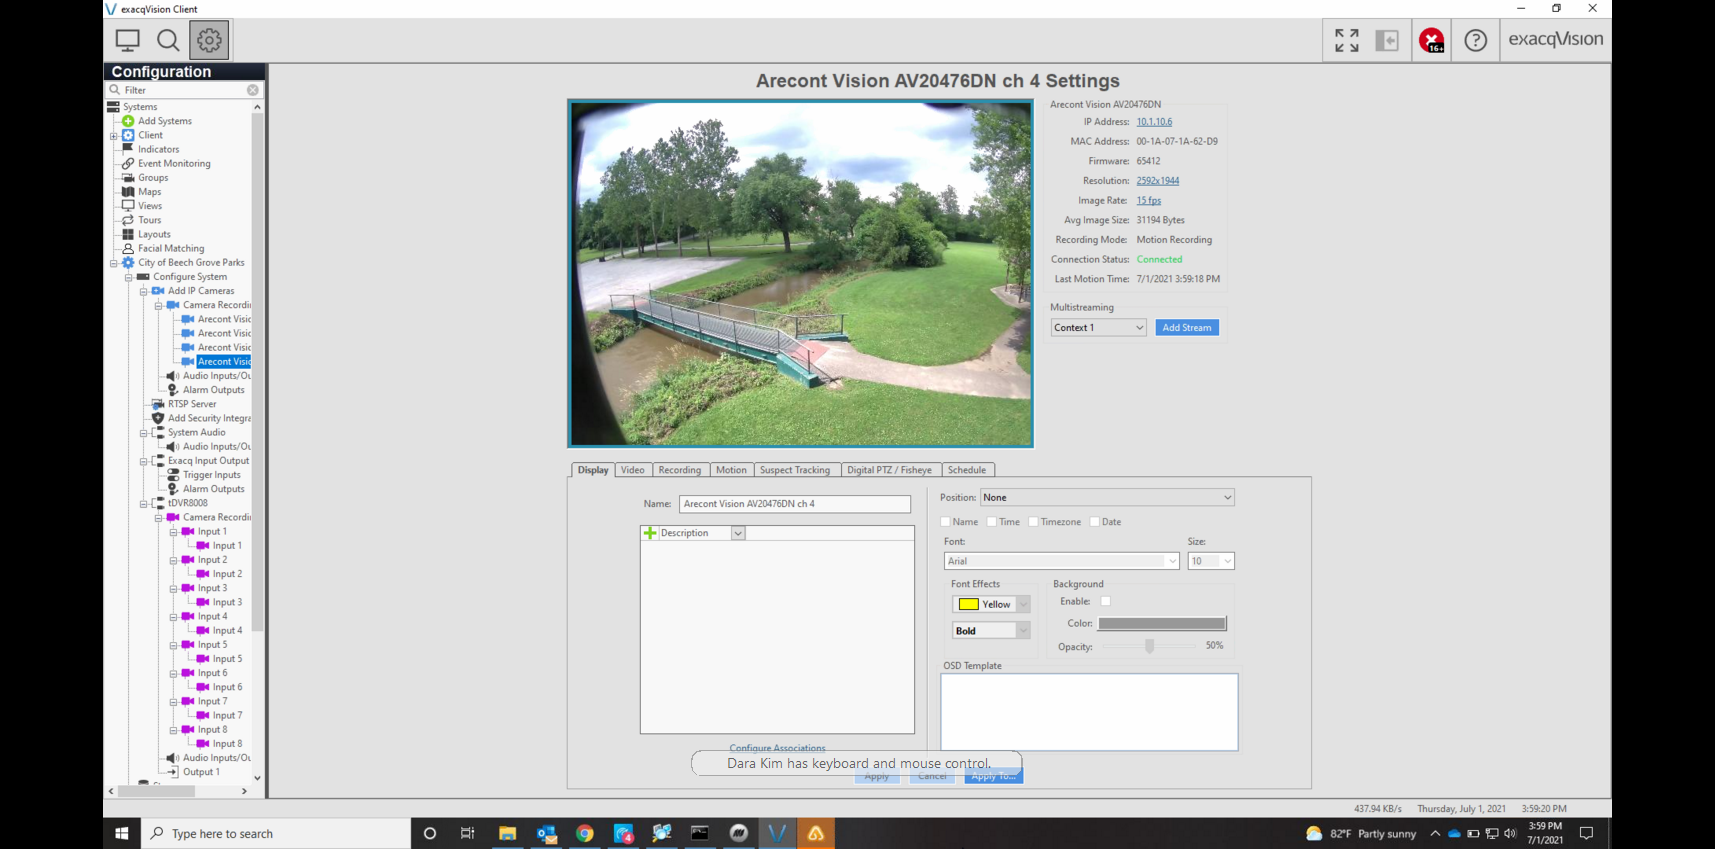
- Click on the camera from the navigation tree on the left. You should see 4 inputs for multisensor cameras. In the example below, it’s an AV20476DN running firmware 65412.
