Uniview NVR Remote Access This guide will show how to view a Uniview NVR on the mobile app EZView.
You will need a network connection for this setup.
How To View A Uniview NVR Remote Access Via EZView App
This guide will show how to view a Uniview NVR on the mobile app EZView.
You will need a network connection for this setup.
Step 1. Connect The NVR To Your Network
First, you will need to connect the NVR to your network. Taking a cat5e/cat6 cable from the LAN port on the NVR, then the other end will go to your router or network switch.
Step 2. Log Into The NVR and Enable EZCloud
We will be going through this process via the web interface on internet explorer from a local PC.
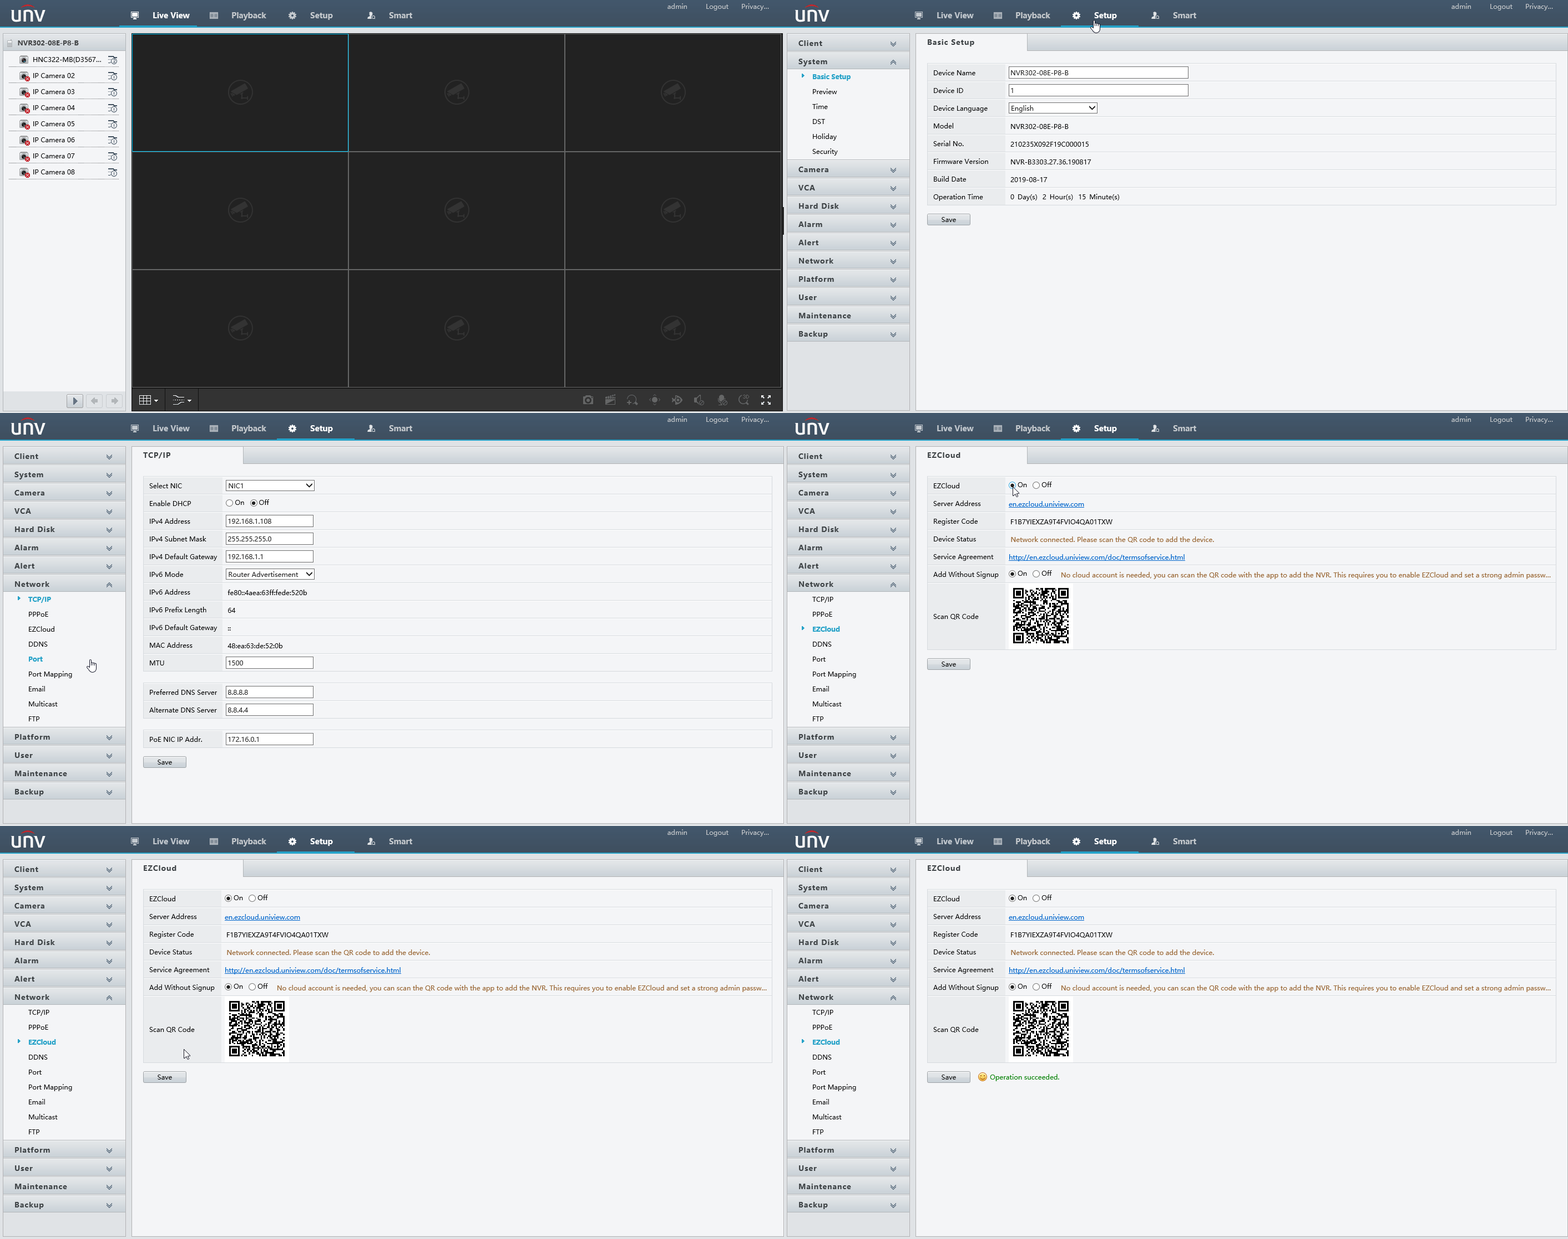
From the Live View of the NVR, Go to Setup -> Network -> EZCloud
Make sure It is set to ON and “Add without Signup” is ON, unless if you would like to have added security, switch it to OFF.
Step 3. Download The EZView App
Step 4. Add the NVR
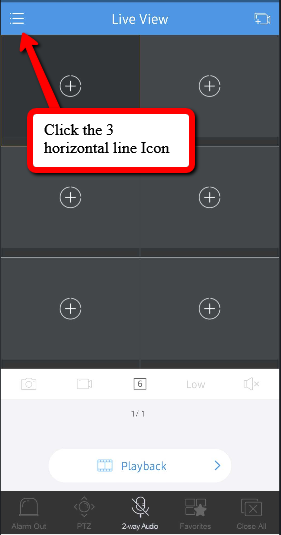
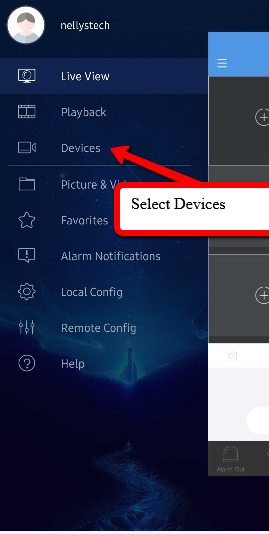
First, open the app, then click the 3 Horizontal Line icon in the top left corner
Click on Devices
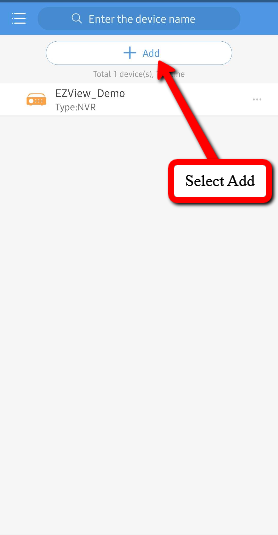
Select Add
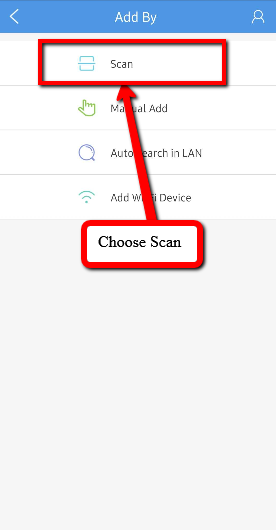
Choose Scan
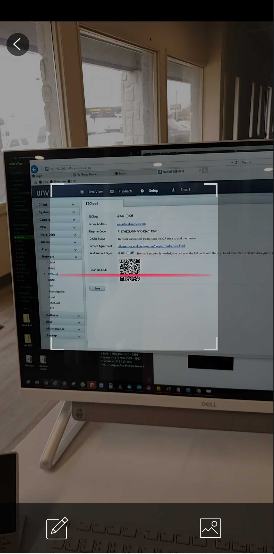
Then Scan the QR Code from the web interface of the NVR
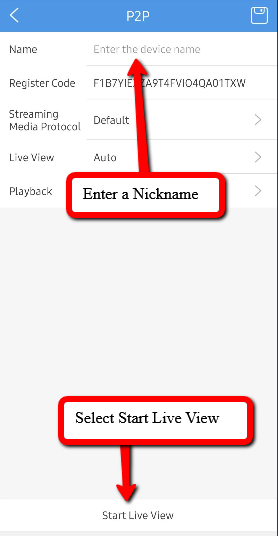
Enter a Nickname for your NVR and click Start Live View
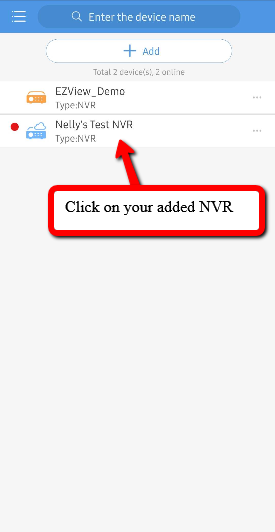
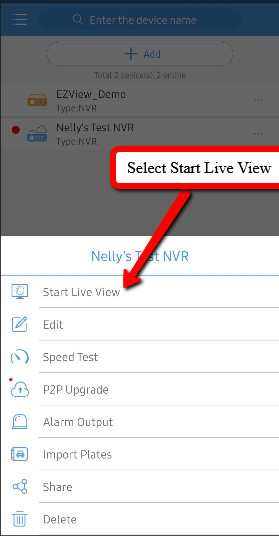
Then you will see a Device list With your NVR, Click on it for a Pop up to appear, and select “Start Live View”
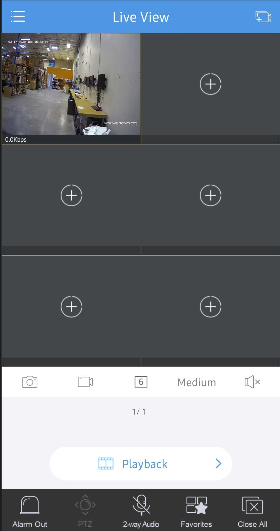
Then You will have a Live View of any cameras connected to the NVR!
EZCloud Displaying Offline
When setting up Remote Viewing, You may get a Success Message after scanning the QR code. However, the NVR can show as Offline on the EZView App afterwards.
On the NVR web Interface, you may get this Message:
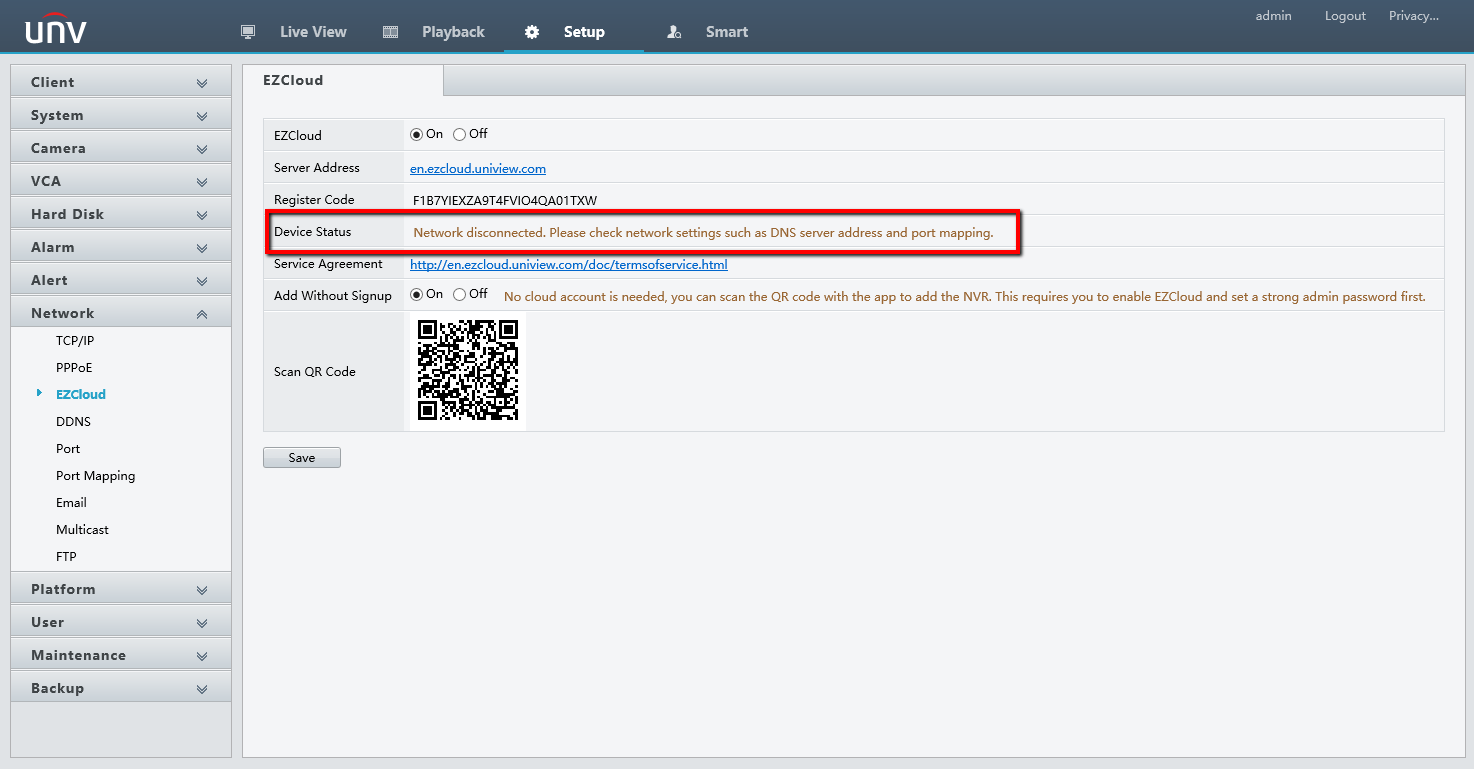
**Network disconnected. Please check network settings such as DNS server address and port mapping. **
Here are a few tips to fix this issue:
– Make sure that the recorder is networked locally correctly.
– Wired Directly from the LAN port of the NVR to your router or network switch.
– Place the recorder on DHCP
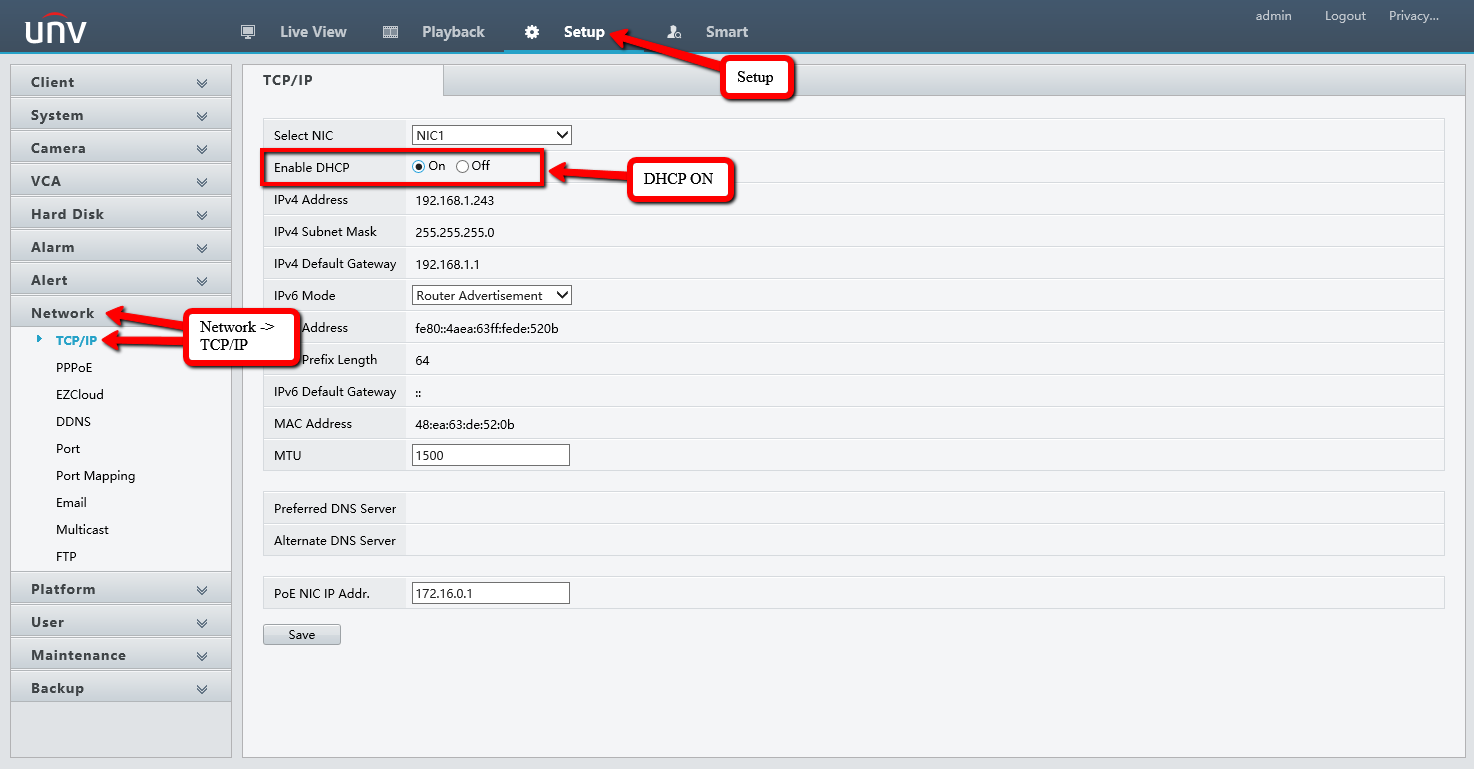
– After Enabling DHCP, click on Save.
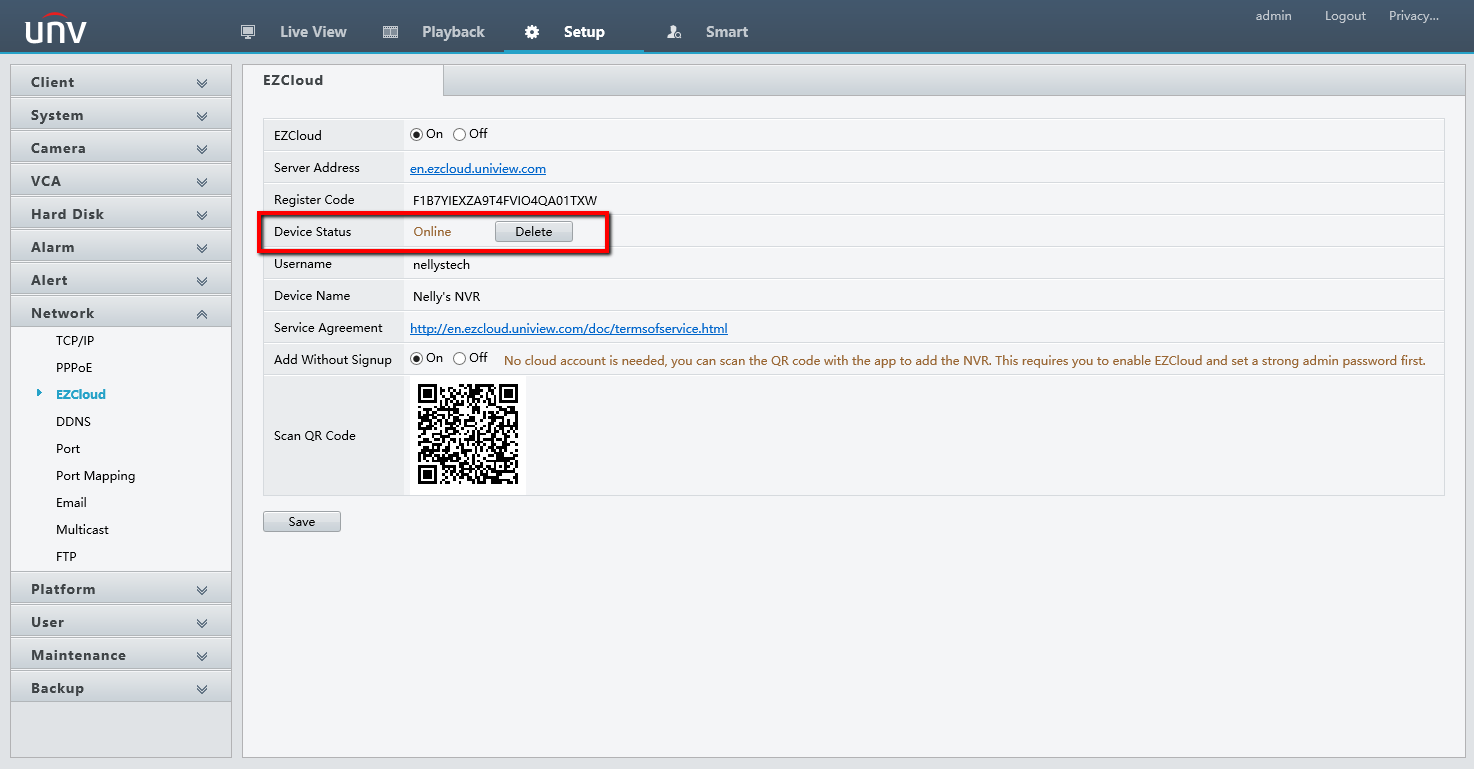
Once all of these steps have been taken, the Status should come Online:
How To View Remotely Through Cloud Via EZStation
EZStation is a CMS for Uniview products to allow the user to allow viewing and configuring.
Please Note
You must have a cloud account created and your device added beforehand
Step 1. Install and Run EZStation
Download the EZStation Program here
Upon initial bootup, you may get prompted to create a login. This is for the EZStation Program exclusively. Typically we’ll recommend setting the same login as your NVR.
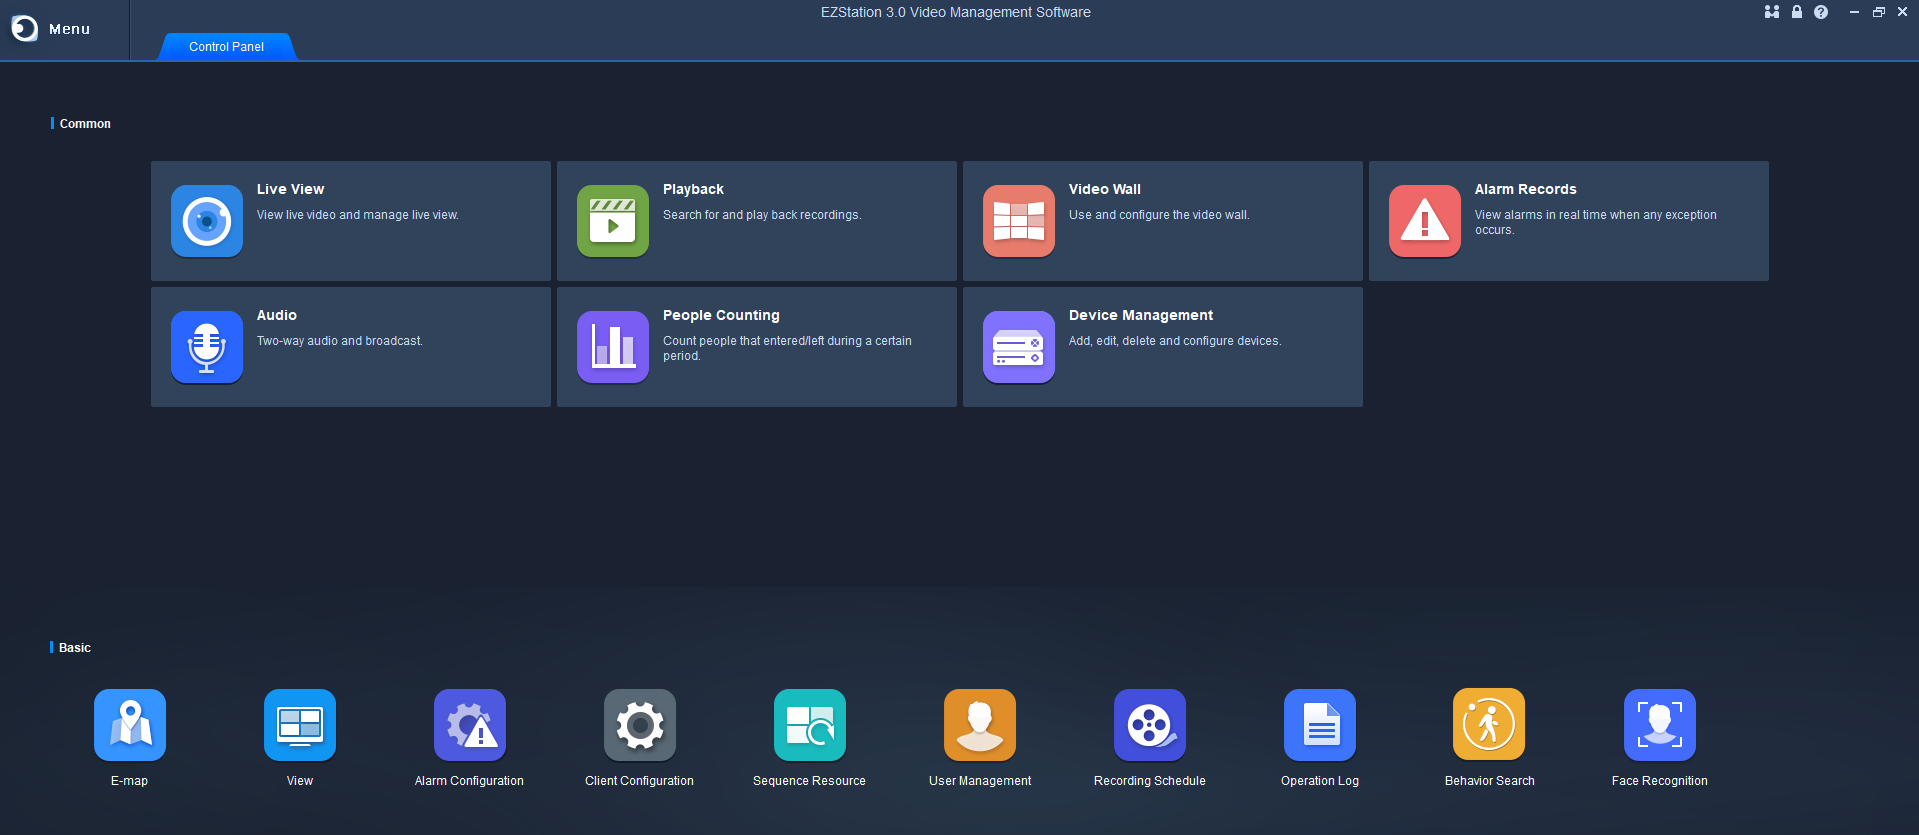
Once Running, You should get a Main Screen:
Step 2. Log Into Your Cloud Account
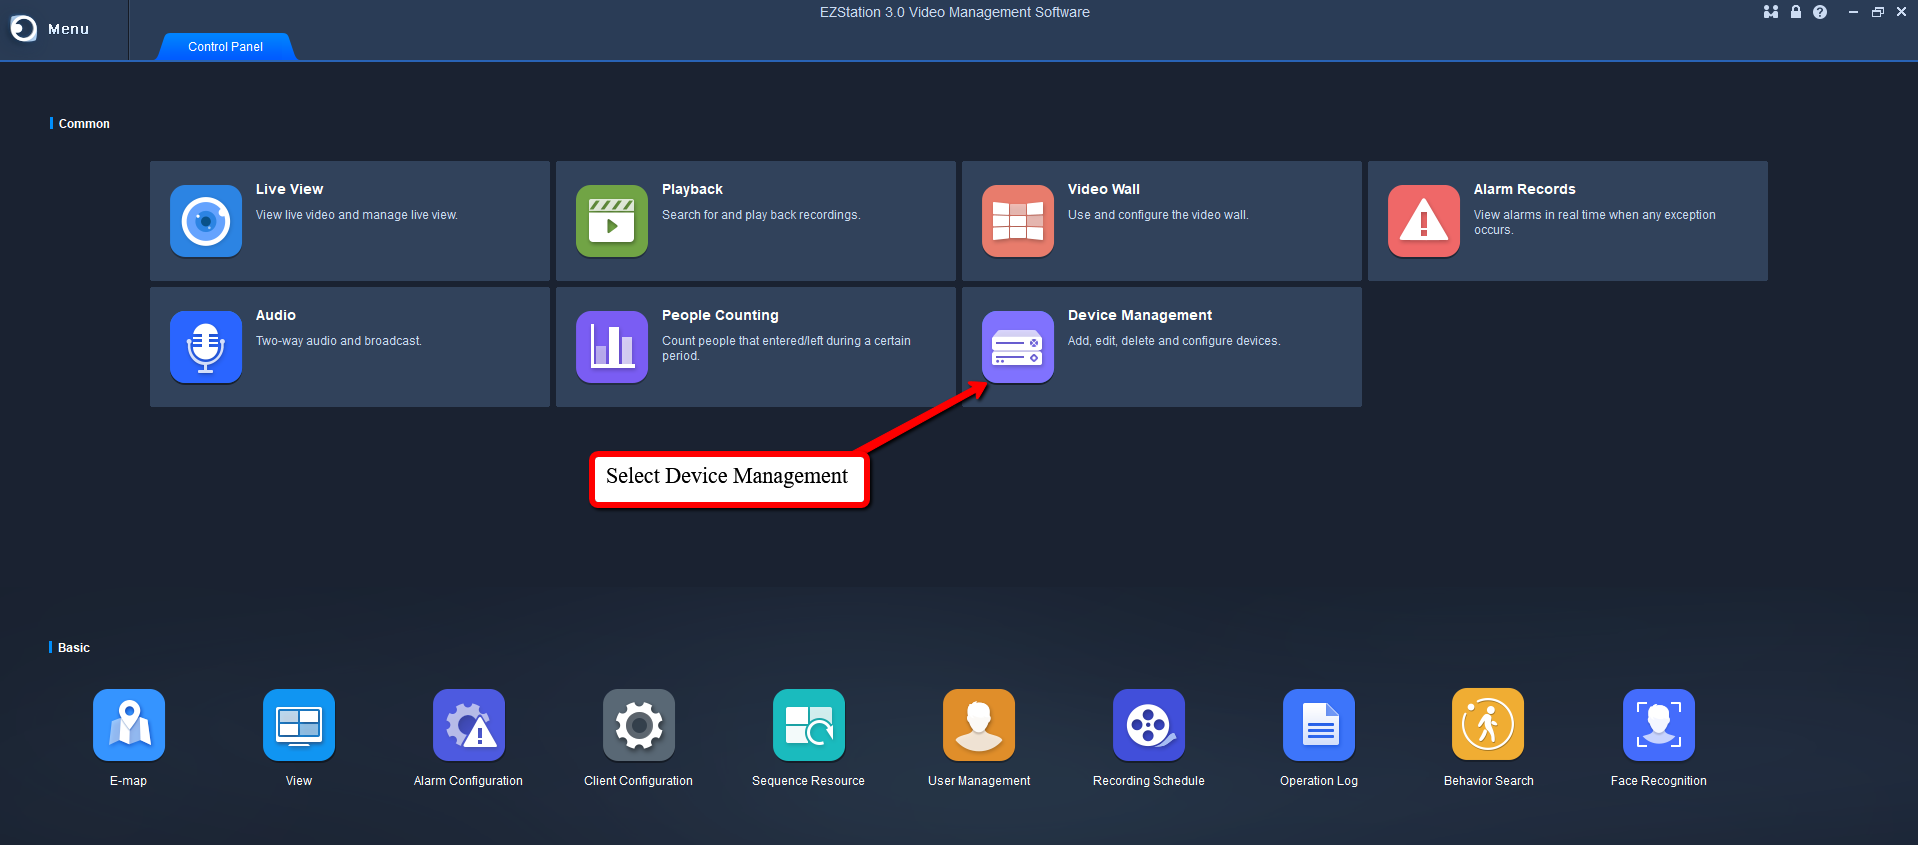
First, Go into the Device Management section.
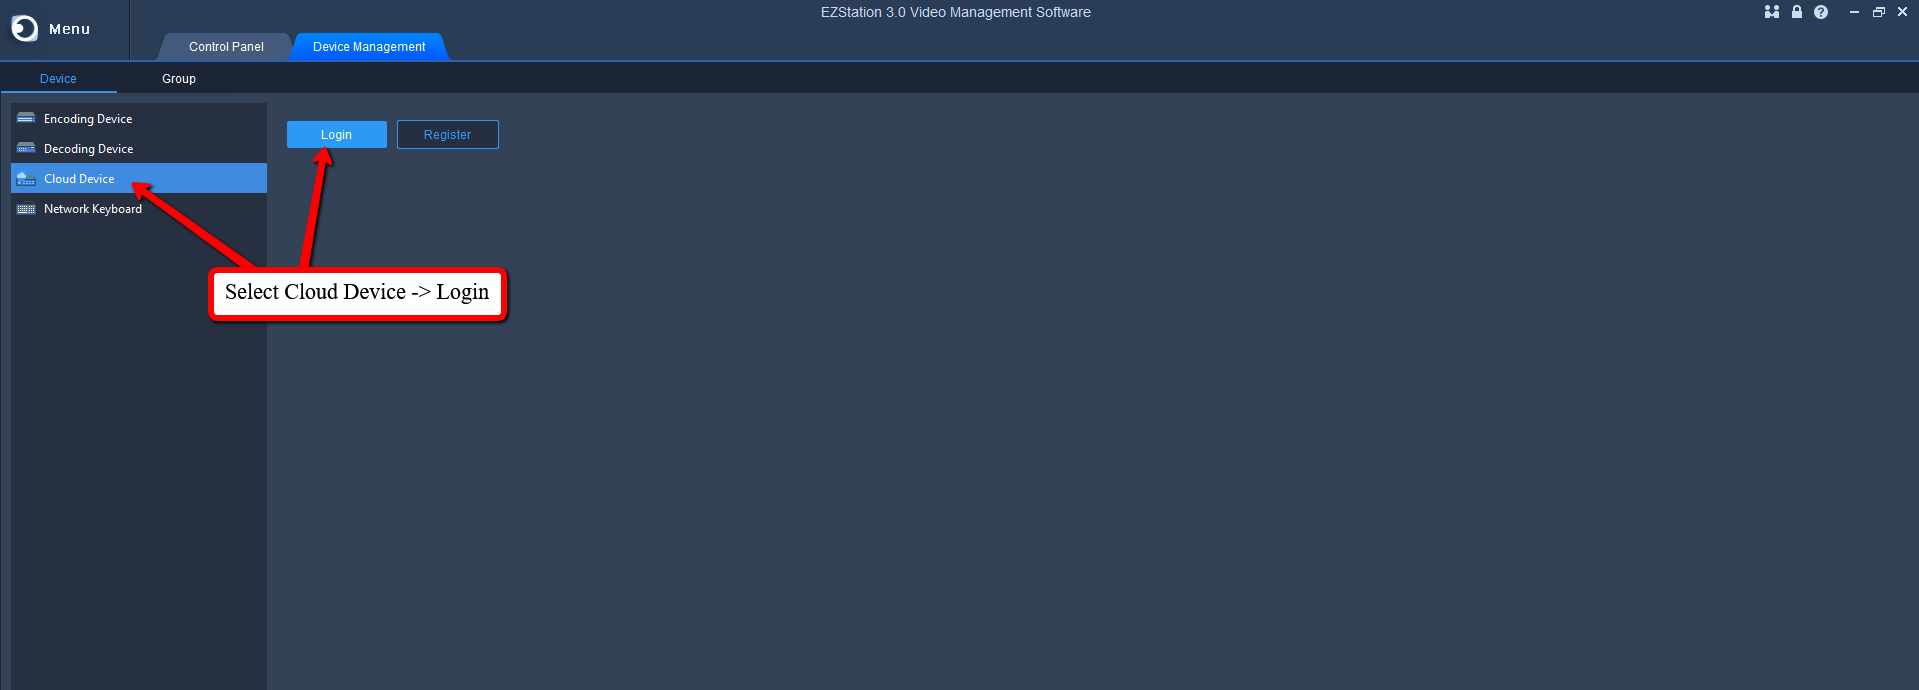
Next, Select Cloud Device on the left side, then Login.
A popup box will appear to input your cloud login info. Once entered, Click Login
A Load screen will appear, then you should be logged in.
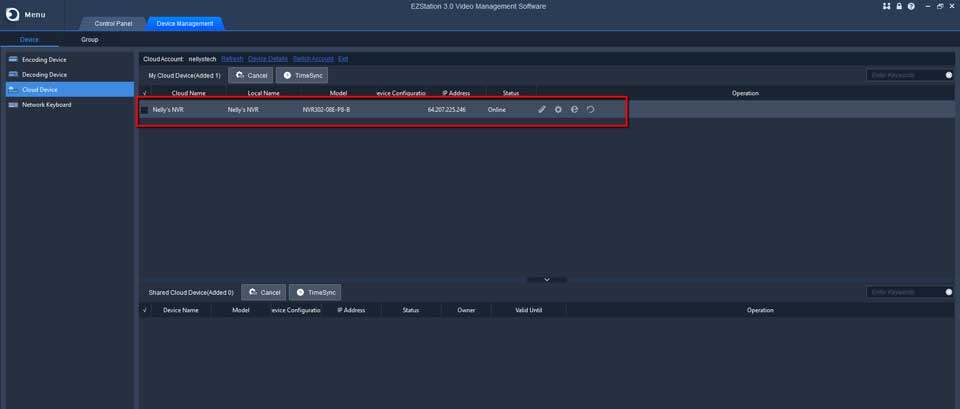
Now your linked devices will be listed under My Cloud Device
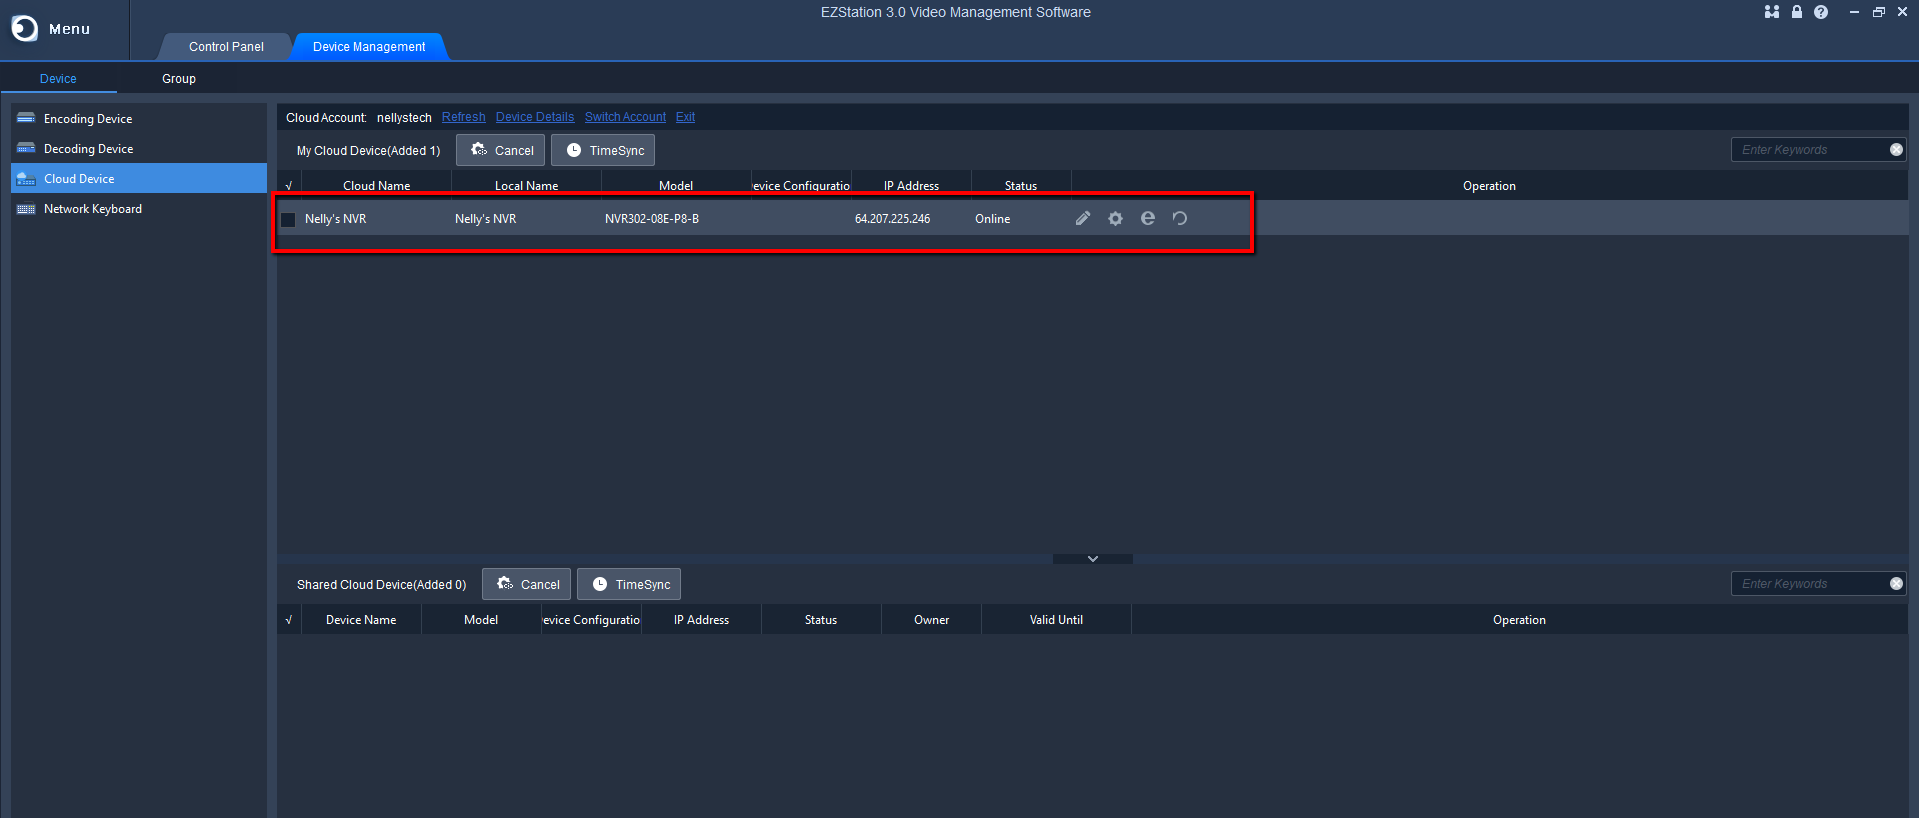
Step 3. Viewing Your Device
Now that we are logged in, we should be able to view whatever devices are on the linked account
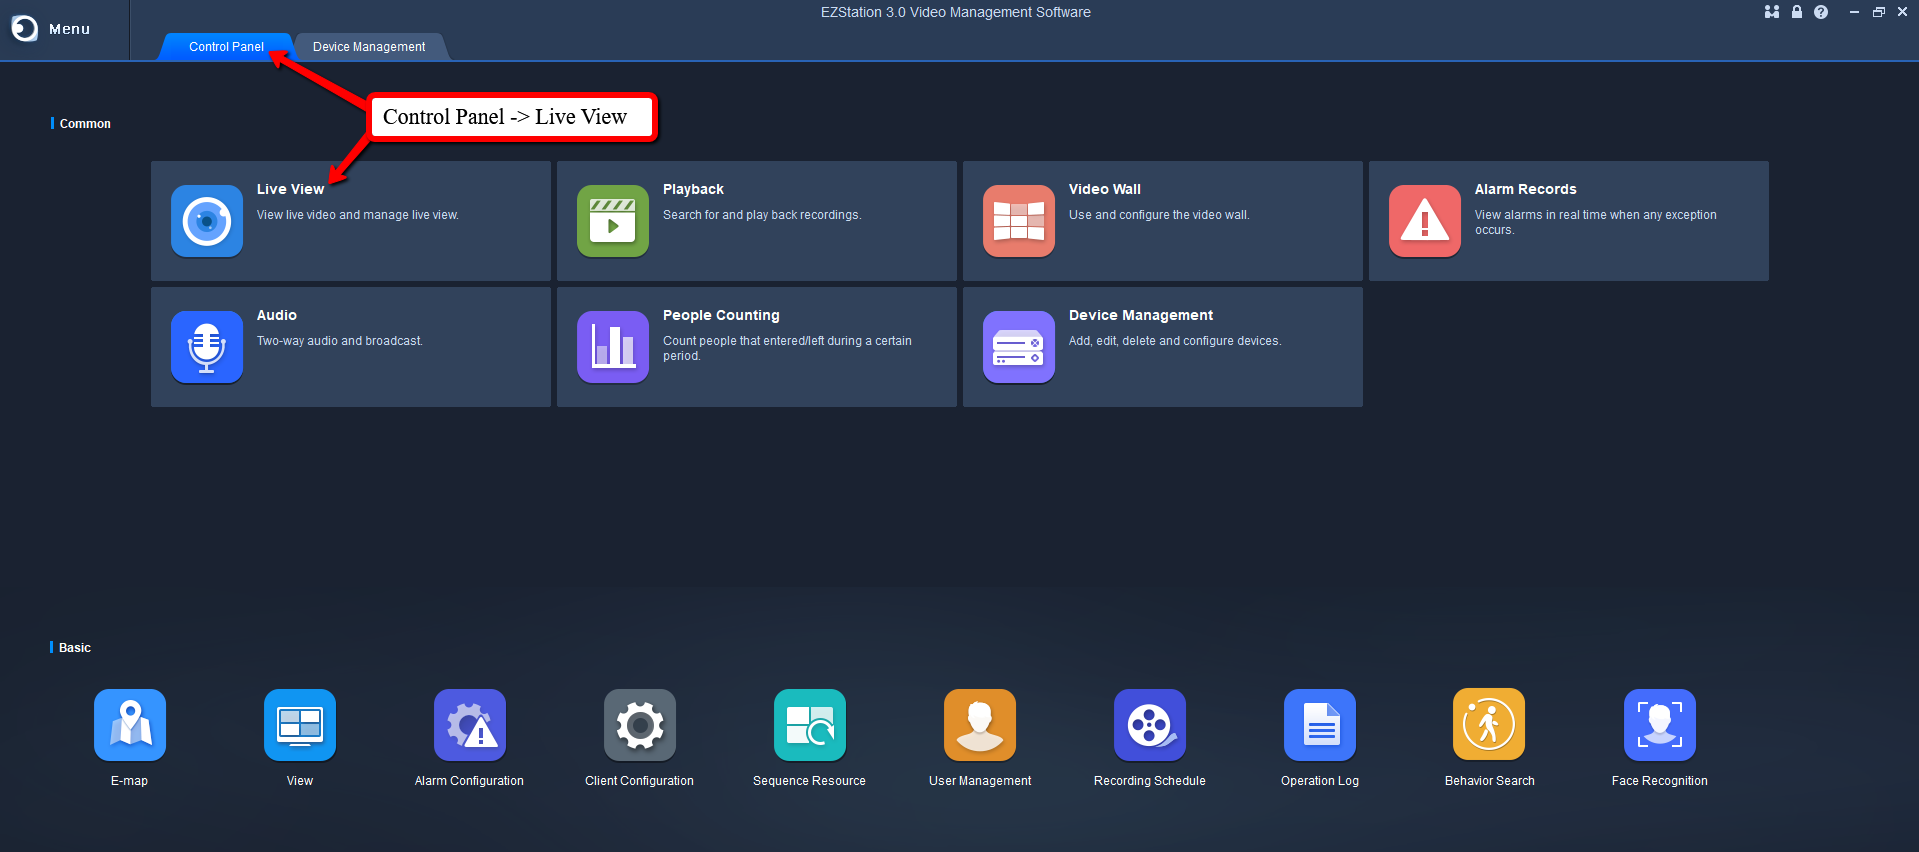
First, go back to the Control Panel Tab, Then select the Live View Section
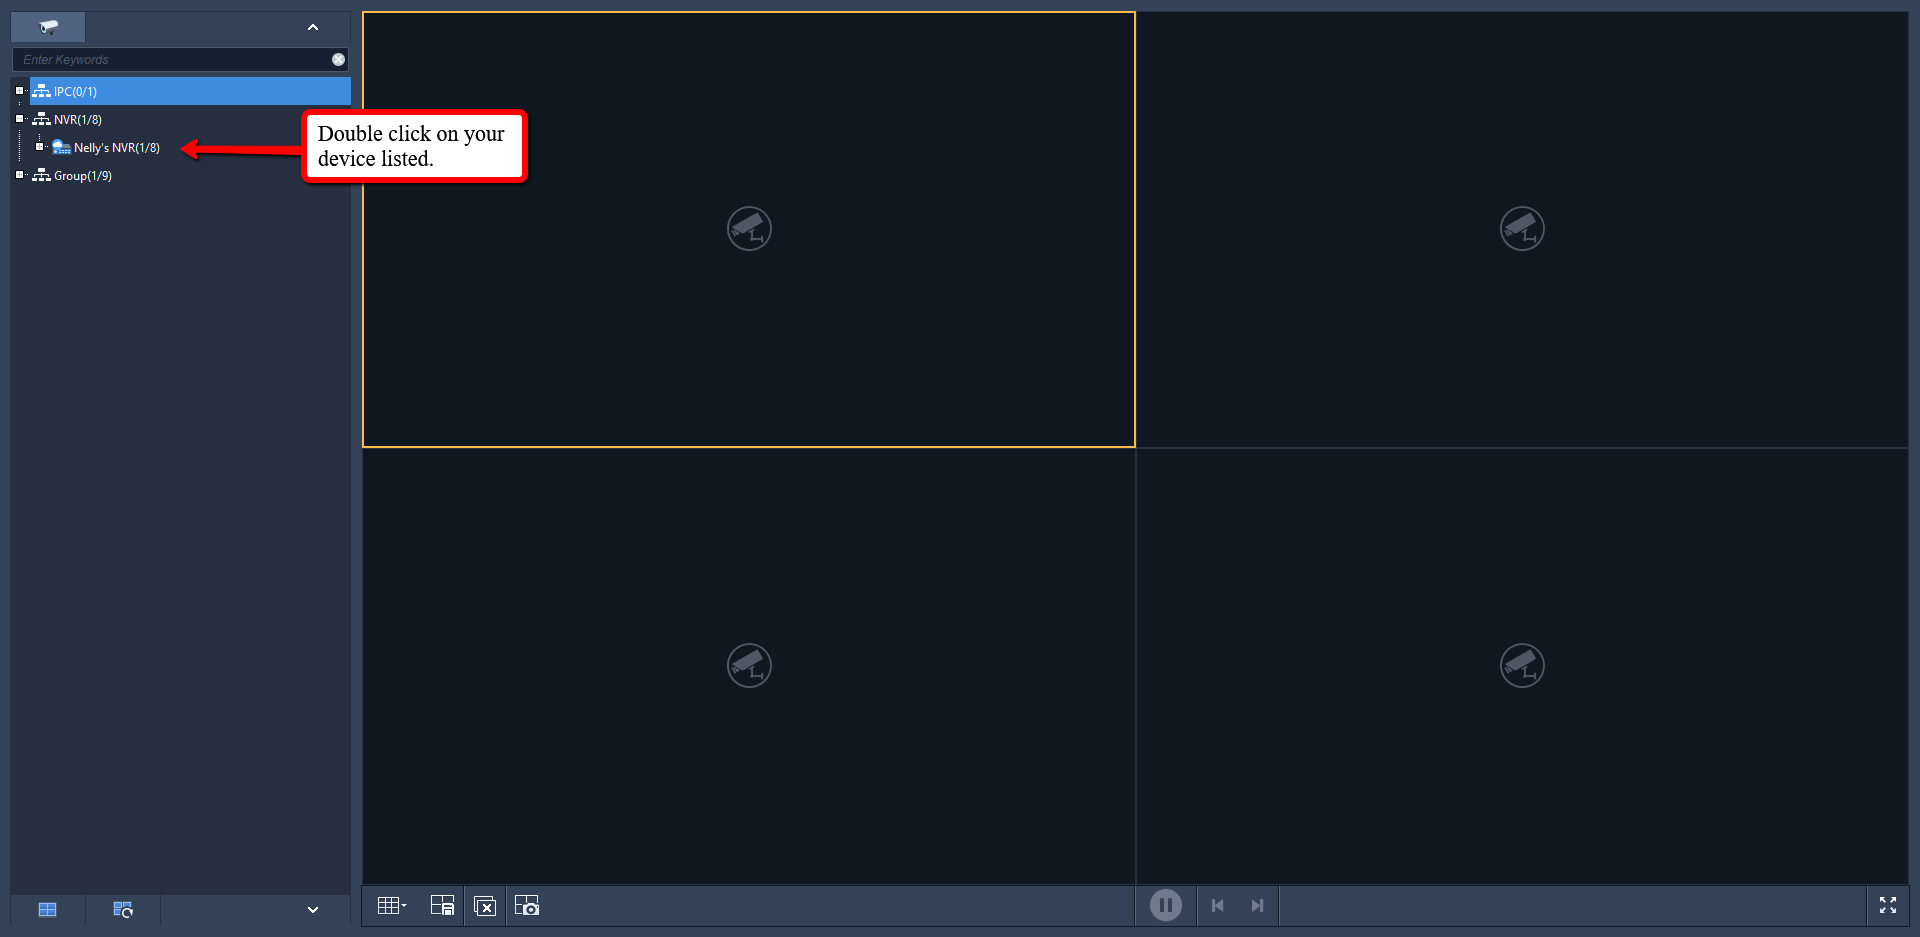
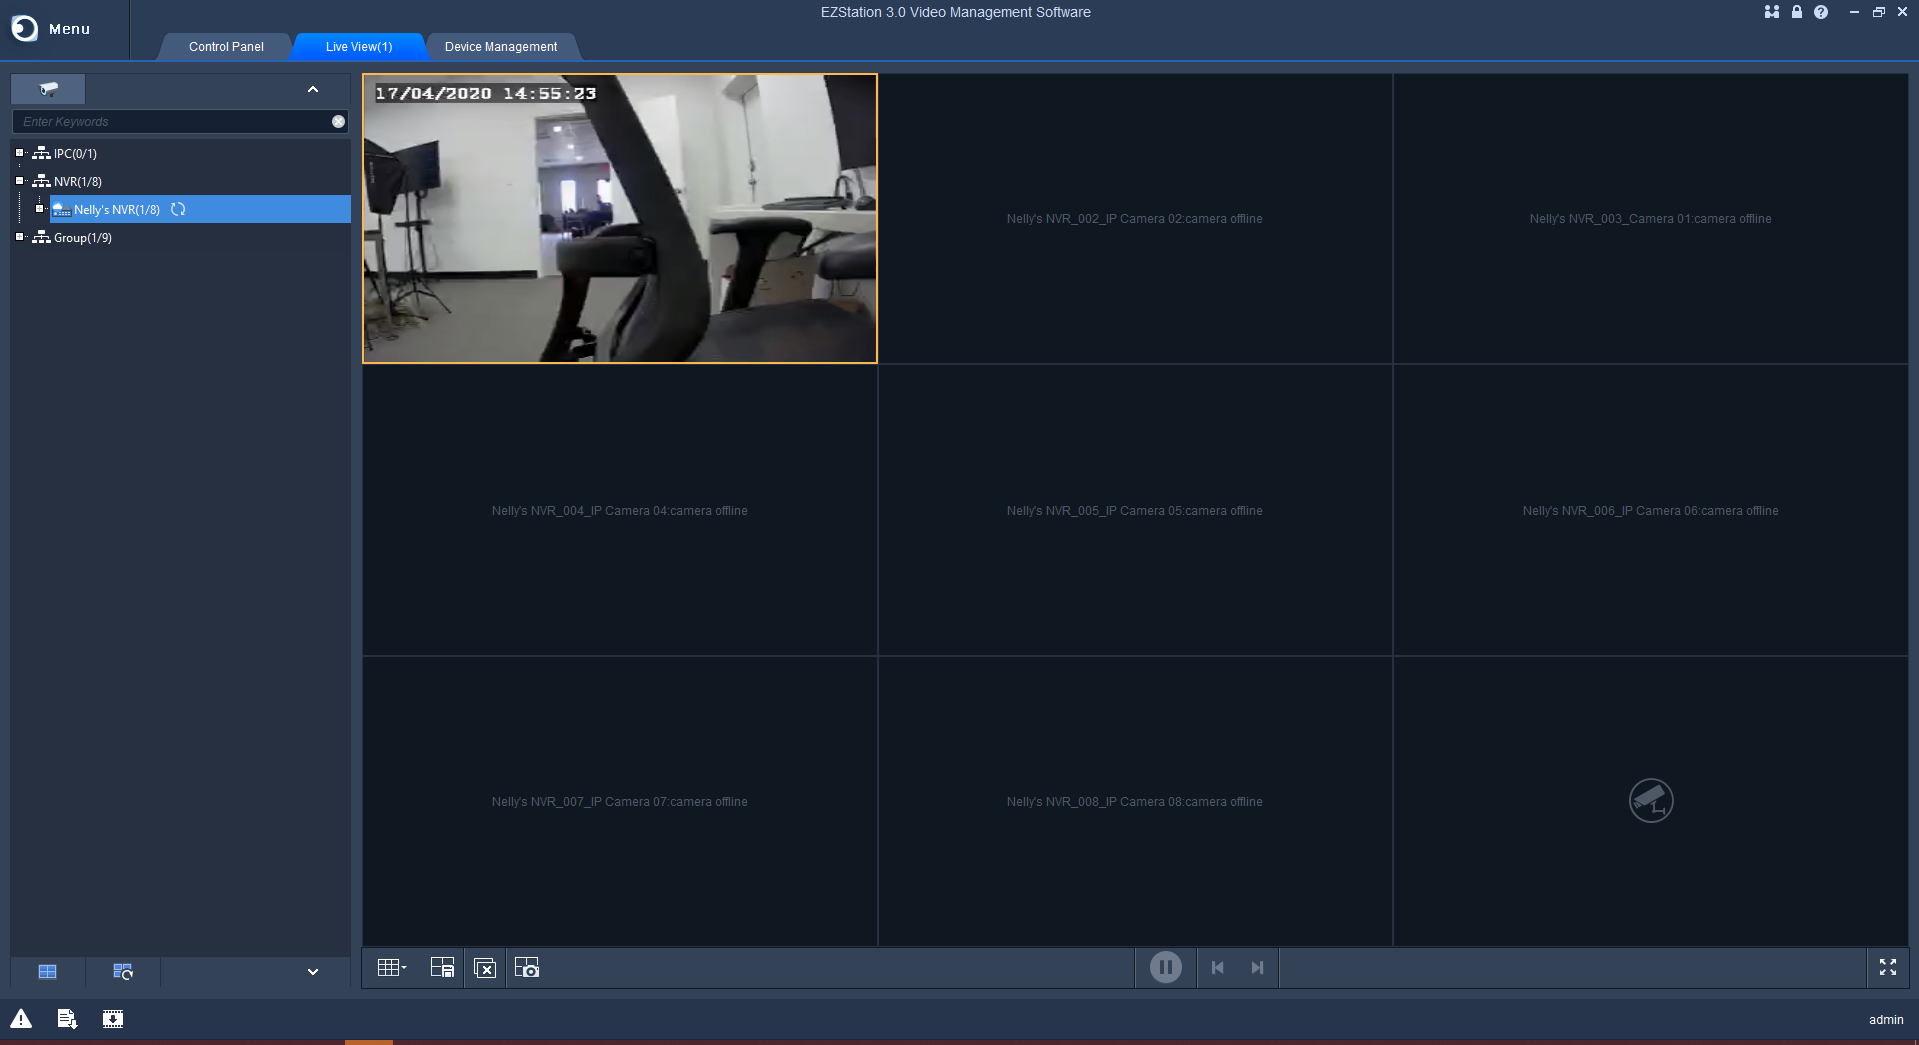
From here, Double click on your device on the left side and any cameras linked will appear
How To Share Your Device Via EZCloud Portal
Each Uniview device is limited to only be registered one single EZcloud account at one time.
Due to this limitation, sharing the device is needed to be accomplished to allow other wanted registered users to access your Uniview device.
To do so login to your EZCloud account via the web (Click Here) and select the “Share” option under the My Cloud Devices -> Operation section.

Once you select share it will prompt you to a new page where you will need to fill in the below three pictured fields. Once all fields are filled in select Confirm.

How To Share Your Device Via EZView Mobile App
Each Uniview device is limited to only be registered one single EZcloud account at one time.
Due to this limitation, sharing the device is needed to be accomplished to allow other wanted registered users to access your Uniview device.
From the Live View in EZView, Select the 3 Horizontal Lines in the top left-hand corner:
Select Devices:

Click on the 3 dots icon next to the device you want to share:

Select Share:

Choose specific cameras or the whole NVR:

Once the Device is selected, Input the User’s info that you want to share it to, the Expiration Date, Roles, and hit Share.
How To Enable App Alerts Via EZView
App alerts are great if you would like to be notified when an event gets triggered.
This guide is for after the device has already been added via EZCloud
From the live view, click on the 3 horizontal lines in the upper left-hand corner:

Select Alarm Notifications:

Select Allow Notifications:

Enable the Device you want notifications for and then select Advanced:

Select the same device again:

Choose the specific cameras you’d like alerts from on the NVR, or select the entire NVR:

You can also set a Notification Schedule. If you do not create one, then notifications will come through 24/7:

You can also select the Event Type you’d like to get alerts from:

Events
- Motion Detection – Basic Grid Based Event
- VCA – Smart Events such as Line Crossing, Intrusion Detection, etc. (Your camera must support that event to allow notifications)
- Alarm Input – Event triggered via physical Alarm Input
- Video Loss – Anytime video feed loses signal
- Others – Can include Device Exceptions events such as HDD error, IP Conflict, Bandwidth Errors, etc.
How To Unbind From Cloud Account
Occasionally, you may come across the need to unbind your Uniview NVR from its current cloud account. Either a new user is taking over an existing system or the cloud account is no longer accessible are some example use cases.
HDMI UI
From the Live View of the HDMI interface of the Uniview NVR, click on the Home Icon in the bottom left-hand corner to access the menu of the NVR.

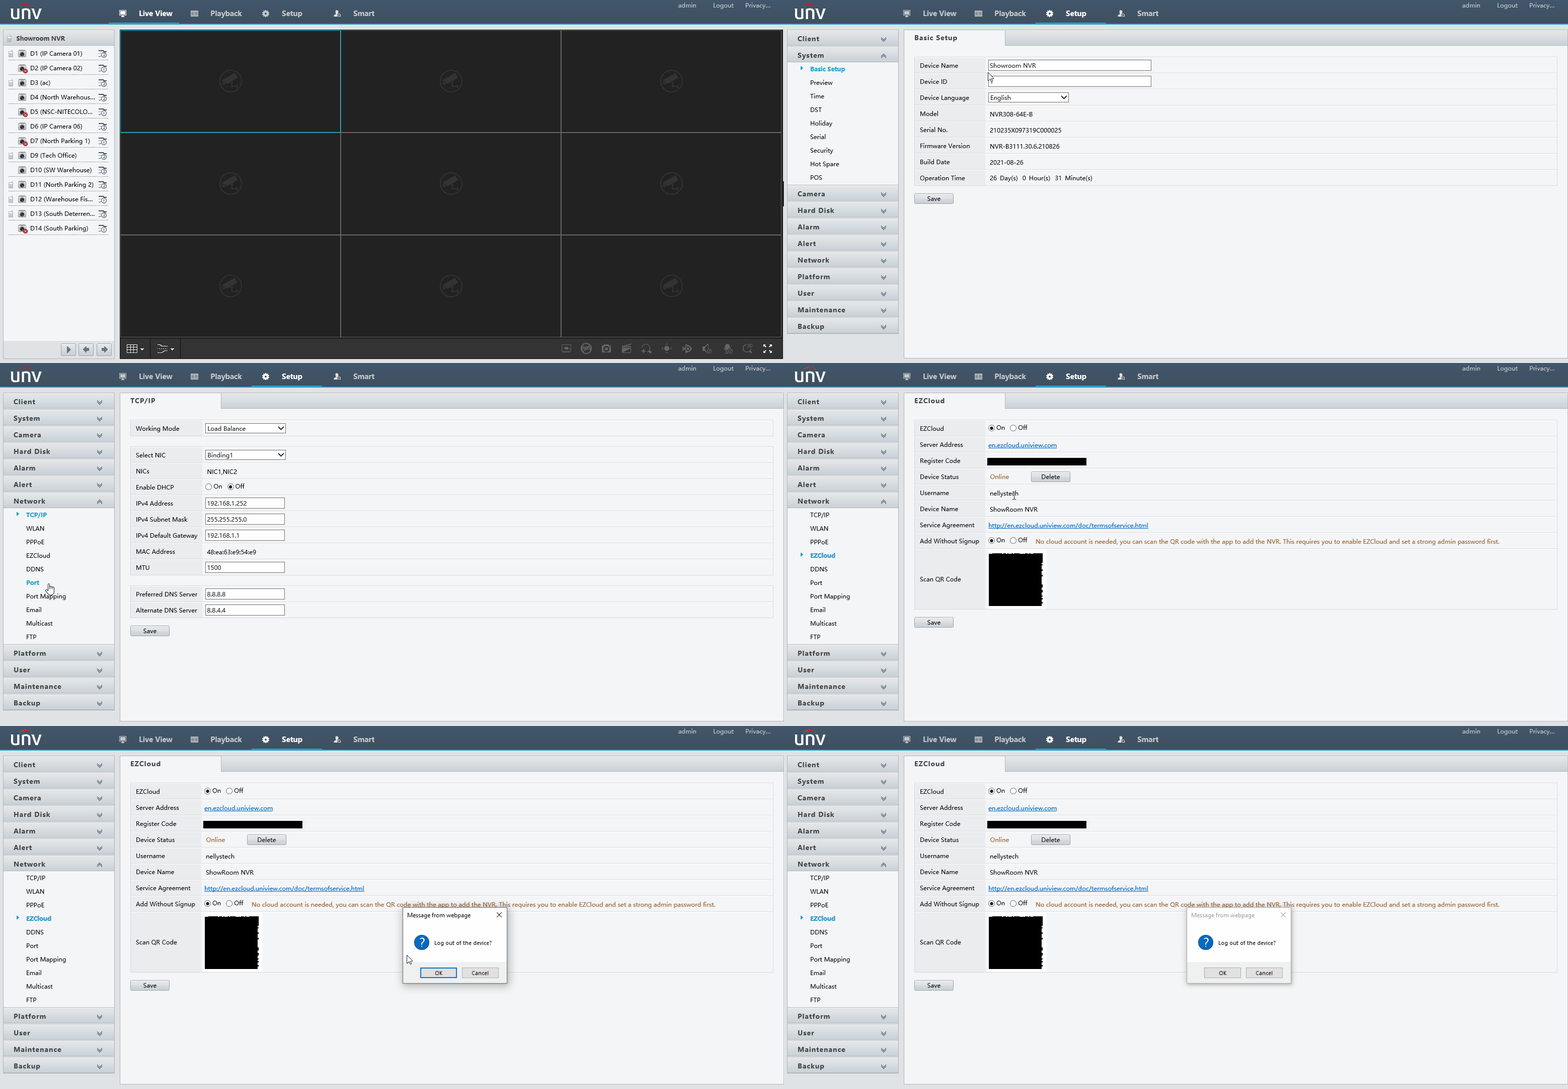
Once the Main Menu is opened up, go to Network -> Basic -> EZCloud.
From the EZCloud Menu, Click on the Delete icon to unbind from its current cloud account.

Web UI
From the Live View of the Web Interface of the Uniview NVR, go to Setup -> Network -> EZCloud -> Delete
