Recorded Video Export & Playback Instructions
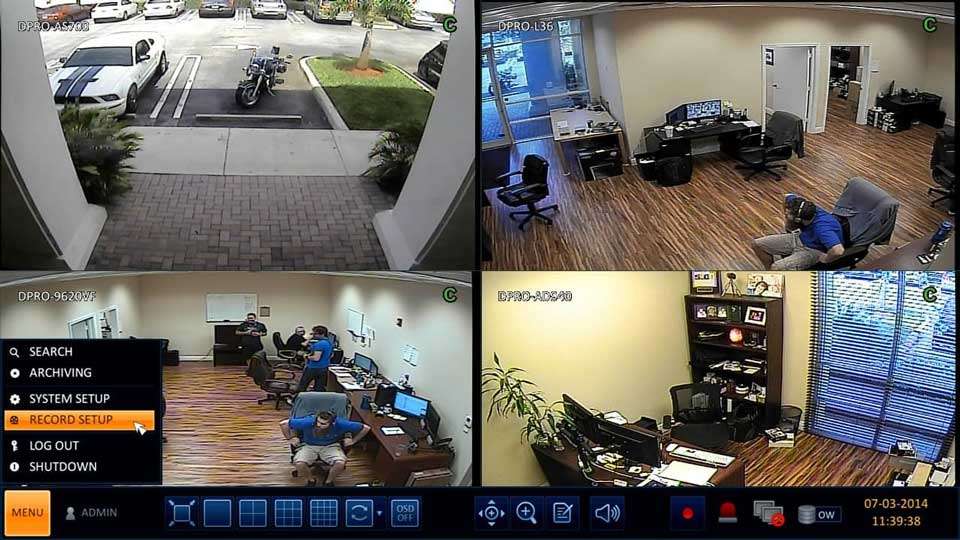
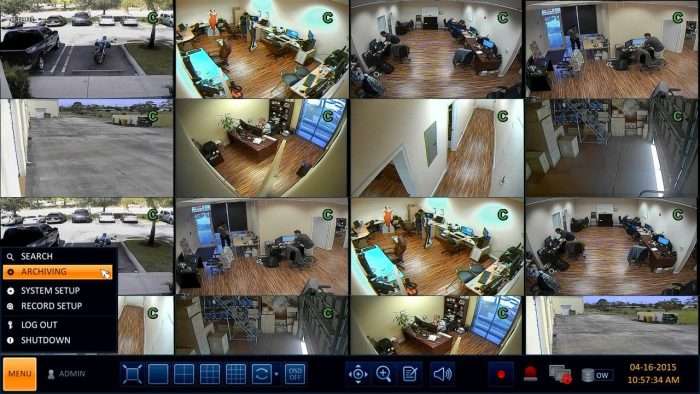
1. First using the included USB mouse, click the Menu icon in the lower left and then select Archiving. (Shown Below)
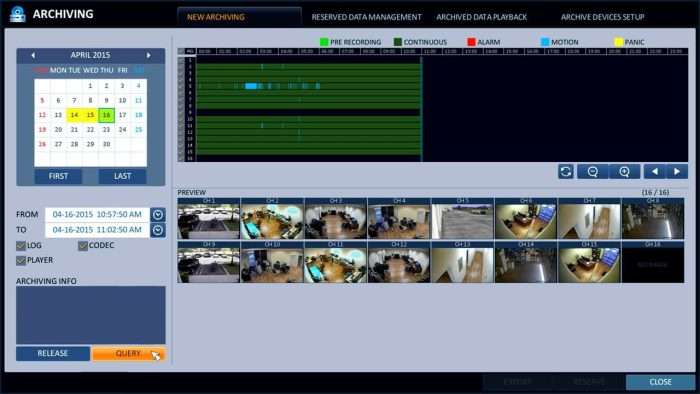
2. Now on the Archiving menu, click the New Archiving tab. In this menu, you will select the specific cameras that you wish to export, along with the date and time. First, select the cameras you wish to export by checking All (all cameras) or each camera individually on the left column of the timeline. Then select the desired Date on the Calender to the left. To choose the specific Time you can either click and drag on the timeline or you can enter it into the From and To boxes. Then check the Log (provides a copy of the user log), CODEC (required in order to playback on a PC) and Player (this is the iDVR-PRO backup player which plays the RAW file format, this is not needed for the AVI format). Once you have everything set, click the Query button to save it. (Shown Below)
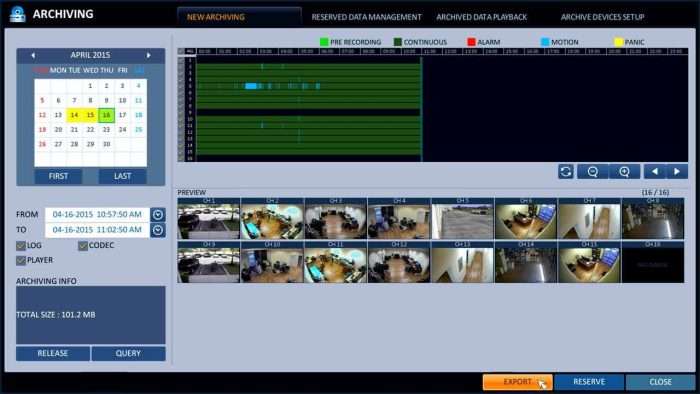
3. You will now see the size of the export in the lower left under the Archiving Info section. Insert a USB thumb drive into the USB port of the DVR and click Export. (Shown Below)
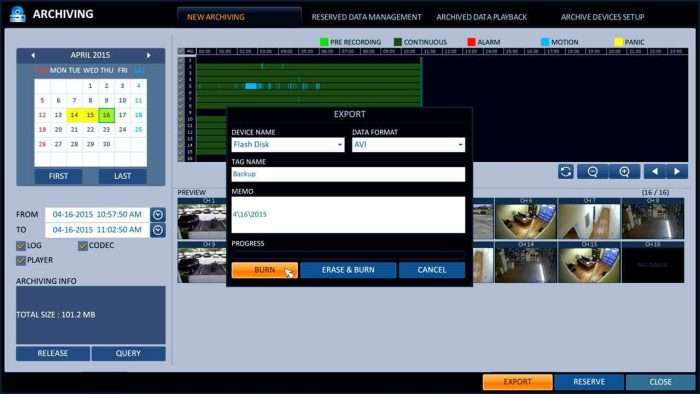
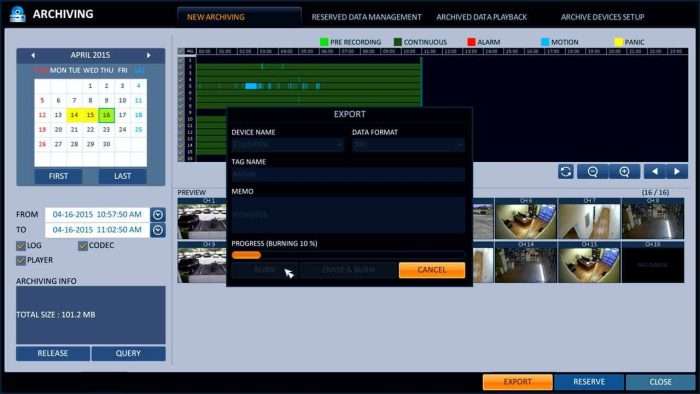
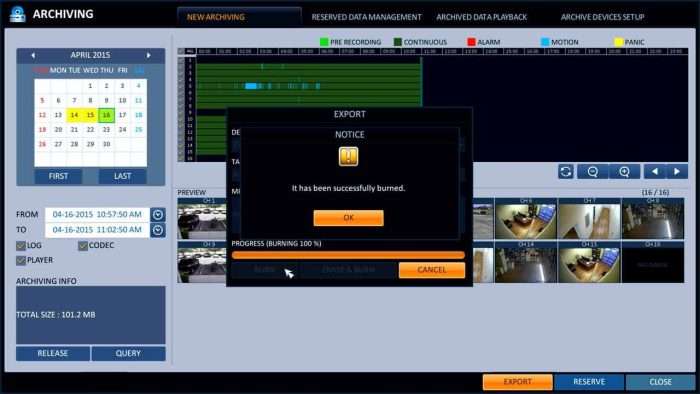
4. The Export menu will now appear, here you will select the USB thumb drive (Flash Disk) under the Device Name. Then select the Data Format. In our example, we are exporting it as an AVI. The Tag Name and Memo are for your reference, however, they must be filled in to continue. Once you have everything entered correctly, press the Burn button. A progress bar will be displayed to show the status of the export. Once complete, a Success message will appear. (Shown Below)
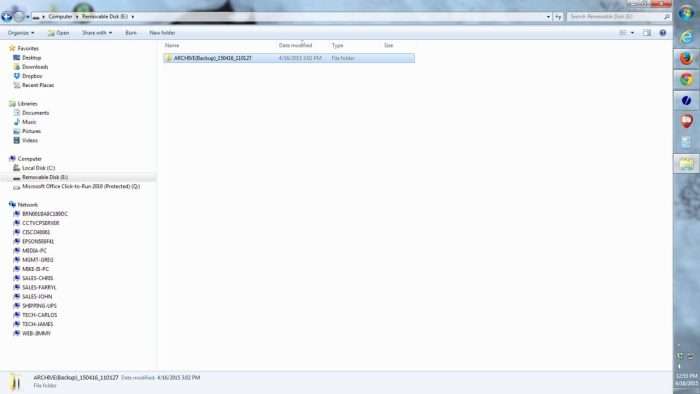
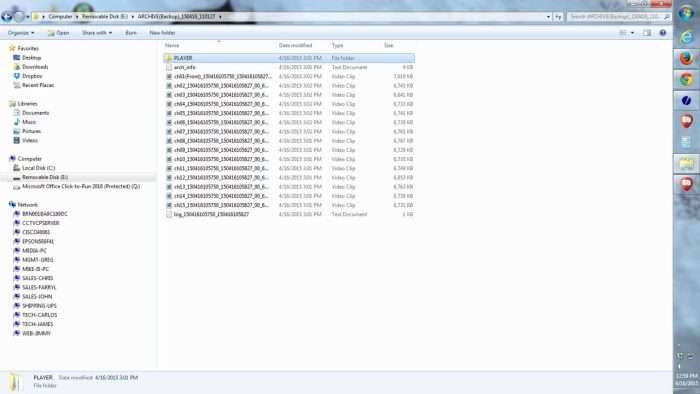
5. Next, insert the USB thumb drive into a PC and open it. You should see the ARCHIVE folder, go ahead and double-click it. (Shown Below)
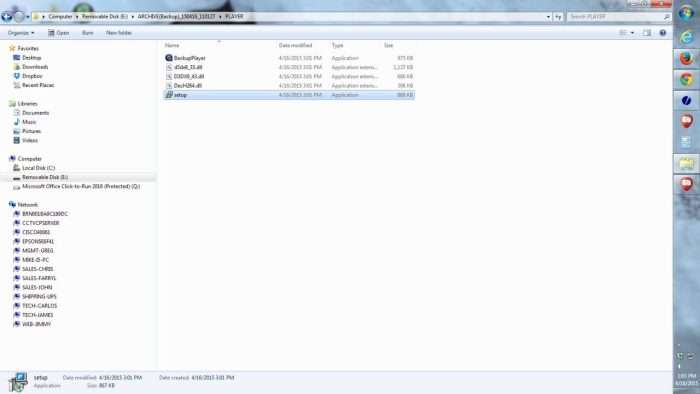
6. Now double-click the Player folder. (Shown Below)
7. Then double-click the Setup folder to install the Codec, this is required when using the AVI video format. (Shown Below)
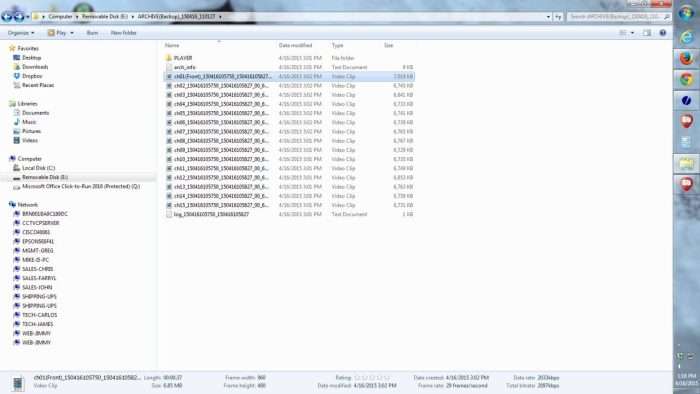
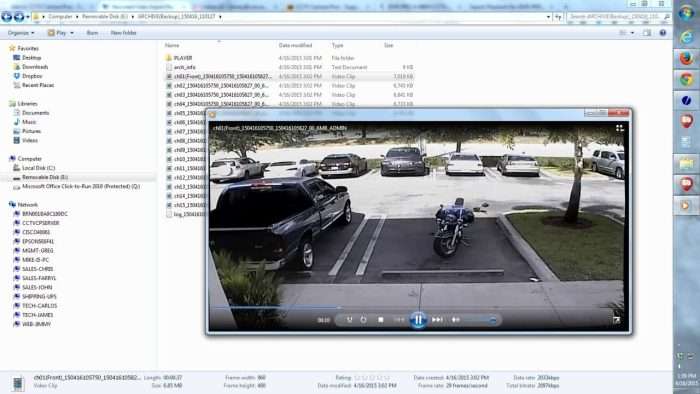
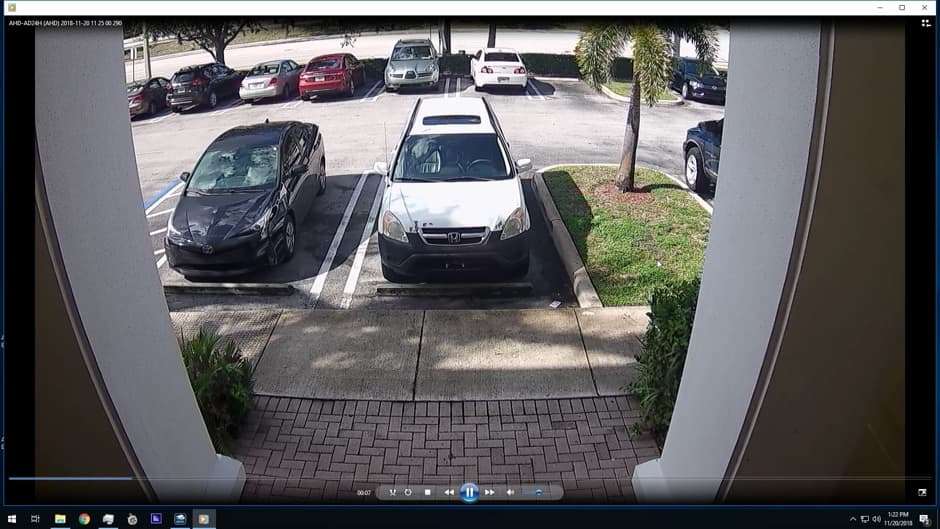
8. Now select the video file that you wish to view. If the codec was installed correctly, the video will begin to play. As you can see, we are using the Windows Media Player. Other players may be used as long as they support AVI video files. (Shown Below)
Download Exported Video Files
We understand that some customers want to experience the video quality that the iDVR-PRO export / backup process provides so we have made the following files available to download. Please follow these instructions to playback the files on your Windows PC. Please note that this only works on Windows. The process to backup and playback video files on Mac is different.
How-to Export and Playback Recorded Video Surveillance on Mac PCs
using the Mac Viewer Software for iDVR-PRO CCTV / HD-over-Coax Security Camera DVRs

The process to backup and play recorded video surveillance footage on a Macintosh PC requires the use of the Mac software that is included with all iDVR-PRO DVRs.
Video Export and Playback Instructions
Follow these instructions to backup / export recorded video surveillance footage from an iDVR-PRO DVR to a Mac computer. These instructions assume that you already have the client software for iDVR-PRO installed on your Mac and that your DVR connection is already configured. If it is not, please follow these setup instructions first. Then, follow the below instructions.
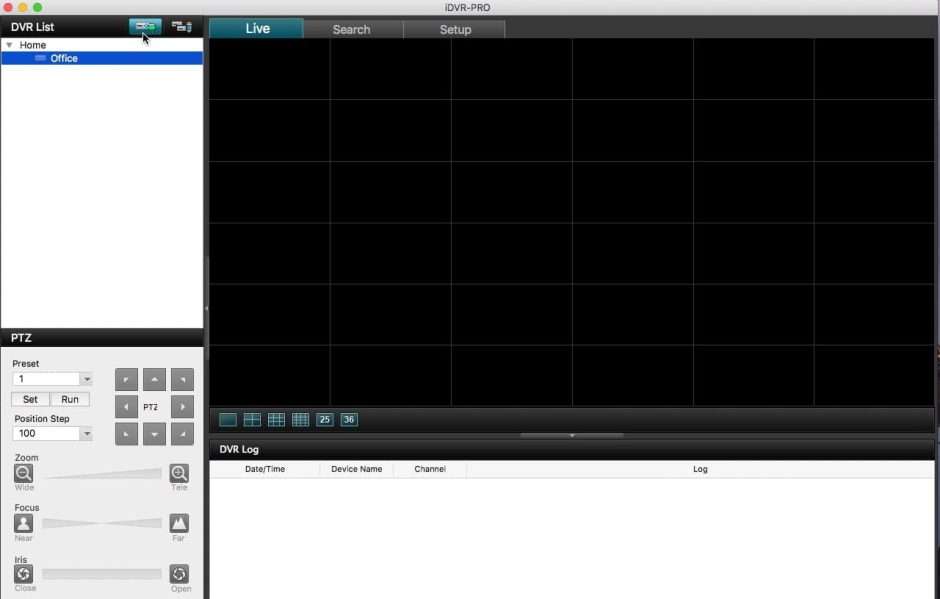
Connect to your DVR by selecting the DVR from the list and clicking on the connect icon.
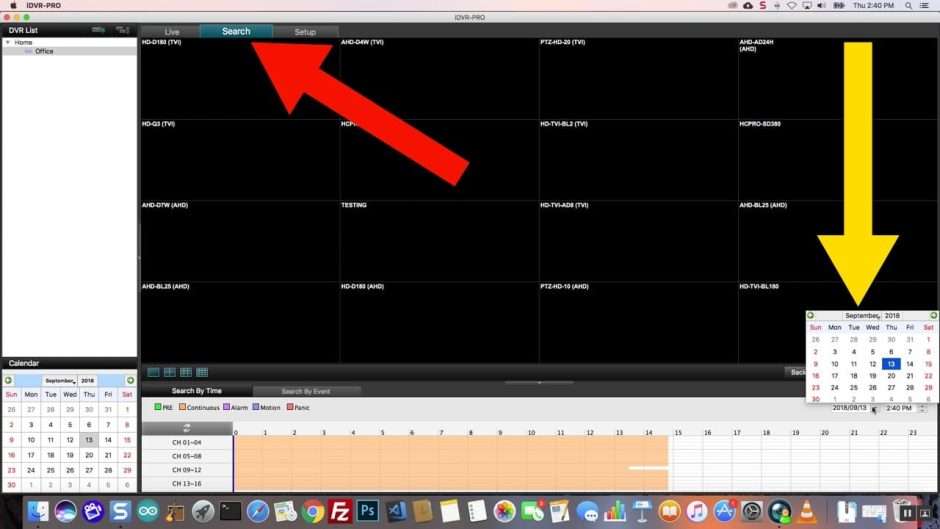
Once the Mac client is connected, you most likely want to playback recorded video on the DVR to identify the time frame of the video event that you want to export. Click on the Search Tab. Then select the date and time where you want video playback to begin. Then press the play button which is located under the calendar pop-up in the above screen shot.
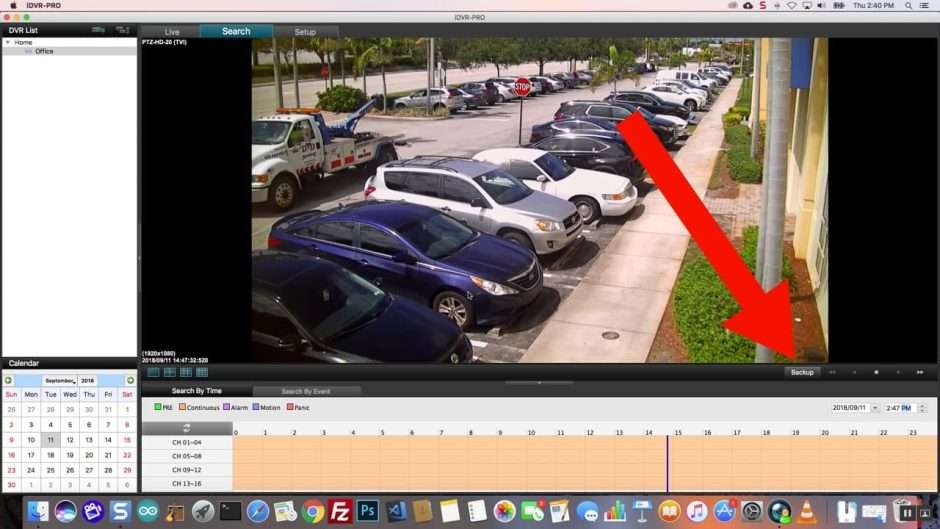
After you identify the time frame of video that you want to backup, click on the stop button in the player. Then, click the Backup button.
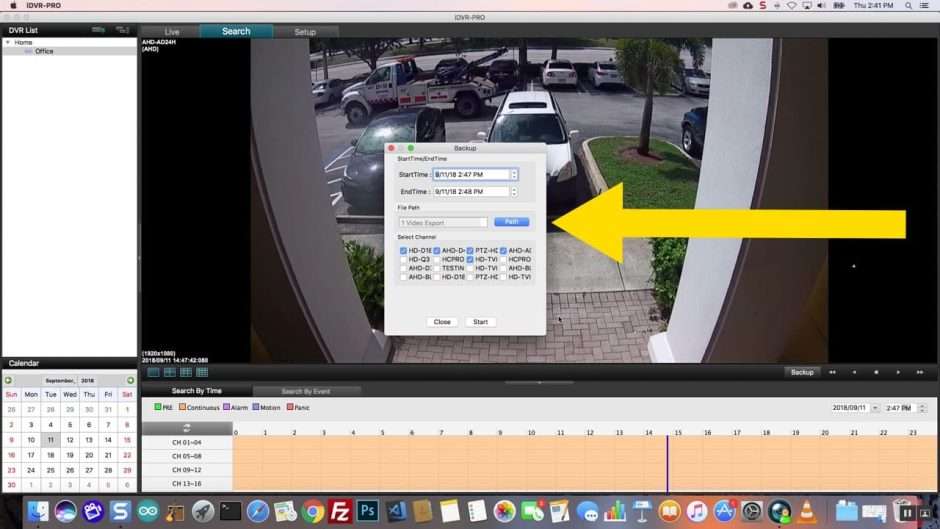
The backup box will open. Select the start and end time of the video export. Press the path button to select the directory where you want the video files saved to. Check off the security cameras that you want included in the export (you do not need to export the video from all of your cameras). Press the start button.
A bar show the progress of the video export. When it is done, you can close the backup screen and the iDVR-PRO software.
If you do not have the free VLC media player installed on your Mac, please download it here and install it.
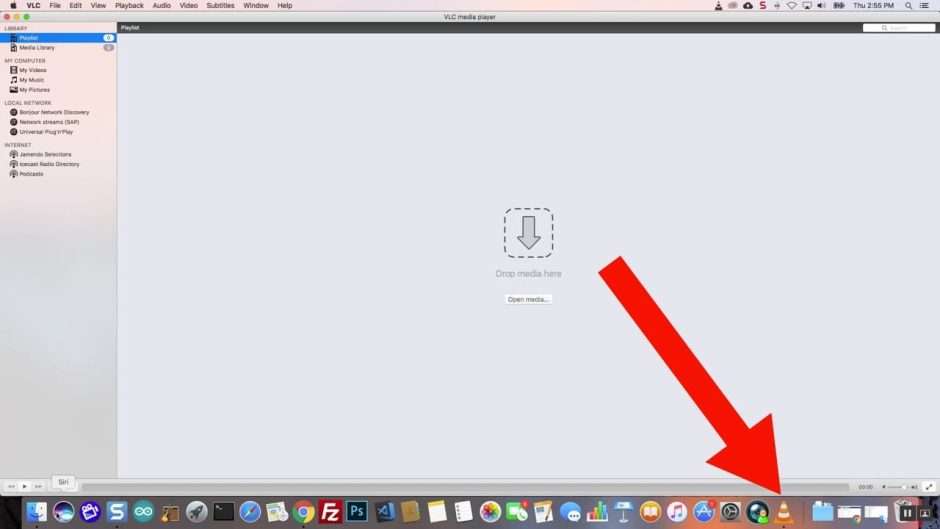
Open the VLC player on your Mac. If you do not have a VLC icon in your system tray (like the above screenshot). Open the finder application on your Mac and look in the applications folder.
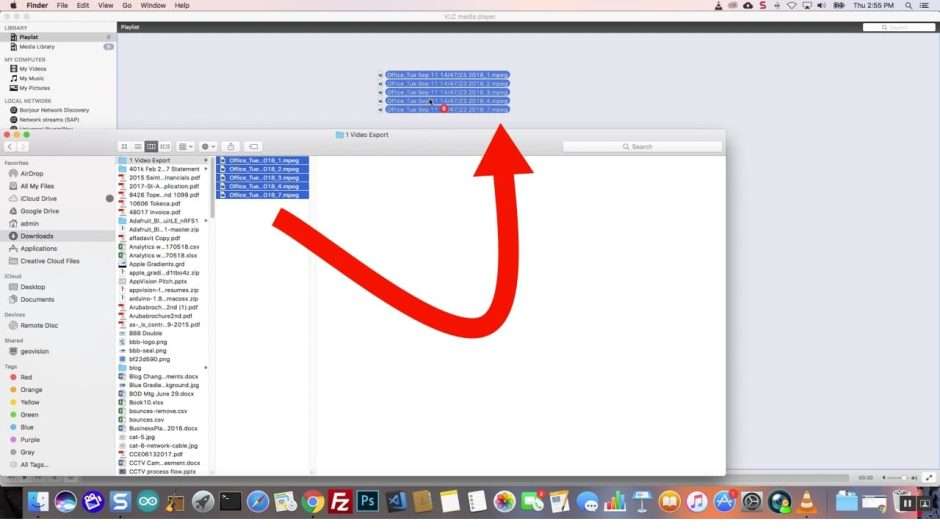
Open the Finder application and browse to the location where you exported the video files. Select the files that you exported by clicking on the top one, holding down the shift key, and clicking on the last one. This should select all of them. Drag the files into the VLC player. This will create a playlist and the first video will most likely begin to playback.
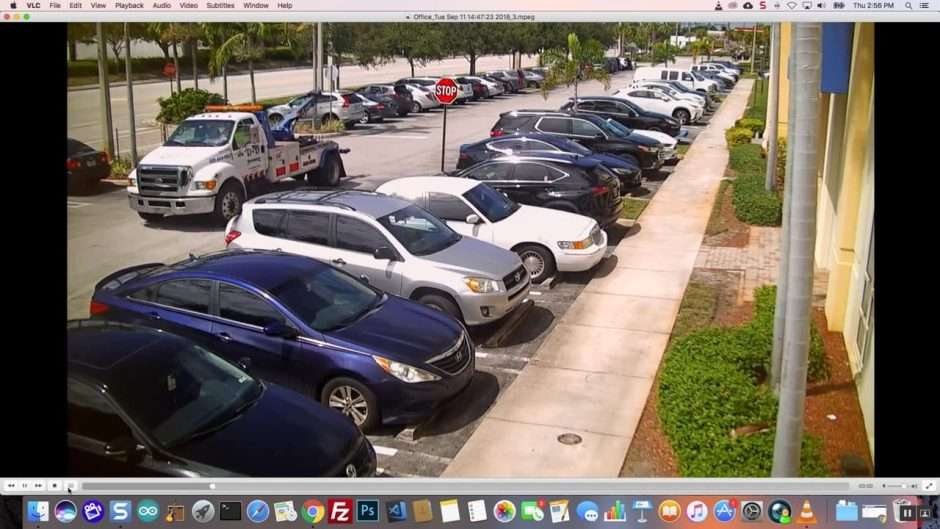
This is exported video from one of our HD CCTV cameras being played back.
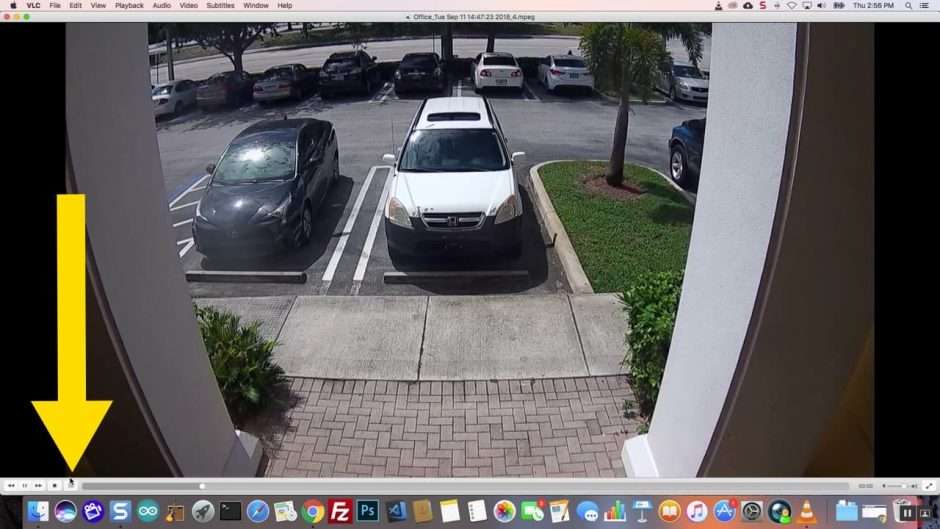
To select video from another camera, click on the playlist button and select the exported video file you want to view.
Download Exported Video Files
Many customers want to experience video playback on their Mac before they decide to purchase an iDVR-PRO. For your convenience, we have made the original exported files used to make the above instructions and demo video available to download. Please follow these instructions to download and playback the below video backup files on your Mac.
How-to Export and Playback Recorded Video Surveillance on Windows PCs
using the Windows CMS Software for iDVR-PRO CCTV / HD-over-Coax Security Camera DVRs

The process to backup and play recorded video surveillance footage on a Windows PC requires the use of the Windows CMS software that is included with all iDVR-PRO DVRs. These DVRs support analog CCTV cameras and the latest HD-over-Coax type security cameras.
Video Export and Playback Instructions
Follow these instructions to backup / export recorded video surveillance footage from an iDVR-PRO DVR to a Windows computer. These instructions assume that you already have the CMS software for iDVR-PRO installed on your Windows PC and that your DVR connection is already configured. If it is not, please follow these setup instructions first. Then, follow the below instructions.
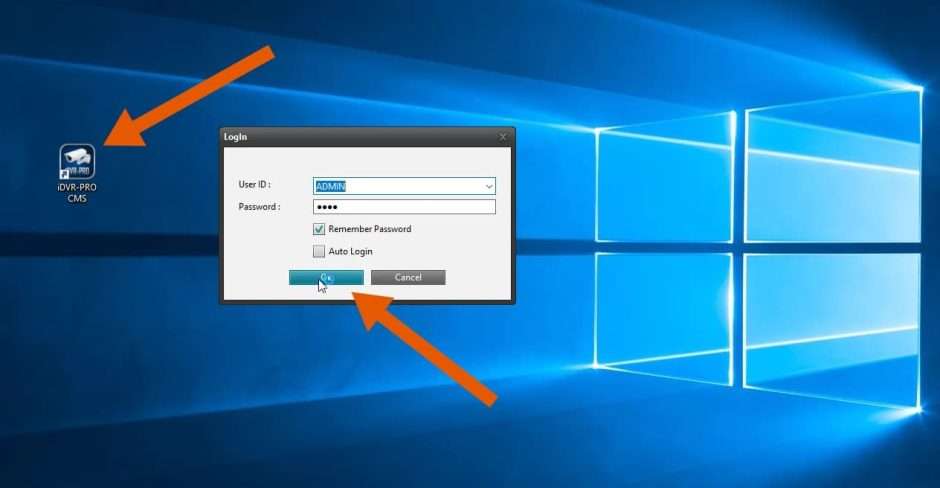
Open the Windows CMS software by double-clicking on the program icon. Then login with your user ID and password. If you did not yet change them, the default user ID is ADMIN and the password is 1234.
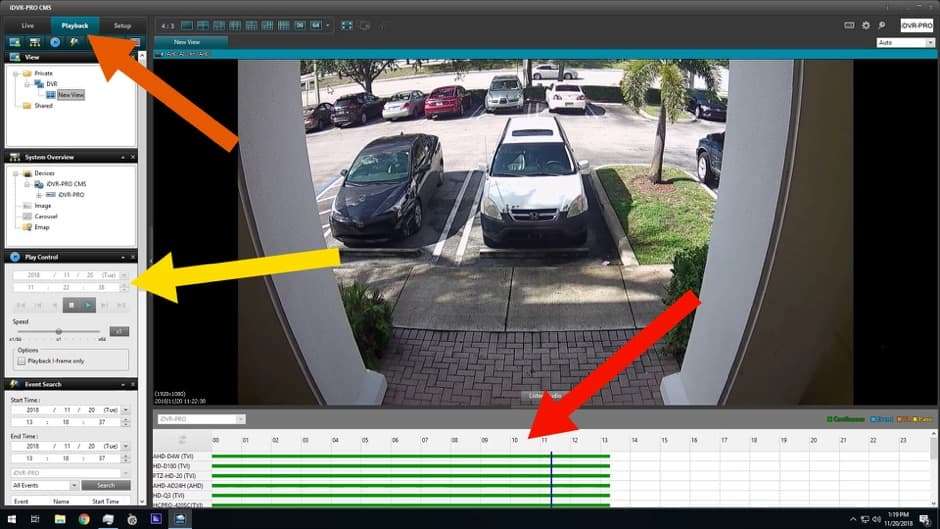
Once the Windows CMS client is connected, you most likely want to playback recorded video on the DVR to identify the time frame of the video event that you want to export. Click on the Playback Tab in the upper left. Then select the date and time where you want video playback to begin from the Play Controls on the left. You can also use the time-line scrubber on the bottom of the screen to select the specific hour and minute. Then, press the play button located on the Play Controls on the left.
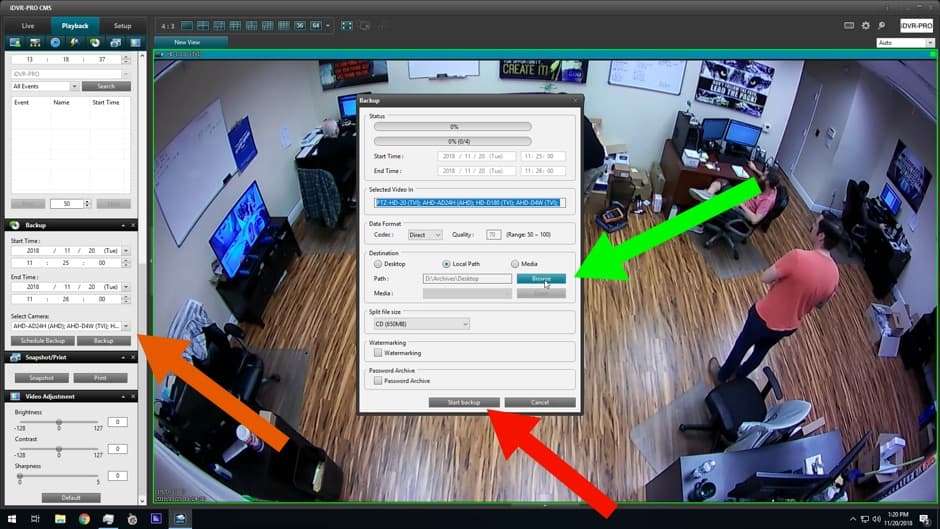
After you identify the time frame of video that you want to backup, enter the Start Time and End Time into the Backup window on the left. You also need to select which security cameras that you want video exported from. Then, click the Backup button. Another Backup window will open. In this Window, you can select to save the exported videos to the Windows desktop, choose a specific local file path, or export to a Media drive (such as a USB thumb drive). If you choose the local file path, click the Browse button to select the specific directory location to save the exported video files. CCTV Camera Pros recommends leaving the Codec format set to “Direct”. Click the Start Backup button after choosing these options.
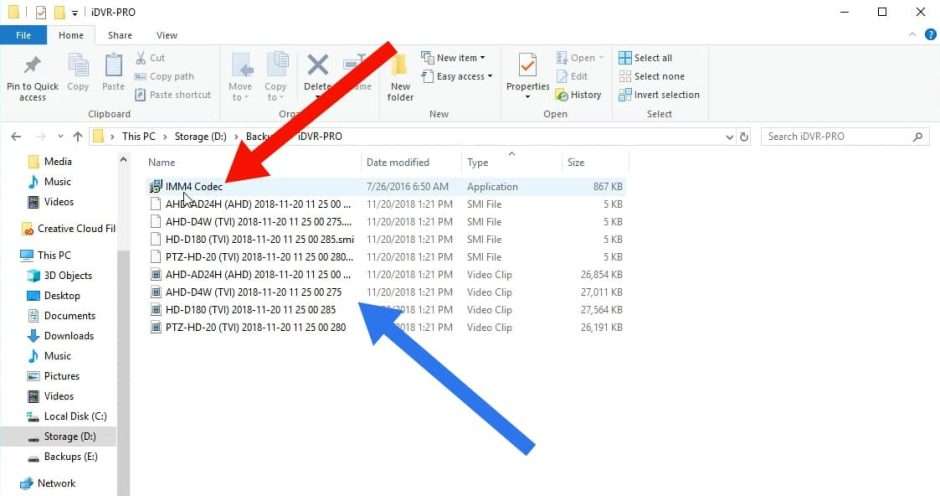
After the backup process completes, open Windows Explorer and browse to the location that you specified to export to. In this demo, I exported video from 4 security cameras. In addition to the 4 video files, the software also exports a video codec installer and 4 SMI information files. If this is the first time the you are playing back exported video from an iDVR-PRO DVR on your Windows PC, run the IMM4 Codec installer first. This will enable Windows Media player to recognize the video files.
After the video codec is installed, you cam double-click on each of the video files to playback in Windows Media Player.
Here is a screenshot of what the video playback looks like in Windows Media Player.
