How to Set Up 24 Hours Recording
Purpose:
You could setup 24 hours recording for the system. Please make sure there is an internal hard disk drive before recording. Without the hard drive, the system can show live viewing, but can’t record, playback either.
Steps:
1. Confirm hard drive was installed.
Newly installed hard drive needs formatting. Please format the hard drive like the picture below.
Please go to Main Menu—HDD—General—HDD Information to find this page.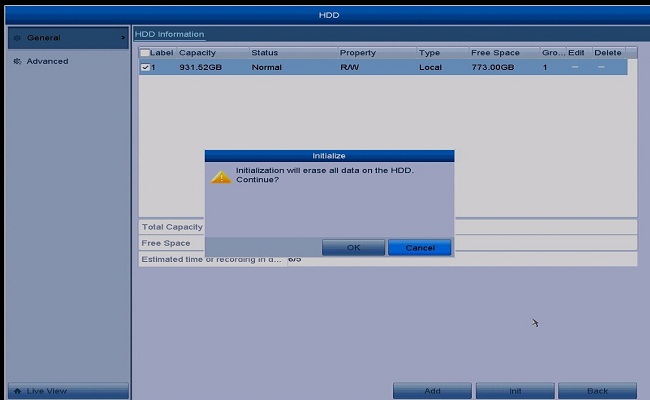
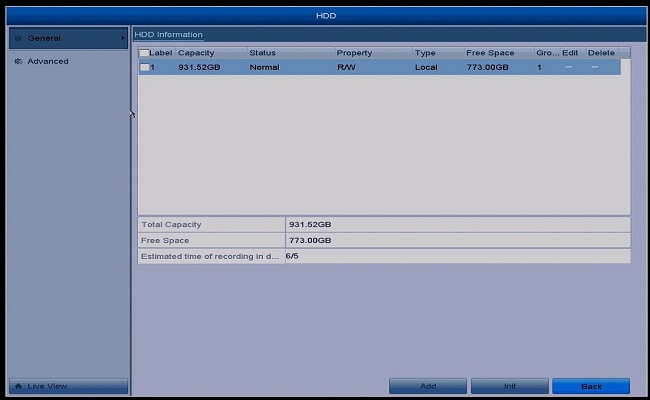
2. Then please check if the status of HDD is normal or not. It should be normal so that the system could record.
If the status is abnormal or other status, please refer to this instruction to make it normal first.
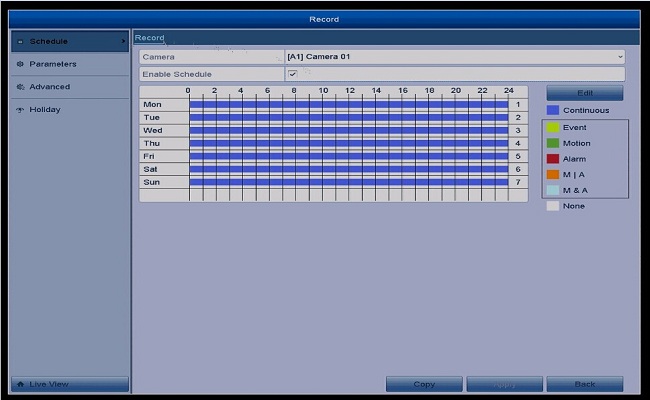
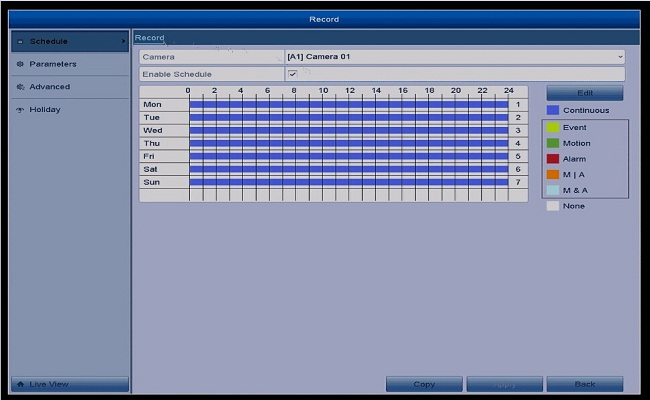
3. Go to Main Menu–Record–Schedule–Record to set up recording.
3.1 Please select the camera which you want to make a recording first.
3.2 Please enable Schedule.
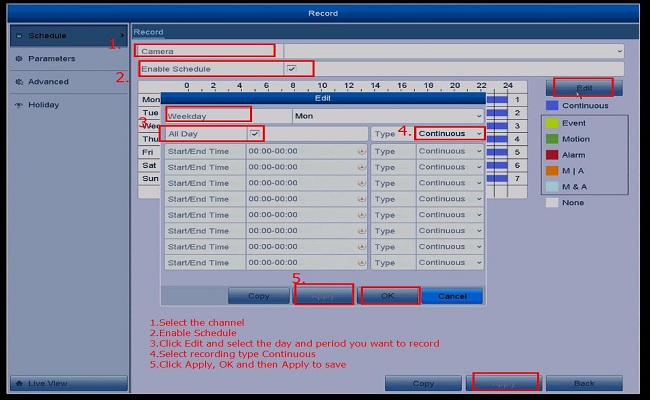
3.3 Please click Edit to setup the schedule.
Weekday: You need to setup the date one by one.
Please enable all day.
Type: Continuous.
4. After that, the blue bar will be showed on the record page. That means you have setup 24 hours recording.
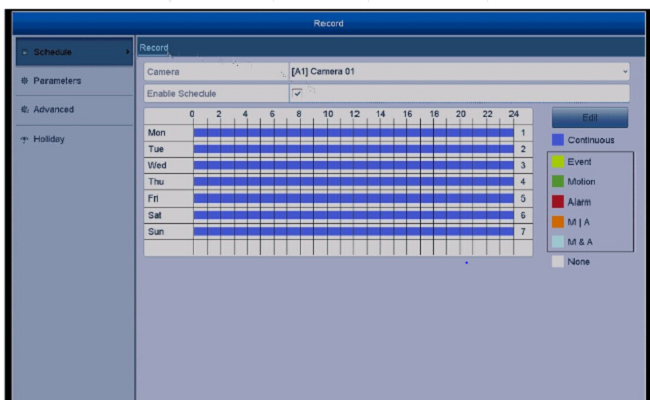
And this icon ![]() on the monitor also means you have already set up schedule recording.
on the monitor also means you have already set up schedule recording.
![]()
NOTE: The DVR needs an internal hard disk drive for recording. Without the hard drive, the system can show live viewing, but can’t record, playback either.
Here are the steps for you:
1. Confirm the hard drive installed. Newly installed hard drive needs formatting, please enter the Main Menu — Advanced Settings– Storage to Format Storage. And then go to the Main Menu—Info—HDD Info to check the hard drive status normal or not.
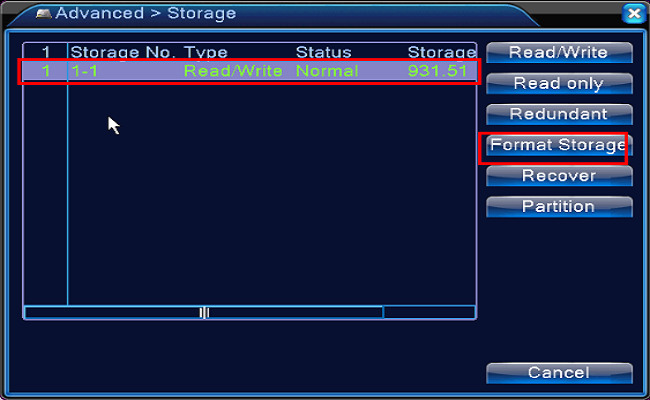
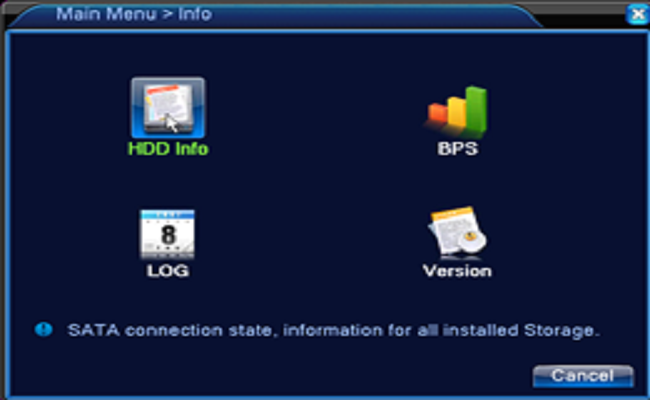
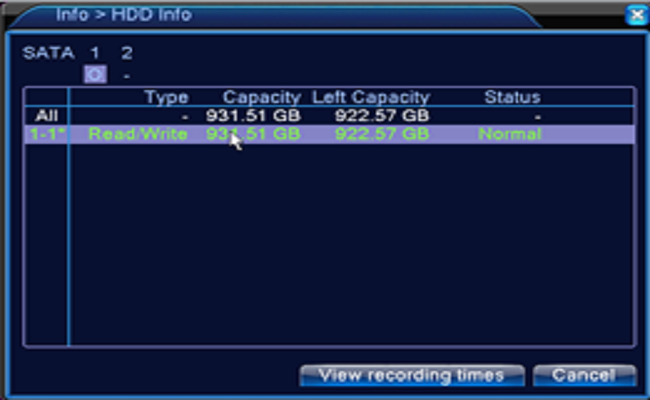
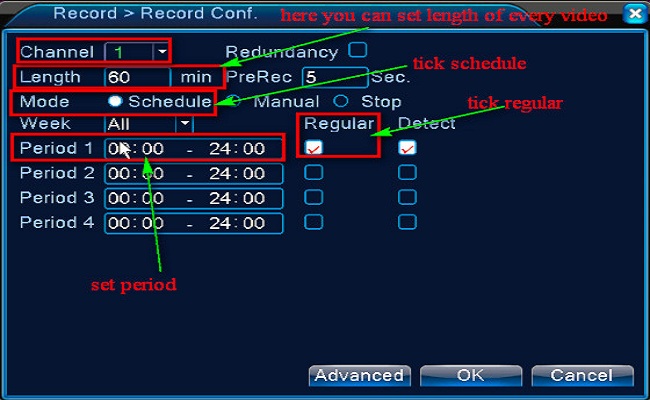
2. Go to the Main menu– Record–Record Conf to set the recording.
Select the channel first.
Set length of every video file
Tick Schedule or Time
Tick Regular
Set the Period you want to record.
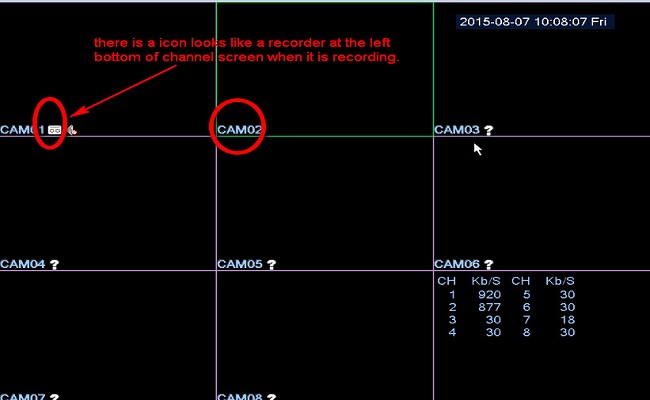
3. Back into the main view mode to check if the camera is recording.
Tips: If you want to back up the recording, please click here to have a try.
NOTE:The DVR needs an internal hard disk drive for recording. Without the hard drive, the system can show live viewing, but can’t record, playback either.
Here are the steps for you:
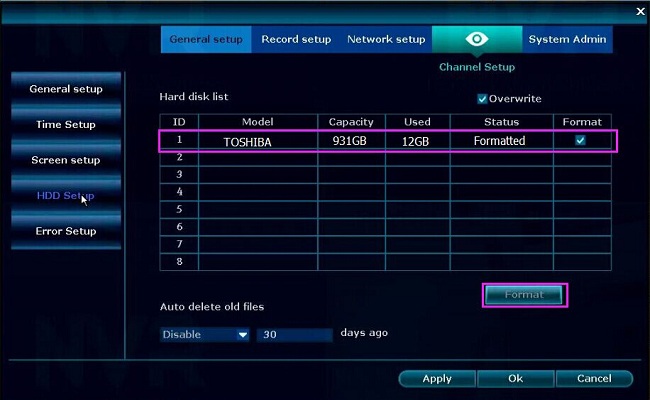
1. Confirm hard drive is recognized by the system and the status is formatted.
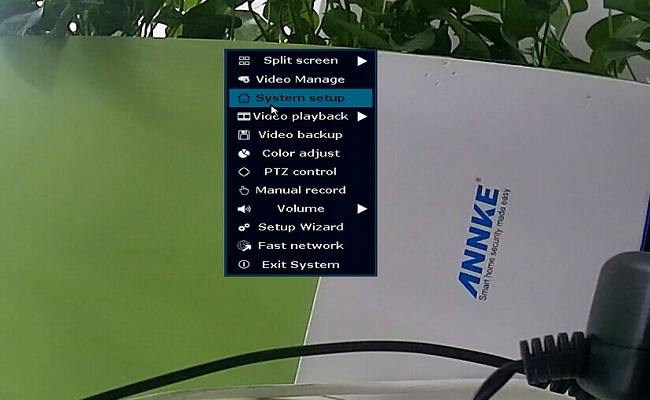
Please right-click your mouse, and click System setup–General setup–HDD Set up to check your HDD status.
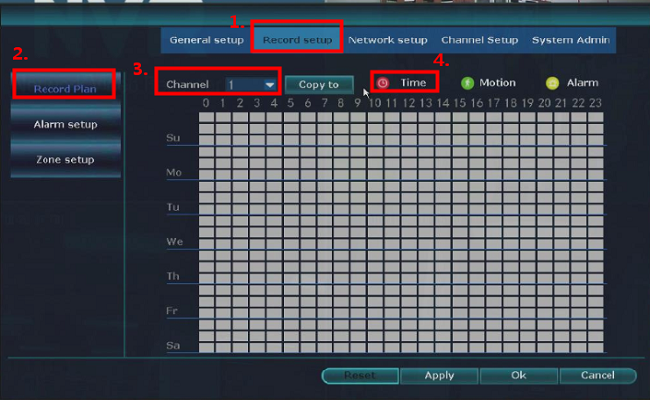
2. Go to Record setup-Record Plan to choose the channel, set the Weekday, set the time schedule, and choose the “Time” option.
Then click “Apply” to save the config.
I really love you
problem not solved thanks
problem not solved thanks
hello nice sharing thanks