We offer ONVIF for the users who want an alternative to our free cloud service.
Precondition:
1. ONVIF only works in the local network, i.e. the PC/smartphone and camera must be within the same network.
2. The camera must be online, i.e. the setup via the HiKam app is already complete.
3. Camera firmware must be higher than 13.0.0.61, go to HiKam App: My Camera -> Setting -> Update Device
From firmware 13.0.0.90 the camera also offers 720p HD via ONVIF interface. However, when HD is running over ONVIF, HD on HiKam App doesn’t work anymore (SD only).
Resolution 1280×720: rtsp://192.168.xxx.xxx:554/onvif1
Resolution 320×180: rtsp://192.168.xxx.xxx:554/onvif2
We have verified the following software that can be used to access the camera. If you need support for other software, please let us know and we’ll be happy to test it for you.
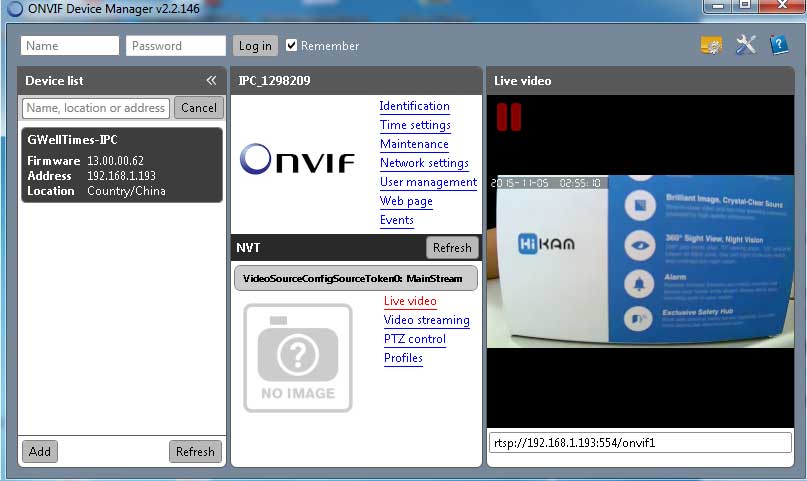
1. PC: ONVIF Device Manager
http://sourceforge.net/projects/onvifdm/
After the installation start the program. The program should be able to detect the camera automatically.
Unfortunately, pan/tilt does not work with this software.
2nd PC: iSpy
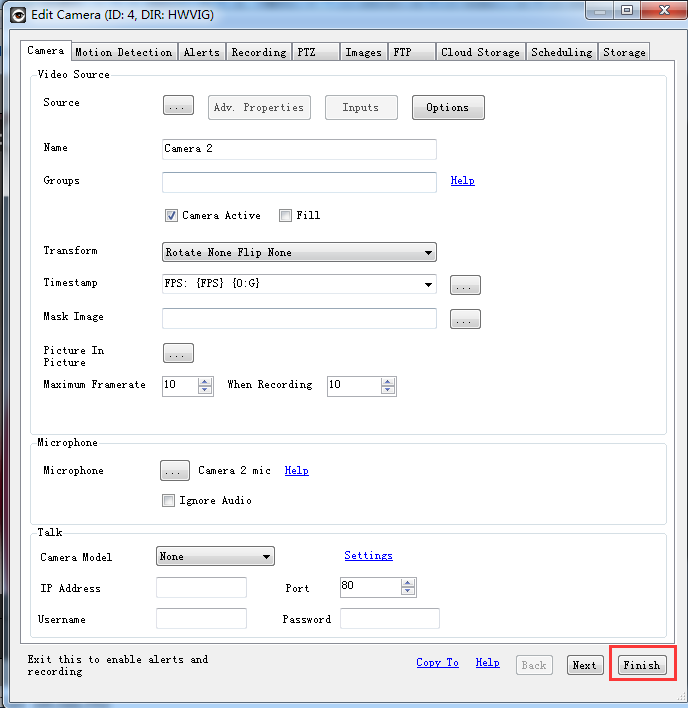
To add camera, go to Add -> Onvif Camera -> select “RTSP” and “Scan Network” -> select camera -> OK. After that you can see the picture.
iSpy offers you multiple configuration options for Alarm, Pan/Tilt (pan and tilt), FTP, SMTP, Cloud…
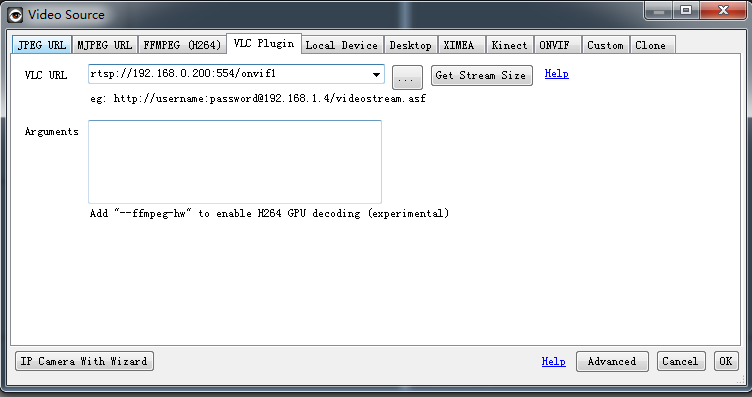
Click Add > ONVIF Camera

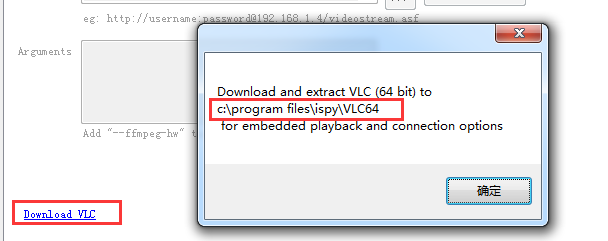
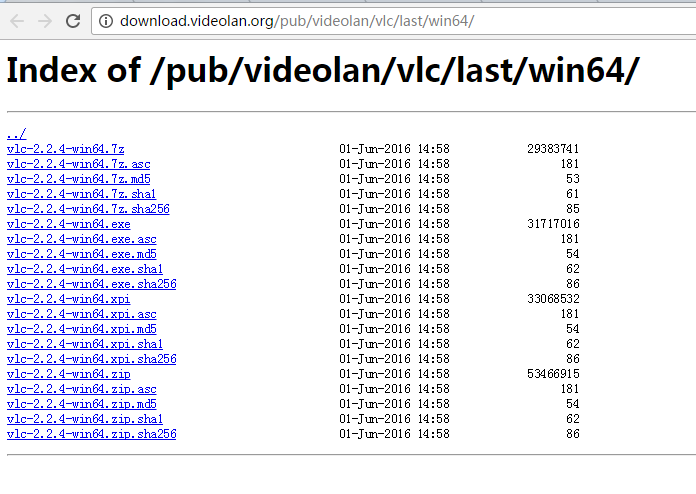
Go to the “VLC Plugin” tab > Download VLC. You will be taken to the page where you can download VLC. Select a suitable download pack here, as in the example “vlc-2.2.4-win64.zip”. Unzip the files into the directory as below by clicking on the link. You might have to create a folder yourself. Please make sure that libvlc.dll is located directly under the VLC64 folder. Close the “Video source” window. Go back to “Add” > ONVIF Camera > VLC Plugin. In the VLC URL, please enter rtsp://your_camera_ip:554/onvif1 and click OK. In the pop-up window click on “Exit”. Now you can see the video image from the camera.

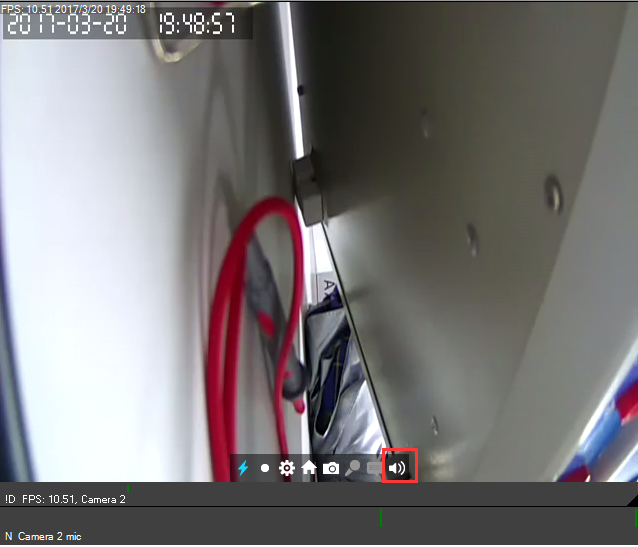
In order for the audio transmission to work, please click on the speaker button.
3. iOS: IP Cam Viewer
You can download the app from the App Store.
Add Camera -> Generic URL -> Type: Generic RTSP over UDP -> URL: rtsp://192.168.1.xxx:554/onvif1
ATTENTION: You must read the IP address of the camera from the router or via PC software such as ONVIF Device Manager.
4. Android: tinyCam Monitor
You can download the app on Google Play.
Add Camera -> ONVIF, enter IP address, port 5000, RTSP over UDP
ATTENTION: You must read the IP address of the camera from the router or via PC software such as ONVIF Device Manager.
5.Mac: SecuritySpy
http://www.bensoftware.com/securityspy/
ATTENTION: You must read the IP address of the camera from the router or via the “M-Sight” app.

6. Synology
IP address: You must read the camera’s IP address from the router or via PC software such as ONVIF Device Manager.
Connection: 554
Brand: Custom
Video format: H.264
Source path: /onvif1
Username and password can be left blank.
Warning: Videos can be saved to Synology, but sound track cannot be decoded yet. We’re still working on it.
Control Panel -> Security -> Advanced -> TLS/SSL Cipher Suites -> Intermediate Compatibility
7. Qnap
IP address: You must read the camera’s IP address from the router or via PC software such as ONVIF Device Manager.




my recorder is not working
I sent an e-mail from the communication channel. Can you help?
I can’t upload
I really love you
can you help me please
hello nice sharing thanks
I sent an e-mail from the communication channel. Can you help?
I can’t upload
I sent an e-mail from the communication channel. Can you help?
I sent an e-mail from the communication channel. Can you help?
hi how can i do
I can’t upload