How to Access Playback on Gamut NVR/DVR/ Camera Using Surveillance Client
Purpose of The Guide
This guide will show you how to access playback recordings of your Gamut camera or recorder, using a Windows or Mac computer.
Before You Begin
Your Gamut device will need to be turned on and connected to your internet router. You will need to use a TV to set up the recorder for the first time, follow the quick start guide to do so. After the initial setup, a TV or monitor is not necessary when accessing the recorder via a network connection.
If you are using a recorder and cameras, make sure that the cameras are connected and working.
If you are using a Wi-Fi bridge system with your camera, make sure that the bridges are turned on, wired correctly and communicating before you begin.
Let’s Get Started
Now that you have connected your recorder/camera to your internet router and turned it on, you will be able to view it using a program called Surveillance Client.
You will need to get the device added first to the Surveillance Client, if you have done this, then follow the guide below, if not then you will need to follow this guide Here
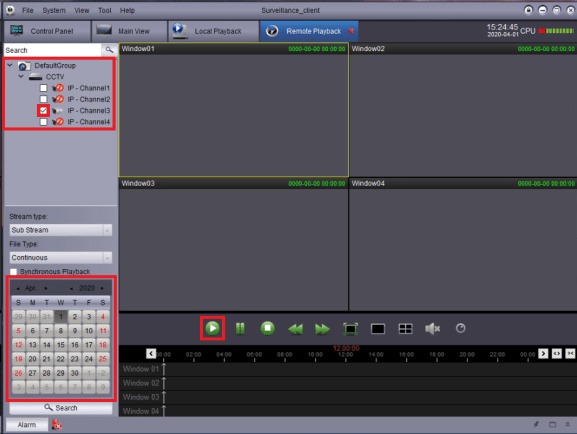
To access recordings, go to the Control Panel and then click on Remote Playback. Open up DefaultGroup on the left side panel, then select the cameras which you would like to view recordings from and click the play button. You can select the date using the calendar on the bottom right.
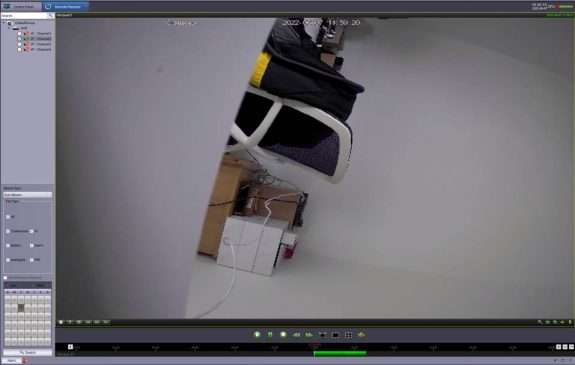
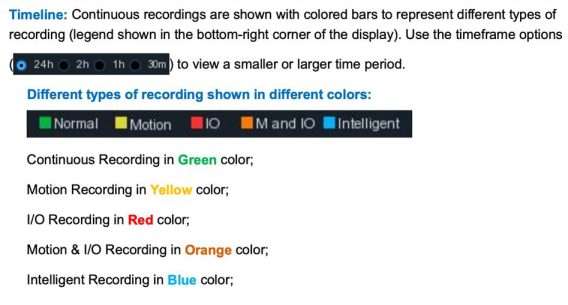
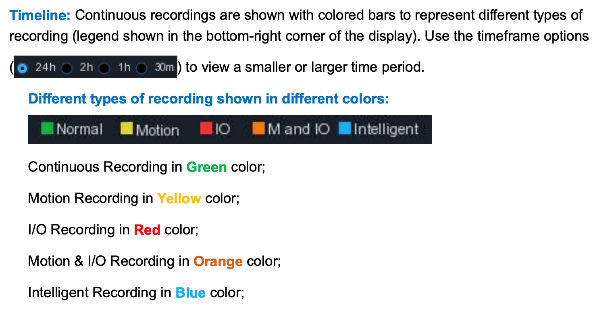
Once you have pressed play, you will see a timeline at the bottom, if you have your recorder set to motion it will be yellow, on continuous recording it will show a green line across the timeline, you can select what time to play by clicking on the timeline and then pressing play.
How To Export Footage from Gamut Surveillance Client Software (Windows/MAC)
Purpose of The Guide
This guide will show you how to download recordings from your Gamut camera or recorder, using a Windows or Mac computer.
Before You Begin
Your Gamut device will need to be turned on and connected to your internet router. You will need to use a TV to set up the recorder for the first time and follow the quick start guide to do so. After the initial setup, a TV or monitor is not necessary when accessing the recorder via a network connection.
If you are using a recorder and cameras, make sure that the cameras are connected and working.
If you are using a Wi-Fi bridge system with your camera, make sure that the bridges are turned on, wired correctly, and communicating before you begin.
Let’s Get Started
You will need to make sure you have added your camera or NVR/DVR to the surveillance client, if you have done this already then you do not need to follow the guide I have provided Here.
Once items have been added to Control panel, select remote playback.
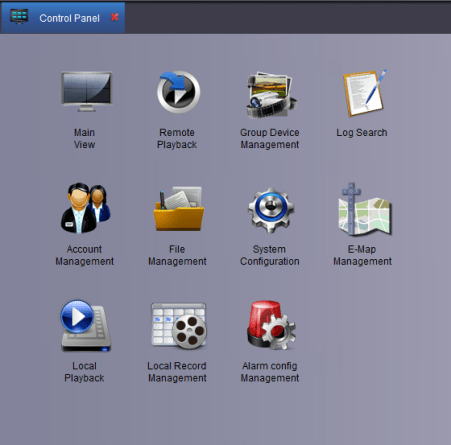
Once you selected remote playback, your page should look like this.
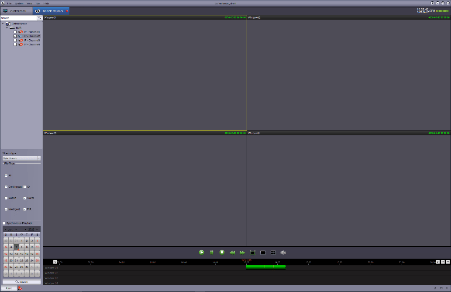
Things you need to make sure of are that you have selected the default groups on which camera you are trying to filter back on the playbacks?
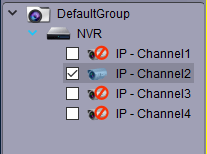
Then select all files and make sure you have selected which date you want to filter the playbacks on.

Then hit search -> then there should be a timeline that indicates what time, if not you can just press the play button, then your playbacks will start to play, when it playing back you will need to look for this icon.
![]()
This is the download button.
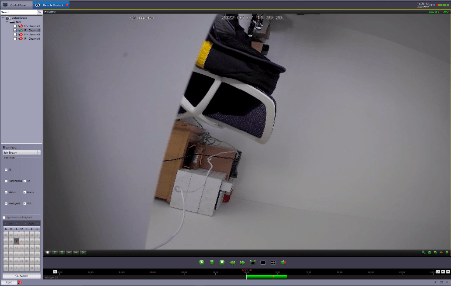
Once the button has been hit, you have a load of files you can download.
Then find the file you want to download, this shows the date and time or tick them all if you want all footage, then hit download, and files should start to download and when shown completed.
![]()
Then you just need to go into the saved directory, where the file path is saved to.
Here are your downloaded files.

To find out where your files are saved too, you will need to system -> systems configurations.
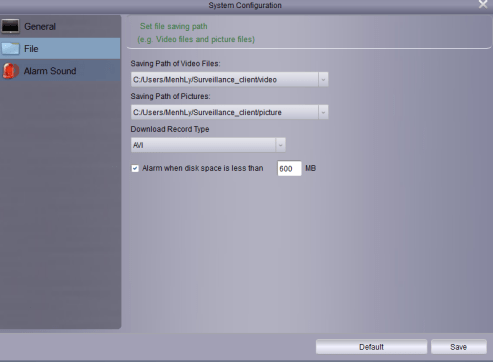
If your files are not playing, please download the VLC player and play the files through there.
How To Add Port Forwarding Rules with Dyn Address to RXCAMVIEW
Purpose of The Guide
This Guide will show you how to add your Dyn address or static IP address settings to the RXCAMVIEW app on a smart device.
Before You Begin
Make sure all the port forwarding rules are in place and the Dyn address is working or you have a static IP address provided by your internet provider. If you want to know how to add the port forwarding rules, then you need to follow the guide Here.
You will also need to make sure your Dyn address is working, ours is exampledns.dvrdns.org <- this should direct you to your Gamut cameras / NVR login page.
If you need to download the RXCAMVIEW App.
You will also need your recorder password to enable you to add the device to the RXCAMVIEW APP.
Let’s Get Started


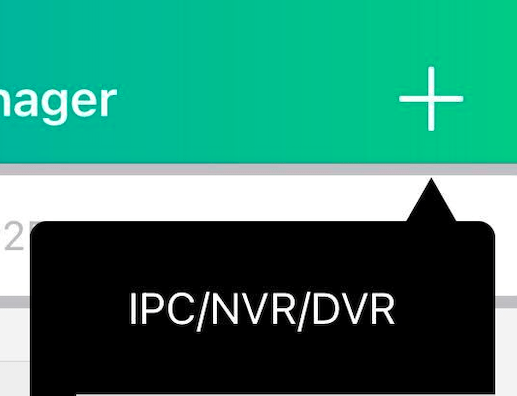

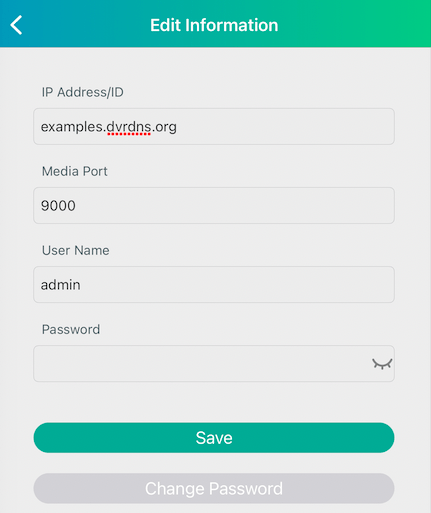
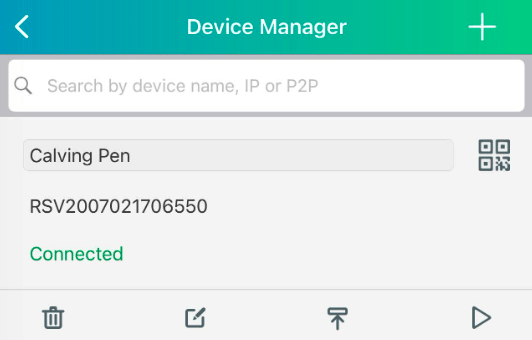
Once it has been saved you need to go back into devices lists and wait for the device to show connected to indicate you have added the device correctly, if it showing like the photo below, to see the camera you need to click on the triangle icon to loads live feeds.
How to Manually Add an IP Camera to a Gamut DVR/NVR through a TV
Purpose of The Guide
This guide will show you how to manually add an IP camera to a DVR/NVR.
Before You Begin
Your Gamut device will need to be turned on and connected to your internet router. You will need to use a TV to set up the recorder for the first time and follow the quick start guide to do so. After the initial setup, a TV or monitor is not necessary when accessing the recorder via a network connection.
If you are using a recorder and cameras, make sure that the cameras are connected and working.
If you are using a Wi-Fi bridge system with your camera, make sure that the bridges are turned on, wired correctly, and communicating before you begin.
IP Camera
This menu allows you to add IP cameras to the NVR.
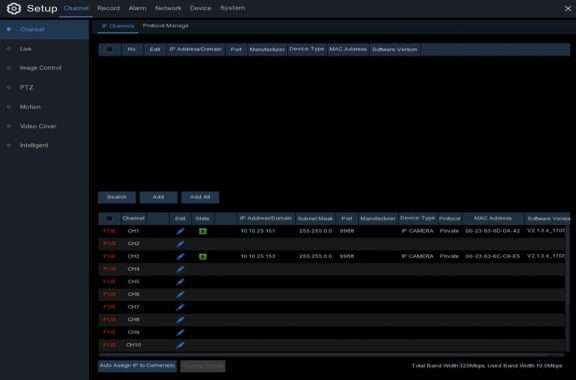
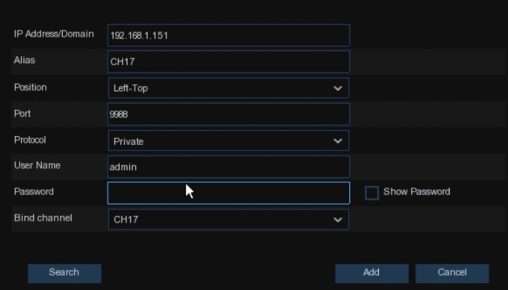
Click Search button to search IP cameras, and then click one of the IP cameras in the device list.
IP Address/Domain: The IP address or domain name of the IP camera
Alias: Name of the IP camera Position: Position to display the camera name on the screen.
Port: Port of the IP camera
Protocol: Choose the protocol of the IP camera from the dropdown menu (Normally Select ONVIF)
User Name: User Name of the IP camera
Password: Password of the IP camera
Bind channel: Choose a channel of the NVR you want to attach to
Auto Assign IP to Camera(s): The added IP camera would be not able to connect if its IP address is not in the same network segment with NVR. With this function to reassign an IP address to all added IP cameras.
Channel Delete: Choose one or more added IP cameras, and click this button to detele.
How To Export Footage From a Gamut DVR/NVR Directly Through a TV
Purpose of The Guide
This guide will show you how to access some of the settings and how to download footage directly from the recorder, using a mouse and TV, and Monitor.
Before You Begin
Your Gamut device will need to be turned on and connected to your internet router. You will need to use a TV to set up the recorder for the first time and follow the quick start guide to do so. After the initial setup, a TV or monitor is not necessary when accessing the recorder via a network connection.
If you are using a recorder and cameras, make sure that the cameras are connected and working.
If you are using a Wi-Fi bridge system with your camera, make sure that the bridges are turned on, wired correctly, and communicating before you begin.
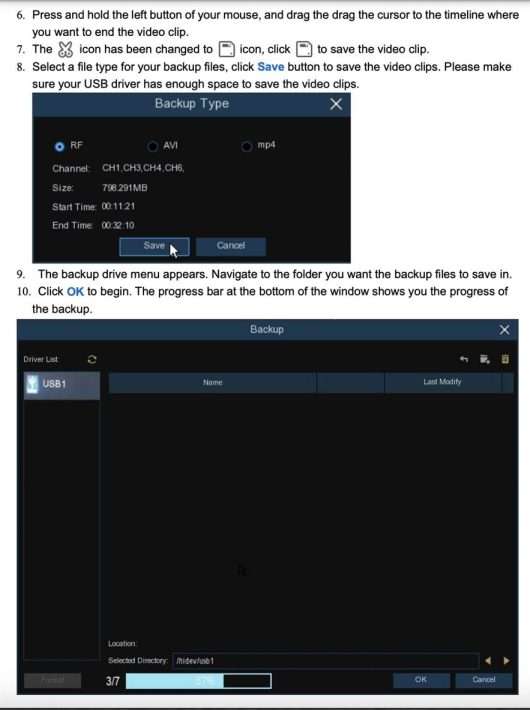
How to Backup Video Footage From DVR/NVR
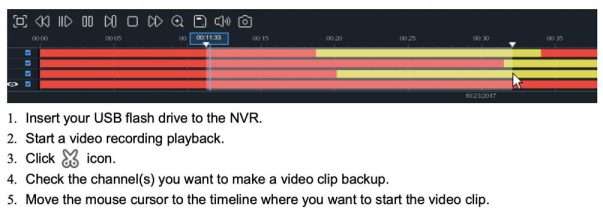
You will need to locate the files you want to download, you will need to access this through playback, if you do not know how to here is the guide for it Here
Then follow here on how to download the footage to USB Stick.
Basic Setting Direct through a Gamut DVR/NVR
Purpose of The Guide
This guide will show you how to use basic settings from your Gamut camera or recorder, using a mouse connected to the TV or monitor directly from the recorder itself.
Before You Begin
Your Gamut device will need to be turned on and connected to your internet router. You will need to use a TV to set up the recorder for the first time and follow the quick start guide to do so. After the initial setup, a TV or monitor is not necessary when accessing the recorder via a network connection.
If you are using a recorder and cameras, make sure that the cameras are connected and working.
If you are using a Wi-Fi bridge system with your camera, make sure that the bridges are turned on, wired correctly, and communicating before you begin.
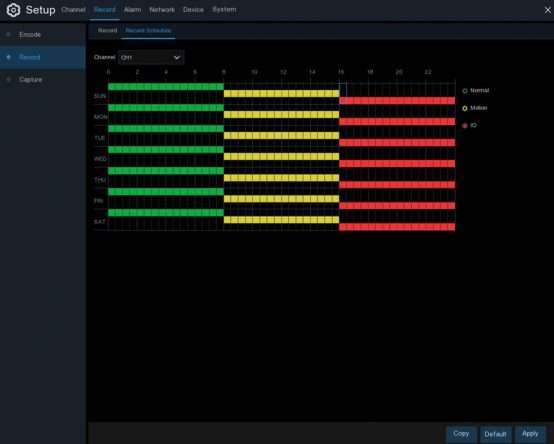
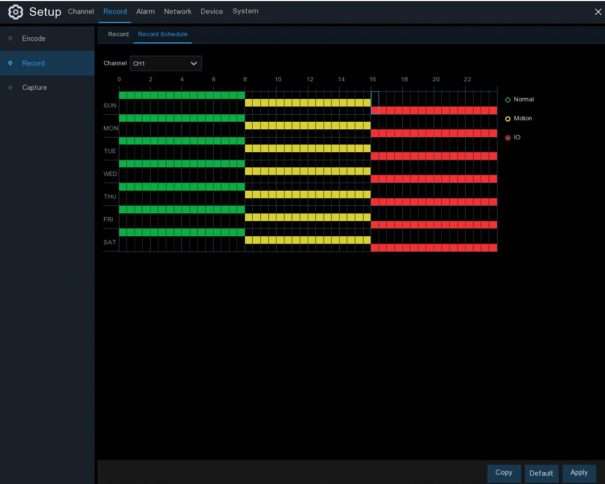
Recording Schedule
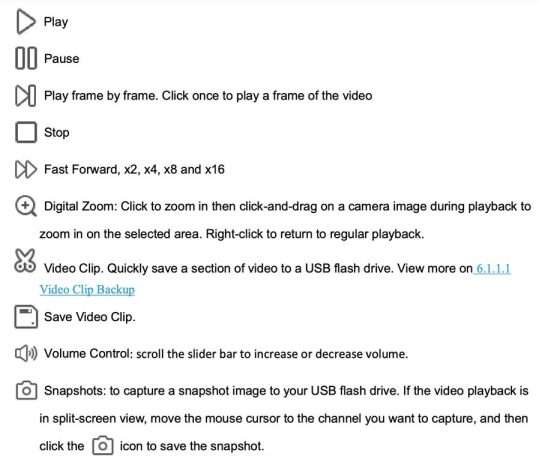
Playback Functions
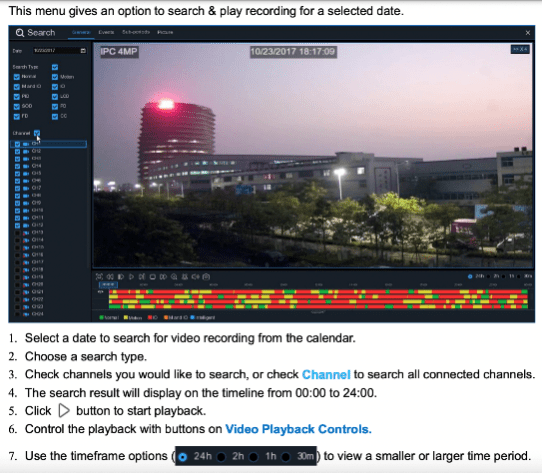
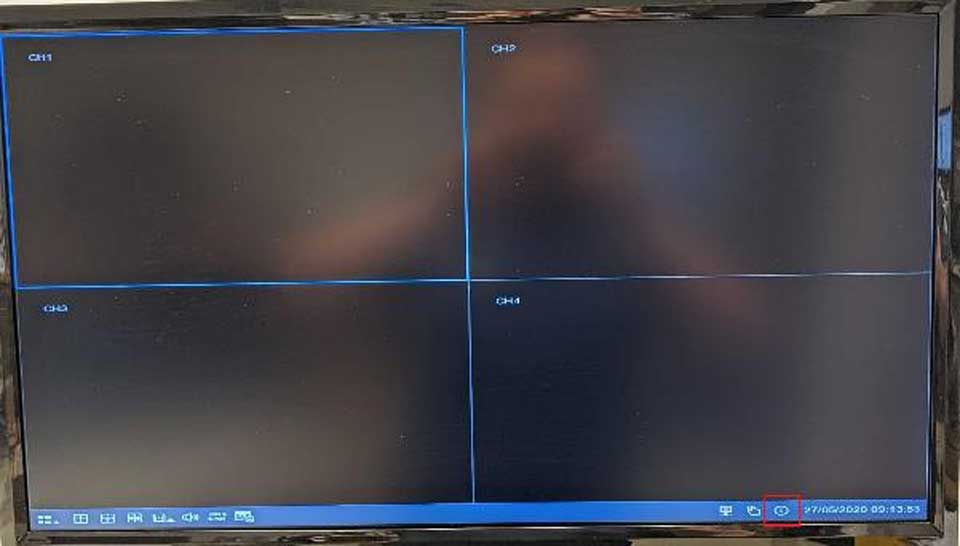
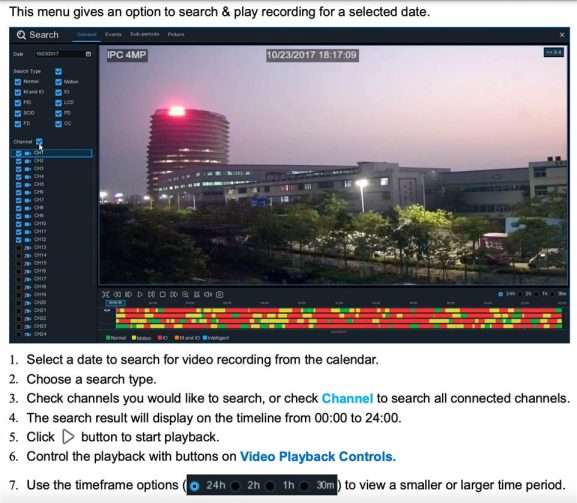
Click the Search button in the Start Menu to enter the search section
6.
Motion Settings
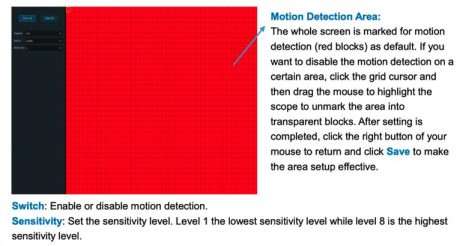
This menu allows you to configure the motion parameters. When the motion has been detected by one or more cameras, your NVR will alert you to a potential threat at your home. It does this by sending you an email alert with an attached image from the camera to use as a reference (if this option is enabled) and/or sending push notifications via the mobile app.
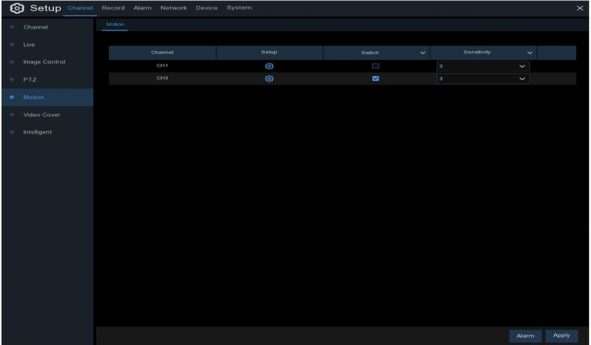 Setup: Click the icon on the setup page
 ![]()
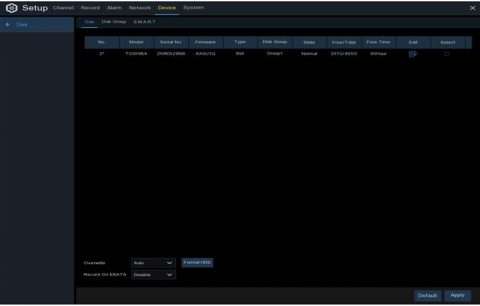
Formatting Disk
This menu allows you to check & configure the internal HDD(s). You need to format the HDD only at the first startup and if you replace a new HDD.
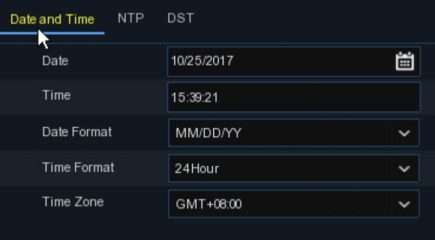
Date and time
This menu allows you to configure the Date, Time, Date Format, Time Format, Time Zone, NTP, and DST
Date and Time. Click on the calendar icon to set the current system date.
To get to this page, please goto systems -> General -> date and time.
NTP
NTP stands for Network Time Protocol. This feature allows you to synchronize the date and time automatically on the NVR over the Internet. Therefore, the NVR needs to be connected to the Internet.
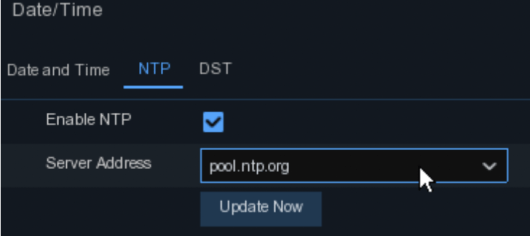 Check the “NTP” box, and select the NTP server
DST
DST stands for Daylight Savings Time.

Changing Password
To change the password for the administrator or user accounts, click the User Edit icon. The password has to be a minimum of 8 characters and can contain a mixture of numbers and letters.
Enter your new password again to confirm, and then click Save to save your new password. You will be required to input your old password to authenticate.
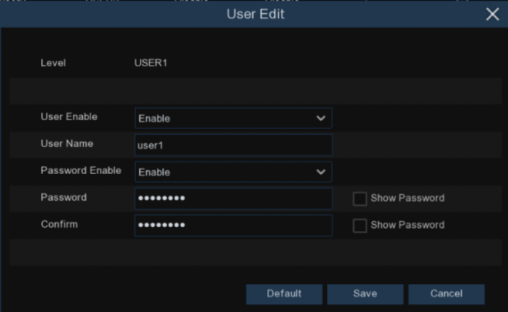
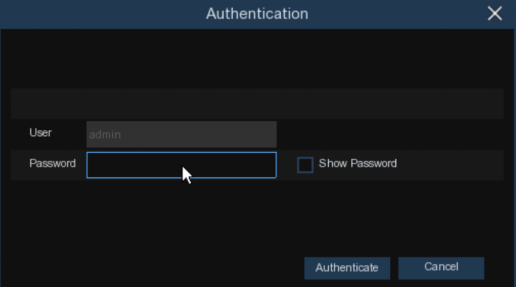
Password Enable: It’s strongly recommended to enable the password to protect your privacy. If you want to disable the password protection, please ensure your NVR is placed in a secure place.
We strongly recommend not having the password disabled if your NVR is connected to the internet as you are at more risk of unwanted people getting access to your system.
Add New Users
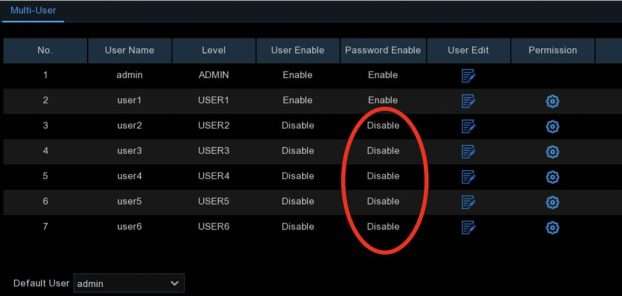
1. Select one of the user’s accounts that is currently disabled, and click the User Edit icon.
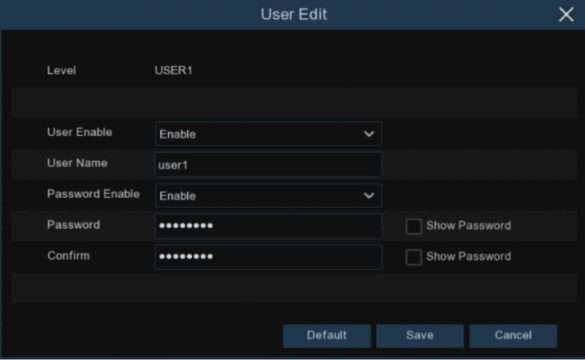
2. Select Enable from the drop-down next to User Enable.
3. Click the field next to User Name to change the user name for the account.
4. Select Enable from the drop-down next to Password Enable.
5. Click the field next to Password to enter the desired password. 6. Click the field next to Confirm to reenter the password. 7. Click Save. You will be required to input your Admin password to authenticate.
How to setup Recording Schedules and Access Playback Directly through a DVR/NVR Through a TV
Purpose of The Guide
This guide will show you how to setup Recording Schedules and access playbacks from your Gamut camera or recorder, direct using a mouse wired to the recorder and monitor/TV
Before You Begin
Make sure the date and time are correct on the recorder and then make sure you have formatted the HDD.
Let’s Get Started
Playbacks Functions
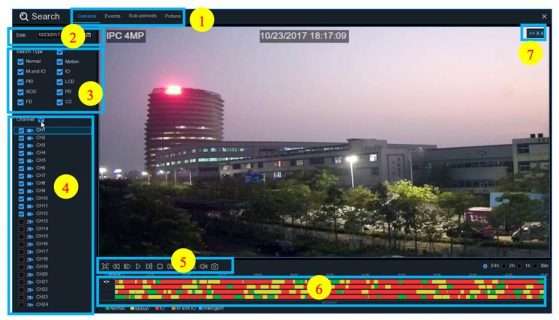
Click the Search button in the Start Menu to enter the search section
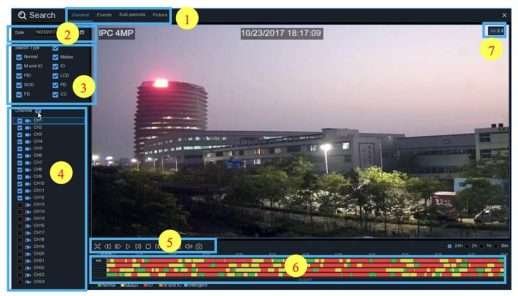
1. Search Options: the system provides various search & playback methods: General, Events, Sub-periods, Smart & Pictures
2. Search Date: search by date to playback.
3. Search Type: the system provides different search types to narrow your search.
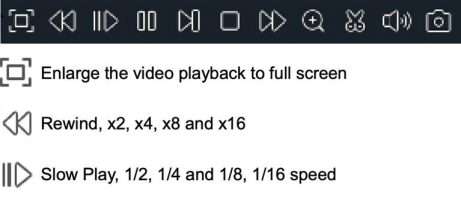
4. Channel Selection: choose the channels you want to search & play. 5. Video Playback Controls: to control the video playback.
5.
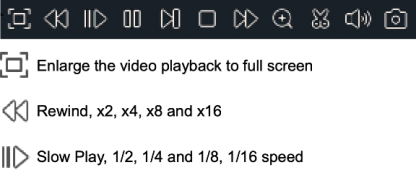
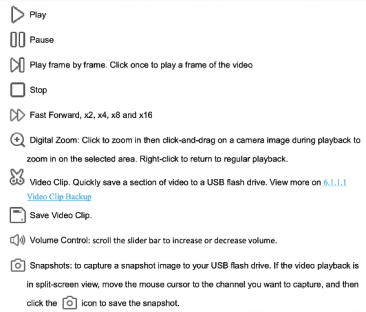
6.
Search & Play Video in General
