If your security system can’t work with the ATCloud properly, please try to use the APP FreecamPro. Here are the steps about how to connect the system to the APP.
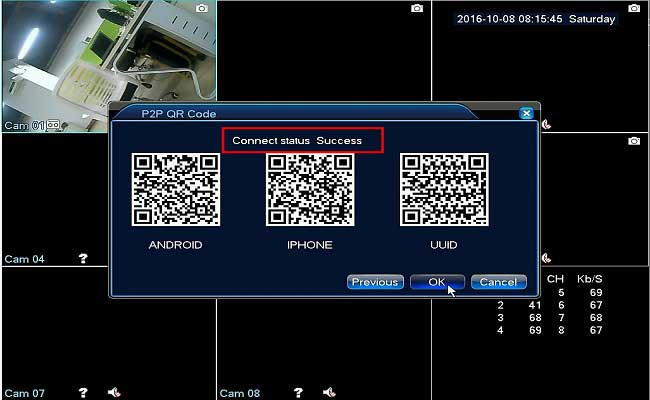
Please check the network status of the system on the monitor. It must be “success” if you want to get a remote view on the phone and on the computer.
Right-click to call out the menu, then go to booting wizard to have the system internet status as bellow:


Please make sure the connection status is success.
If the network is not “connected”, please refer to below instruction to fix the network problem:
1. Please download the APP FreecamPro from Google Play or APP Store.
2. Please do not register the APP account and directly to add the system via the local login.

3. Add the system to the APP by using the serial number:


In the Device Information page, please input the information and click save button on the right upper corner:
-
- Register Mode: GID
- DeviceName: create a name for your system on the phone APP
- GID: serial number of your system, and scan the UUID QR code of the system
- User Name: default one is admin
- Password: admin password of your system
- Channel Num: 8 for DN81Q, 4 for DN41Q
4. If the device information is correct, the system could be added successfully, and you could view the cameras on the APP.
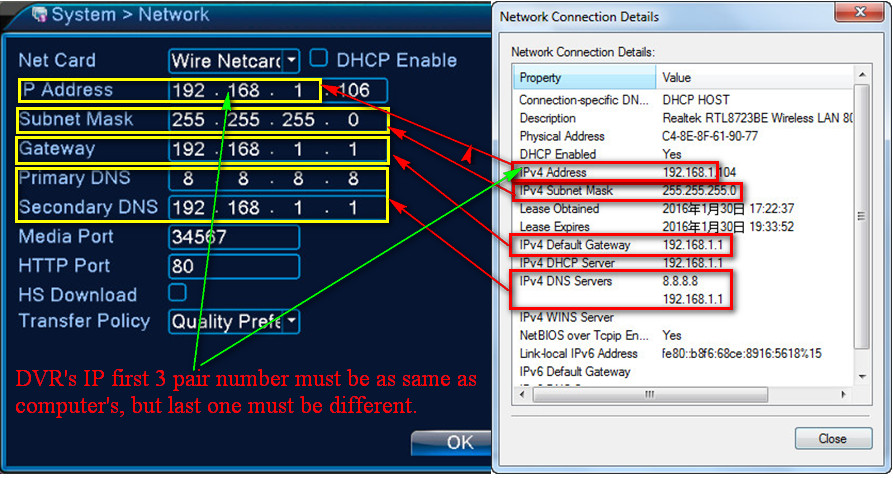
How to manually fix DVR/NVR’s IP?
1. Please use a computer that is connected to the same router and check the computer’s network information.
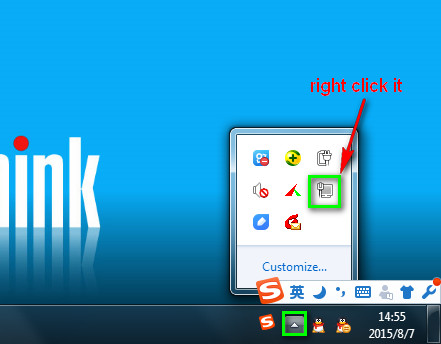
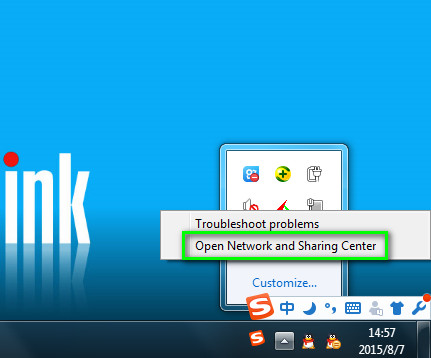
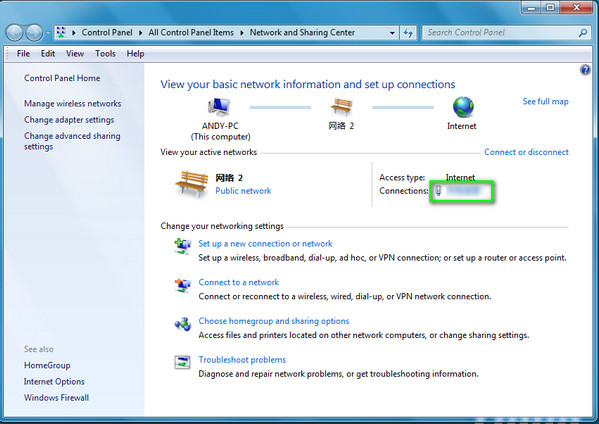
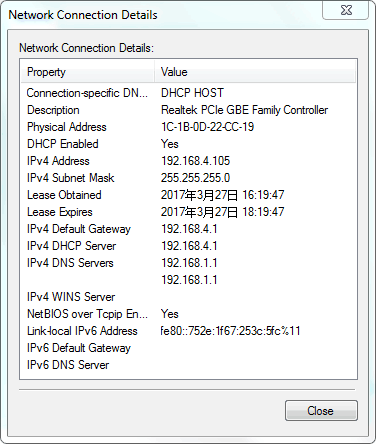
3. Please fix the system’s IP like the picture below.
I sent an e-mail from the communication channel. Can you help?
my recorder is not working
hi how can i do
hi how can i do