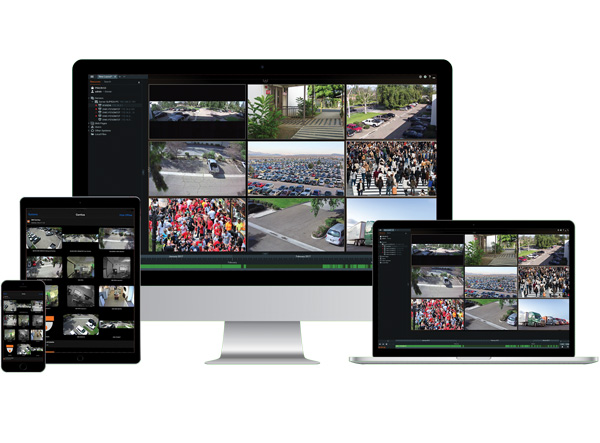
Installing DW Spectrum for Windows, DW Spectrum® is an endlessly customizable IP video management platform that gives users the ability to create tailored network video solutions for any type of project, for use by anyone, on any device.
Creating A New System
DW Spectrum is composed of two parts:
To ensure the best possible experience and to keep your systems secure and stable, we strongly recommend using a supported operating system. Please click on the link provided HERE for a list of supported operating systems by DW Spectrum.
Supported/Affected Devices
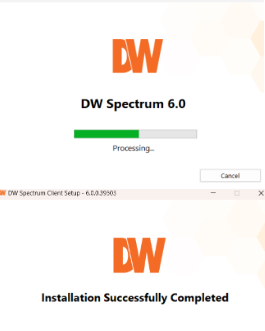
Installing DW Spectrum
To download the most recent version of DW Spectrum:
For instructions on how to install DW Spectrum on Ubuntu, please click HERE to be directed to the Ubuntu installation guide page.
For instructions on how to install DW Spectrum on Macintosh, please click HERE to be taken to the Windows installation guide page.
To obtain previous versions of DW Spectrum, go to https://support.digital-watchdog.com/kb/article/997-dw-spectrum-previous-build-list/ which provides links for downloading older versions of DW Spectrum.
Creating a New System
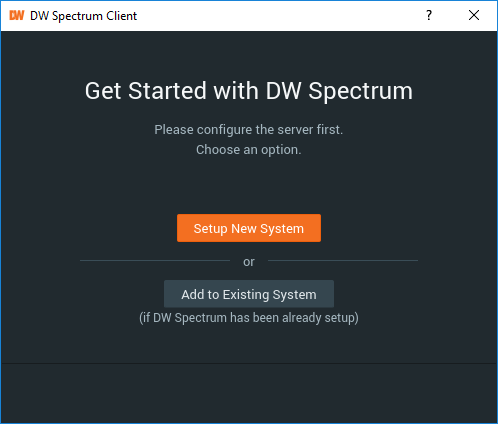
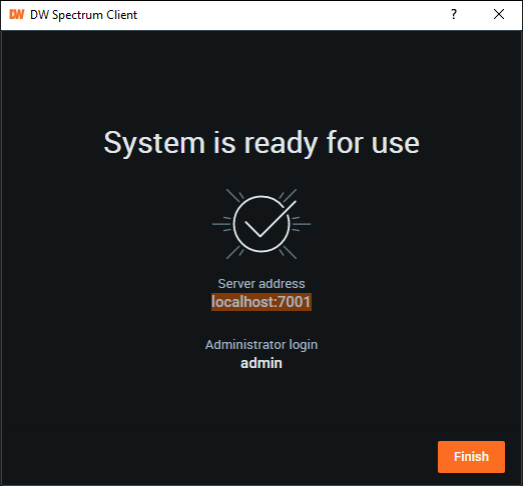
1. Launch DW Spectrum and create a New Server.
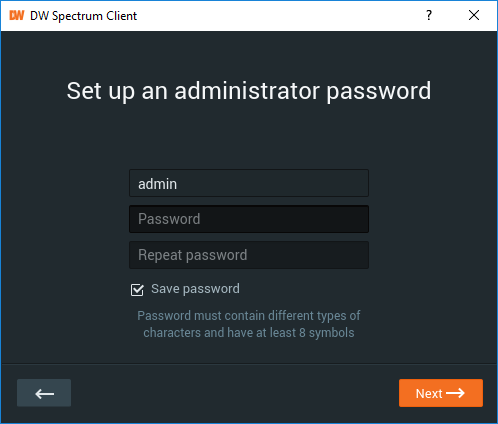
**NOTE: It is recommended to create a password that uses at least eight characters and contains at least two variations of lowercase letters, capitalized letters, numbers, or non-roman symbols.
Use the login of “admin” and the password that you created in the previous step to log in and use the System.
.
DW Spectrum – FQDN or Allowlist for DW Cloud Access
Port Configuration
Video management systems (VMS) will generate Internet traffic if a system is provided with Internet access. Because of this, some port management may be needed to allow access through network security for systems to communicate with each other, especially if a DW Spectrum System is comprised of merged servers between different locations.
DW Cloud™ is part of a Peer-to-Peer (P2P) network that allows DW Spectrum users to easily connect with individual servers and merged systems but there may be instances where an enterprise Firewall prevents communication.
When a user attempts to connect with a camera remotely, the connection will first be routed to the DW Cloud server, which will then direct the connection to the DW Spectrum Server using the already established socket that was previously initiated. Authentication and connection will then be established between the connecting DW Spectrum Client and DW Spectrum Server, providing access to the camera.
The presence of a firewall or SonicWall can interfere with this P2P communication. This is why some network configuration may be required when using an Internet connection from behind a security wall.
This article will outline the relative port information required to allow access between DW Cloud and DW Spectrum systems.
**NOTE: To check DW Cloud status, visit https://www.digital-watchdog.com/cloudstatus.
FQDN/Allowlisting – Firewall/SonicWall Pass List
To allow a remote connection through a firewall or SonicWall with DW Cloud or a DW Spectrum Client interaction, the routing and Internet security settings of your network may require you to use a specified address list.
When configuring a firewall or SonicWall, FQDN (Fully Qualified Domain Name) format should be used in order to successfully allowlist the specific services of DW Cloud and DW Spectrum, as some of the endpoints do not inherently resolve to static IP addresses.
**NOTE: Please note that it is important to add all the FQDNs that are listed below to your firewall pass list, not just the ones that are specific to your region. To learn more about how the DW Cloud connection service work, you may refer to the article DW Cloud Overview.
For DW Cloud Portal and Cloud Database (TCP Ports: 80, 443)
Required to connect with or to disconnect systems from DW Cloud and to maintain connections.
https://dwspectrum.digital-watchdog.com
.
15.197.226.136
.
3.33.243.34
.
13.248.187.145
.
76.223.54.46
For Relay – (TCP Ports: 80, 443, 3345; UDP Port: 3345)
Main
relay.vmsproxy.com
Americas
Ashburn 1, VA
relay-us-abn-1-prod-dp.vmsproxy.com (37.19.207.250)
.
Chicago 1, IL
relay-us-chi-1-prod-dp.vmsproxy.com (143.244.60.94)
.
Chicago 2, IL
relay-us-chi-2-prod-dp.vmsproxy.com (143.244.60.77)
.
Dallas 1, TX
relay-us-dal-1-prod-dp.vmsproxy.com (95.173.216.240)
.
Los Angeles 1, CA
relay-us-lax-1-prod-dp.vmsproxy.com (89.187.187.173)
.
Los Angeles 2, CA
relay-us-lax-2-prod-dp.vmsproxy.com (89.187.185.106)
.
Miami 1, FL
relay-us-mia-1-prod-dp.vmsproxy.com (121.127.41.217)
.
New York 1, NY
relay-us-nyc-1-prod-dp.vmsproxy.com (79.127.243.103)
.
New York 2, NY
relay-us-nyc-2-prod-dp.vmsproxy.com (79.127.243.102)
.
Seattle 1, WA
relay-us-sea-1-prod-dp.vmsproxy.com (79.127.221.31)
Europe
Prague 1, Czech
relay-cz-prg-1-prod-dp.vmsproxy.com (143.244.58.97)
.
Frankfurt 1, Germany
relay-de-fra-1-prod-dp.vmsproxy.com (87.249.129.114)
.
Amsterdam 1, Netherlands
relay-nl-ams-1-prod-dp.vmsproxy.com (79.127.227.187)
.
Stockholm 1, Sweden
relay-se-sto-1-prod-dp.vmsproxy.com (79.127.249.120)
Oceania
Sydney, Australia 1
relay-au-syd-1-prod-dp.vmsproxy.com (95.173.193.212)
.
Melbourne, Australia 1
relay-au-mel-1-prod-dp.vmsproxy.com (79.127.130.34)
China
Used for China users only, excluding Hong Kong.
cn-north-1.relay.vmsproxy.cn (52.81.101.172)
APAC Region
Singapore 1
relay-sg-sin-1-prod-dp.vmsproxy.com (169.150.243.58)
.
Singapore 2
relay-sg-sin-2-prod-dp.vmsproxy.com (169.150.207.238)
For Connection Mediator – (TCP Ports: 80, 443, 3345; UDP Port: 3345)
Americas
us-east-1.mediator.vmsproxy.com (52.7.195.88)
.
us-east-2.mediator.vmsproxy.com (3.138.130.201)
.
us-west-1.mediator.vmsproxy.com (54.193.142.173)
APAC
ap-southeast-1.mediator.vmsproxy.com (13.228.203.47)
.
ap-southeast-2.mediator.vmsproxy.com (54.153.133.243)
Europe
eu-central-1.mediator.vmsproxy.com (3.79.106.55)
.
me-south-1.mediator.vmsproxy.com (16.24.73.120)
For License Activation/Deactivation (TCP Ports: 80, 443)
Required to activate and manage licenses online.
licensing.vmsproxy.com (52.72.83.214)
For Update Notifications (TCP Ports: 80, 443)
updates.vmsproxy.com (18.239.83.45)
.
beta.vmsproxy.com (131.226.218.124)
For Anonymous Reporting (TCP Ports: 80, 443)
Required to send anonymous usage statistics.
stats.vmsproxy.com (54.156.124.139)
.
stats2.vmsproxy.com (34.232.222.180)
.
crashes.vmsproxy.com
For Fetching Public IP (TCP Ports: 80, 443)
Required to allow Servers to fetch a public IP for use in directing System traffic.
tools.vmsproxy.com (108.61.82.62)
.
tools-eu.vmsproxy.com (45.77.143.40)
For Speed Testing (TCP Port: 80)
speedtest.vmsproxy.com (18.197.17.126)
Refers to the following IPs, depending on the location of the client instance:
18.196.46.87
54.193.97.109
54.255.218.20
13.211.129.121
For Time Synchronization (TCP Ports: 37, 443)
Required to synchronize Server times with DW time servers.
time.rfc868server.com (13.57.241.111)
.
us-west.rfc868server.com (13.57.241.111)
.
frankfurt.rfc868server.com (3.65.25.111)
.
singapore.rfc868server.com (13.229.145.75)
Refers to the following IPs, depending on the location of the client instance:
54.67.89.126
35.157.161.236
54.254.212.230
For DW Ai Server Licenses and Configuration Tool (TCP Port: 443)
Required for DW Blackjack Ai Servers using Ai Version 2.9 or older.
**NOTE: DW Ai Server version should be 2.10r3 (or newer) and Configuration Tool is 2.10.2 (or newer).
https://ivalicense.mydw.cloud
Additional Resources
**NOTE: If needed, the current tool provides the option to create a .csv file.
Hotspot Set Up
Camera Hotspots
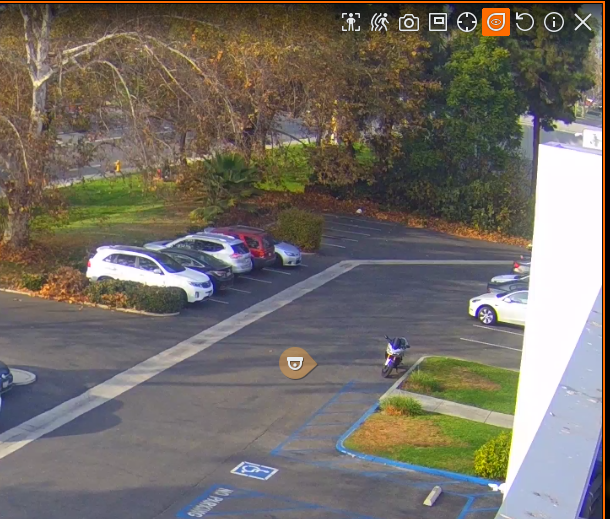
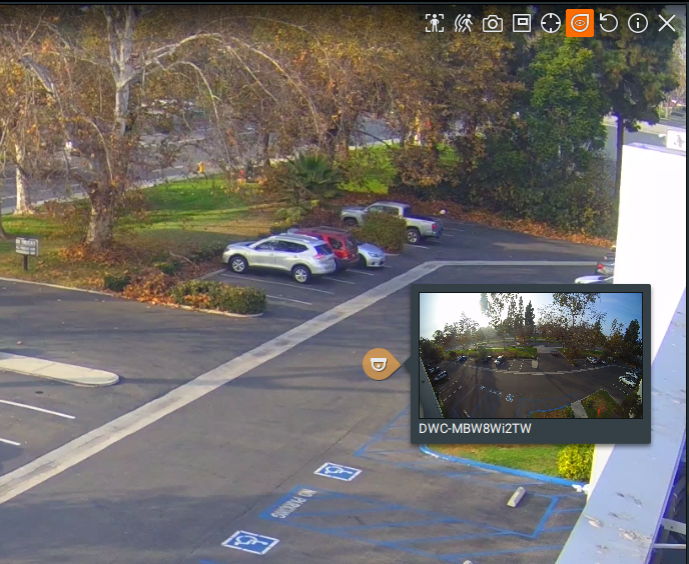
A “Hotspot” is a DW Spectrum viewing feature where clickable icons are layered over the display of a camera. Each hotspot icon is linked to another camera, offering easy navigation to alternative views of the same area or a natural path to follow as a person or vehicle moves through your surveillance site.
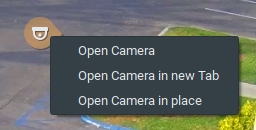
Viewers can hover their mouse over a hotspot to see a preview of a linked camera or click on the hotspot to open the linked camera in the viewing grid. This provides an easy method to follow objects of interest as they travel through doorways, down hallways, in and out of view from cameras.
Description of Use
Administrators and Power Users can add hotspots to cameras and customize each setup as desired. Including color coding and directional indicators. They can be freely positioned over camera displays in fixed positions that are not affected by image controls or pan, tilt, zoom controls.
Meanwhile, all users who have permission to view the camera can toggle the hotspot overlay on and off, using them to navigate surveillance sites with ease.
Adding a Hotspot
To add a hotspot using the DW Spectrum Client:
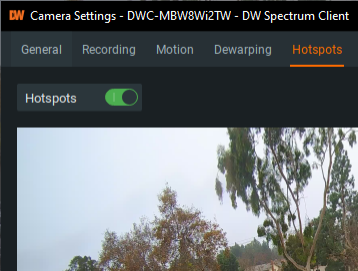
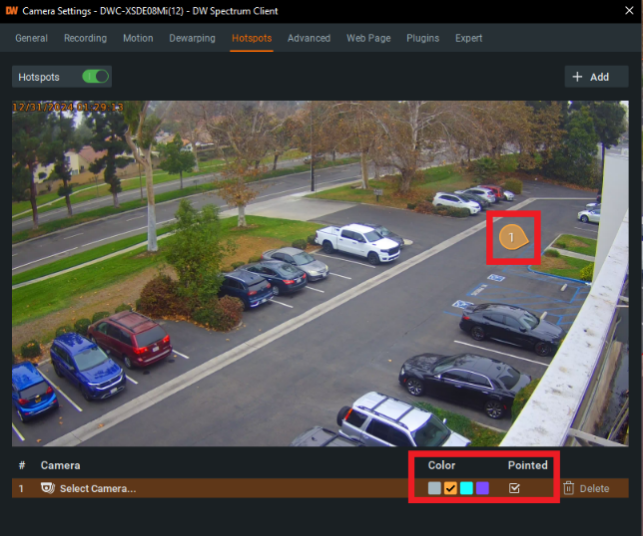
By default, camera hotspots are disabled for all cameras. To create a hotspot, toggle the slider into the green ON position and click the Add button.
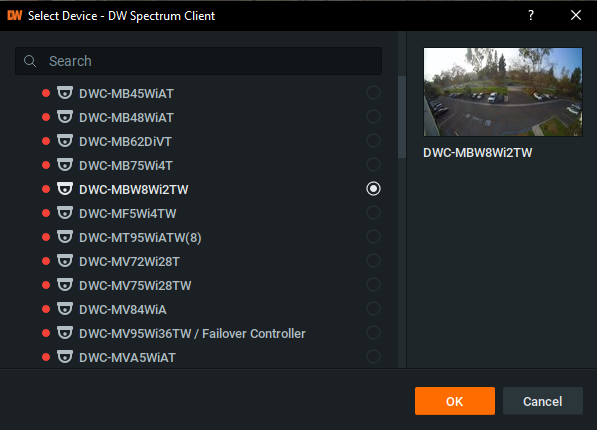
In the camera list, select a camera to link to the hotspot and select a color for the icon.
When finished, click the Apply button to save the changes.
Using Camera Hotspots
When using the Hotspot feature:
Changing Server Port Spectrum’s Default Port
By default, Spectrum IPVMS uses port 7001. In some cases where Spectrum detects another application using 7001, it will add an integer of 10 until it finds an available port to use. (7011, 7021, 7031, etc.)
Changing the Port Number
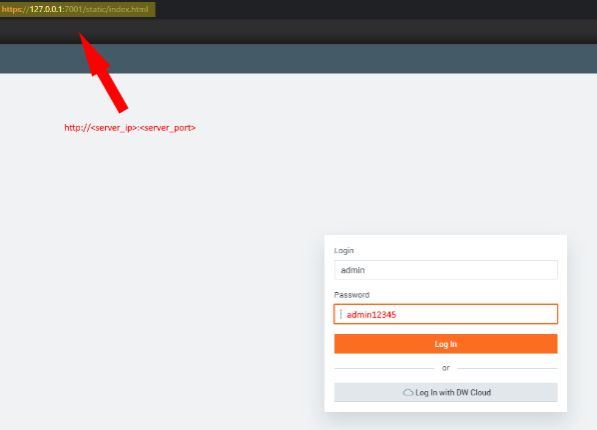
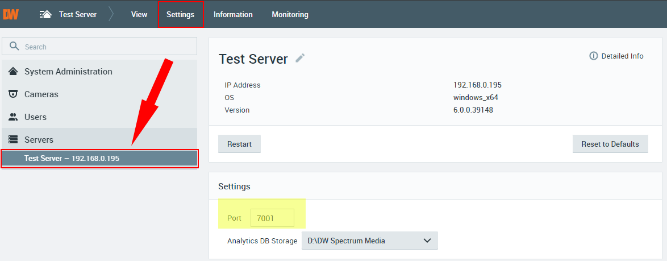
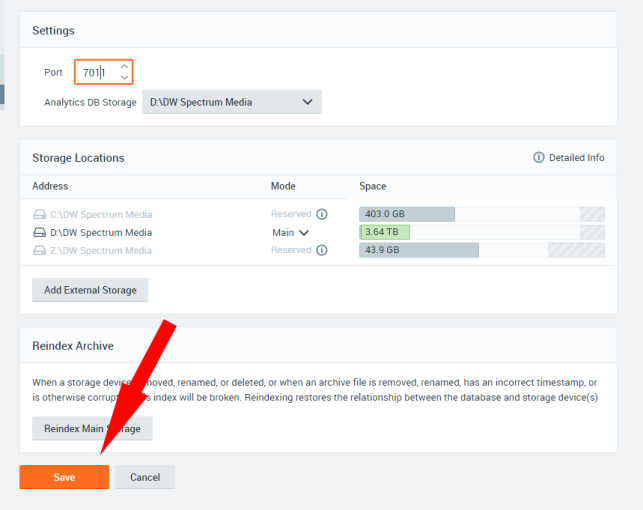
If you find that you need to change the port number, or if Spectrum has changed its port and you would like to configure it to a desired port, you can change the port number via the server’s Web Page.
Troubleshooting: Finding the Port
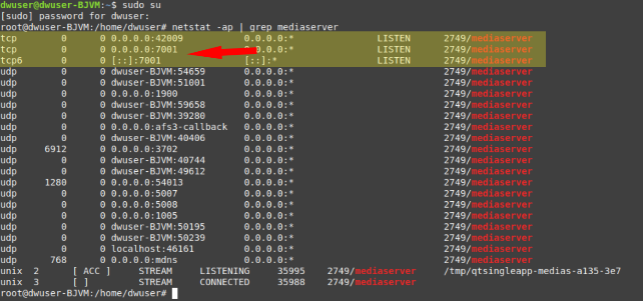
If the server is not using default 7001 and you do not know the port, start by trying 7011 as this would be the most common port it would automatically change to. If this fails:
Windows
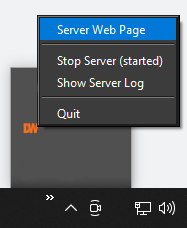
On the server directly, navigate to the tray tool and select “server web page”. This will automatically pull up the web page with the associated port number.
Linux
Supported Operating Systems and Mobile Versions
What Operating Systems Are Supported by DW Spectrum IPVMS and DW Spectrum Mobile?
DW Spectrum IPVMS is a cross-platform software program, supported by all major operating systems. The advantage of cross-platform functionality is that computers that are using different operating systems can work with other computers that are using a different OS. For example, a Windows instance of the DW Spectrum Client software can work and communicate with an Ubuntu version of DW Spectrum Server software.
Official releases of DW Spectrum IPVMS and DW Spectrum Mobile end support for operating systems in accordance with the estimated end-of-support (EoS) dates that have been set by the OS manufacturers (Microsoft, Windows, etc.).
The EoS dates for operating systems as determined by the OS manufacturer are listed below.
**NOTE: This article applies to the current release versions of DW Spectrum IPVMS and DW Spectrum Mobile. Prior versions of DW Spectrum IPVMS (4.2 and older) are now considered as outdated.
Supported Computer Operating Systems
Microsoft Windows OS
Microsoft Windows is supported by both DW Spectrum Server and DW Spectrum Client.
**NOTE: DW Spectrum IPVMS for Windows can be installed as a single software bundle or the Server and Client software can be installed as individual programs.
Ubuntu (Debian-based Linux) OS
Ubuntu/Linux is supported by both DW Spectrum Server and DW Spectrum Client.
**NOTE: DW Spectrum IPVMS for Ubuntu is only available for separate installations (not bundled).
Macintosh OS
macOS is supported only by the DW Spectrum Client. DW Spectrum Server is not available for macOS.
**NOTE: DW Spectrum IPVMS for macOS only supports the DW Spectrum Client.
Supported Mobile Operating Systems
Android Mobile
Android is supported only by the DW Spectrum IPVMS Mobile application.
Available on the Google Play Store
iOS Mobile
iOS is supported only by the DW Spectrum IPVMS Mobile application.
Available on the App Store
What Devices are Supported with DW NVRs?
Digital Watchdog NVRs are designed to integrate with a wide variety of surveillance cameras and devices to provide complete video management systems. The NVRs work with many types of cameras and other hardware to record, manage, and analyze security video feeds.
Supported/Affected Devices:
Supported Devices:
Digital Watchdog provides a list of compatible models that have been tested. However, if your device model is not listed, please note that Digital Watchdog supports third-party devices that comply with the ONVIF standard. ONVIF (Open Network Video Interface Forum) is an open standard that ensures compatibility and communication between IP-based physical security products, such as cameras and video management systems (VMS).
Note: Real-time streaming Protocols (RTSP) and HTTP streams can also be manually added to the NVR. This process allows the integration of the video feed from the RTSP or HTTP stream into the NVR’s interface.
Required Network Configurations for Remote Connection
DW Spectrum® Remote Access
To access your DW Spectrum® system from an external network, you will need to make your system available for access through the Internet.
To allow external network access to your DW Spectrum® system, there are 3 options that you may use; DW Cloud, Traditional Port Forwarding, and static block IP addressing.
DW Cloud™
To use DW Cloud for Remote access, refer to our documentation related to DW Cloud setup. If a firewall/Sonicwall is in use, refer to our Passlist documentation to allow communications to our cloud services.
Spectrum 3.2 and older
Servers and clients using DW Spectrum 3.2 and older are no longer supported with the use of DW Cloud.
Requirements:
– Not Applicable; Update as soon as possible.
Spectrum 4.0 – 4.2
Servers and clients are still able to function with DW Cloud, however DW Cloud services have been optimized for 5.0-6.0.
Requirements:
– Passlist (If firewall/Sonicwall is in use)
Spectrum 5.0 – 6.0
Servers and clients using 5.0 and newer function best with the current DW Cloud architecture, which includes additional security items.
Requirements:
– Passlist (If firewall/Sonicwall is in use)
– Installing necessary CA certificates (if not already installed). Refer to our article on the necessary certificates if connection issues are found.
Traditional Port Forwarding
You will need to port forward the TCP port within your router (or firewall settings) to allow access from the Internet to your DW Media Server. By default, DW Spectrum uses TCP Port 7001. If you want your server to be Internet accessible, you will need to forward this port value (7001).
When using traditional port forwarding, the router will require a port forwarding/application rule to forward traffic using the server’s port to the server. More information can be found on our article explaining Port Forwarding.
There are different methods to connect to your server that will need to be taken into consideration:
NOTE**: Digital Watchdog Technical Support does NOT offer assistance with the creation and management of port forwarding rules. Technical support will assist in locating the necessary information in relation to the server, but difficulties/issues with port forwarding will need to be addressed by either the ISP or network administrator of the location.
Static Block IP Addressing
Similar to Router Public IP (Static Block) mentioned under port forwarding, a block of static IP addresses can be purchased from an ISP. By applying a static address to the server directly, you can use the same IP address for the server anywhere. This method is generally not recommended, as it would allow open and total communication to your server.
.
